Have you ever spent hours cleaning your home only to notice dust on a shelf, marks around a door handle, or crumbs on the floor shortly after you finish? The difference between random cleaning and professional-style cleaning is often not how hard you work. It is the order in which you work.
Learning How to Clean Your House Like a Professional means following a repeatable system. Professional cleaners prepare before they begin, work from high surfaces toward lower ones, remove dry soil before introducing moisture, use products according to the surface, and leave floors until near the end so they do not repeatedly clean the same area.
The goal is not to rush through every room or use the strongest cleaning products available. It is to work systematically so every task supports the next one.
In this guide, you will learn the best order to clean a house, professional dusting techniques, how to approach different surfaces, when to vacuum and mop, which commonly missed areas deserve attention, and how to complete a final inspection that makes a room look genuinely finished.
What Makes Professional House Cleaning Different?
Professional-style cleaning is less about secret products and more about having a reliable system. Understanding How to Clean Your House Like a Professional starts with following a consistent cleaning order that reduces wasted movement and prevents you from repeating work.
A common DIY mistake is moving randomly between tasks: vacuuming one room, wiping a table in another, returning to dust a shelf, and then realizing dust has fallen onto the floor you already cleaned.
Professional cleaning techniques usually follow a few simple principles:
Prepare supplies before starting.
Remove obvious obstacles first.
Work from higher surfaces toward lower ones.
Handle dry dust and debris before wet cleaning when practical.
Use the correct product for the surface.
Give high-use areas extra attention.
Finish floors after most above-floor cleaning is complete.
Inspect the room before moving on.
These habits make cleaning more efficient without sacrificing detail.
The Best Order to Clean a House Like a Professional
The best order to clean a house is one that prevents dirt from returning to areas you have already finished.
A practical whole-house workflow looks like this:
Order
Cleaning Task
1
Gather supplies and prepare the space
2
Remove clutter and obvious trash
3
Dust ceiling fans and high surfaces
4
Dust furniture, shelves, ledges, and décor
5
Wipe doors, switches, handles, and visible marks
6
Clean kitchens and bathrooms according to their needs
7
Clean mirrors and appropriate glass surfaces
8
Vacuum carpets, rugs, edges, and upholstery as needed
9
Sweep and mop suitable hard floors
10
Complete a final inspection and reset the room
The exact tasks will vary depending on the condition of your home, but having a consistent house cleaning order makes it much easier to track what has already been completed.
Step 1: Gather Your Cleaning Supplies Before You Start
Professional cleaners do not want to stop halfway through a room because the microfiber cloths, vacuum attachments, or bathroom cleaner are somewhere else in the house.
Prepare your basic supplies before you begin.
A useful cleaning kit may include:
Microfiber cloths.
A vacuum with suitable attachments.
Mop and appropriate floor-cleaning equipment.
Nylon detailing brush.
Glass-cleaning supplies.
Surface cleaners appropriate for your home’s materials.
Bathroom cleaner.
Trash bags.
Gloves when appropriate.
Clean towels or additional cloths.
You do not need dozens of chemicals to get professional-level results.
The important part is matching the product to the material you are cleaning and following the manufacturer’s instructions.
If safer ingredient selection is important to your household, theEPA Safer Choice program provides information about products that meet EPA criteria for safer chemical ingredients.
Step 2: Clear the Space Before Detailed Cleaning
Before detailed cleaning begins, remove anything that blocks access to the surfaces you need to clean.
Pick up obvious items such as:
Clothes.
Toys.
Shoes.
Dishes.
Papers.
Bags.
Trash.
Objects sitting on the floor.
Items that clearly belong in another room.
However, do not turn this stage into a full closet or drawer organization project.
If you find something that requires a decision, place it in a temporary basket and continue cleaning.
The goal is simply to create access.
If your main challenge is staying on top of everyday clutter and cleaning when your schedule is limited, our guide toCleaning Tips for Busy People covers daily resets, weekly routines, and time-saving habits in more detail.
Step 3: Clean From Top to Bottom
One of the most important professional house cleaning tips is to work from higher surfaces downward.
If you want to understand How to Clean Your House Like a Professional, top-to-bottom cleaning is one of the first techniques worth mastering.
Dust does not stay exactly where you wipe it.
If you vacuum a floor and then clean a dusty ceiling fan, some of that debris may land on the floor you just finished.
Start with areas such as:
Ceiling fans.
High shelves.
Tops of reachable furniture.
Curtain rods.
Door frames.
High ledges.
Accessible light fixtures.
Then gradually move lower.
Do Not Sacrifice Safety for Cleaning
Never stand on unstable chairs, countertops, furniture, or other unsafe surfaces to reach high areas.
Use appropriate equipment and only clean areas you can access safely.
If an area requires specialized equipment or unsafe access, leave it for someone equipped to handle it properly.
Step 4: Dust Properly Instead of Moving Dust Around
Dusting is one of the areas where good technique makes a noticeable difference.
The objective is to capture and remove dust rather than simply redistribute it.
Use a suitable microfiber cloth, vacuum attachment, or other appropriate dusting tool.
A professional dusting sequence may include:
Ceiling Fans
Clean fan blades before furniture and floors underneath them.
Window Ledges and Sills
Raise blinds or move curtains when practical so you can reach the ledge instead of wiping only the visible front edge.
Picture Frames and Décor
Dust upper edges and narrow surfaces where buildup often goes unnoticed.
Shelves and Furniture
When practical, move several small items together instead of lifting and replacing each object individually while you dust.
Door Frames
Pay attention to the upper horizontal edge. It is easy to miss and can collect visible dust.
Baseboards
Baseboards belong near the lower end of the cleaning sequence. Vacuum loose debris first when appropriate, then wipe them using a method suitable for the painted or finished surface.
A systematic approach is more reliable than simply hunting for visible dust spots.
Step 5: Clean High-Touch Areas
After general dusting, address surfaces that are handled frequently.
Depending on your home, these may include:
Door handles.
Light switches.
Cabinet pulls.
Stair railings.
Appliance handles.
Frequently touched table surfaces.
Remote controls when manufacturer instructions permit cleaning.
Use a product suitable for the material.
Cleaning and disinfecting are not automatically the same task.
For routine household conditions, the CDC explains that cleaning with soap, detergent, or an appropriate household cleaner removes dirt and many germs from surfaces. Disinfection may be appropriate in certain situations, such as when someone is sick or has recently been sick.
Never mix household cleaning products unless the manufacturer specifically instructs you to do so.
Need professional cleaning support in Oakland or the East Bay? You canview BA House Cleaning on Google Maps to see our business location and profile.
Step 6: Match the Cleaning Product to the Surface
A major part of understanding How to Clean Your House Like a Professional is recognizing that one cleaner does not belong on every surface.
Your home may contain:
Painted wood.
Finished hardwood.
Laminate.
Stainless steel.
Glass.
Natural stone.
Porcelain.
Ceramic tile.
Acrylic.
Specialty coatings.
A useful professional rule is:
Surface first, product second.
Do not choose a cleaning product first and then look for somewhere to use it.
Check the label and manufacturer care instructions where available.
If you are unsure about compatibility, test the product in a small inconspicuous area before applying it across a large or highly visible surface.
Step 7: Give Kitchens and Bathrooms Extra Attention
Kitchens and bathrooms often contain more surfaces requiring wet cleaning than bedrooms and living areas.
Apply the same professional principles:
Remove loose debris first.
Work from higher surfaces downward.
Clean according to the material.
Allow products only the contact time specified on the label.
Remove dirty residue.
Dry surfaces when appropriate.
Finish floors near the end.
We intentionally do not turn this article into another detailed kitchen-cleaning guide.
If your kitchen needs a full room-specific process, see ourKitchen Cleaning Guide, which covers kitchen surfaces, appliances, floors, maintenance, and deeper cleaning separately.
This keeps each article focused on a different search intent.
Step 8: Clean Mirrors and Glass at the Right Stage
Mirrors and appropriate glass surfaces can quickly make a room look brighter and more polished.
However, avoid cleaning them too early.
Dust nearby frames, ledges, fixtures, and furniture first so you do not immediately dirty freshly cleaned glass.
Use a product intended for the specific surface and a clean cloth.
Pay attention to:
Bathroom mirrors.
Glass tabletops.
Interior glass doors.
Appropriate decorative glass.
Fingerprints and visible smudges.
Exterior windows may require different tools and techniques depending on access, coatings, and window design.
Step 9: Vacuum After Above-Floor Dusting
Floors collect much of what falls while you clean.
That is one reason vacuuming too early often creates extra work.
After dusting and surface cleaning, vacuum areas such as:
Carpets.
Rugs.
Floor edges.
Corners.
Under accessible furniture.
Stair edges.
Upholstered surfaces when appropriate.
Use vacuum attachments designed for the task.
A crevice tool may work well around baseboards and narrow gaps, while an upholstery attachment may be more suitable for certain furniture.
Do not force a vacuum tool onto delicate fabrics or finishes without confirming compatibility.
Step 10: Mop Hard Floors Last
For many whole-house routines, mopping should be one of the final major tasks.
By this stage, most loose dust, hair, crumbs, and above-floor debris should already have been removed.
Before mopping:
Vacuum or sweep loose soil.
Identify the flooring material.
Choose the appropriate cleaning product.
Follow dilution instructions.
Avoid excessive water on moisture-sensitive floors.
Replace dirty water when necessary.
Allow the floor to dry appropriately.
Do not assume the same mop solution is suitable for hardwood, tile, laminate, stone, vinyl, and other flooring materials.
The wrong cleaning method can leave residue, streaks, or even affect the finish.
Use the Professional “Dry Before Wet” Principle
A useful professional cleaning principle is:
Remove loose dry soil before introducing liquid whenever practical.
Think about what happens when dust, crumbs, hair, and loose soil are immediately mixed with cleaning solution: they can turn into dirty residue that is harder to remove.
A practical sequence is often:
Pick up → dust → vacuum → wet clean → mop.
This does not apply identically to every surface or situation, but it is a useful framework when learning How to Clean Your House Like a Professional.
Work in Sections Instead of Cleaning Randomly
Moving around a room without a consistent direction makes it easier to miss areas.
Choose a starting point and work systematically.
For example, move clockwise around a room while working from higher surfaces toward lower ones.
This helps you track:
What has already been cleaned.
Which areas still need attention.
Where cleaning products have been applied.
What still needs vacuuming or mopping.
The objective is not speed for its own sake.
The objective is reducing wasted work.
Professional Cleaning Details People Commonly Miss
An important part of How to Clean Your House Like a Professional is paying attention to areas that are easy to overlook during routine cleaning.
Once the main surfaces are complete, inspect details such as:
Tops of door frames.
Light switch plates.
Door handles.
Cabinet handles.
Window ledges.
Chair legs.
Table bases.
Banisters.
Baseboards.
Lower cabinet fronts.
Corners.
Areas behind doors.
Visible marks around frequently touched surfaces.
You do not need to detail every item during every routine cleaning session, but periodically addressing overlooked areas prevents buildup from becoming obvious later.
Clean What You Can See From Normal Eye Level
After finishing a room, do not immediately move on.
Stand near the entrance and look at the room the way someone normally sees it.
Ask yourself:
Is there visible dust on edges or trim?
Are mirrors streaked?
Is furniture reset neatly?
Is anything obviously out of place?
Are there floor marks?
Did you leave cleaning supplies behind?
Does one neglected area stand out from the rest of the room?
This final walkthrough is one of the simplest professional cleaning techniques and can catch small details that are easy to miss while actively working.
Common Mistakes That Make House Cleaning Take Longer
Learning How to Clean Your House Like a Professional also means eliminating habits that create unnecessary work.
Cleaning Floors Too Early
If you mop before dusting high surfaces, you may need to clean the floor again.
Using One Cleaner Everywhere
Different surfaces may require different products and methods.
Applying Too Much Product
More cleaner does not automatically produce better results. Excess product may leave residue and require additional wiping.
Using Dirty Cloths for Too Long
Once a cloth becomes heavily soiled, it may start redistributing dirt.
Moving Randomly Between Rooms
Without a cleaning sequence, it is easier to repeat completed tasks or forget others.
Mixing Cleaning Products
Never combine household chemicals in an attempt to make them stronger.
Ignoring Product Contact Time
Some products are designed to remain on a surface for a specific period. Follow the label instead of wiping immediately or leaving the product on indefinitely.
Scrubbing Before Identifying the Material
Aggressive abrasion can damage finishes that would have responded to a gentler method.
How Professional Cleaners Save Time Without Rushing
Learning How to Clean Your House Like a Professional does not mean trying to complete every room as quickly as possible.
Professional efficiency comes from reducing unnecessary movement and repeated work.
A better approach is to:
Carry necessary supplies with you.
Complete similar tasks together.
Work in a predictable direction.
Move from high to low.
Avoid re-cleaning finished surfaces.
Use the right tool for each task.
Change dirty cloths and water when necessary.
Recognize when a different method is needed instead of applying more force.
The cleaner is still doing the work. The system simply makes that effort more productive.
Want more professional cleaning ideas, home-care tips, and updates from our team?Follow BA House Cleaning on Facebook for practical cleaning advice and service updates.
Professional House Cleaning Checklist
Use this professional cleaning checklist whenever you want to apply the full method.
Before Cleaning
Gather cleaning supplies.
Prepare ventilation when appropriate.
Remove obvious clutter.
Empty trash when necessary.
Identify delicate or specialty surfaces.
High Areas
Ceiling fans.
High shelves.
Tops of reachable furniture.
Door frames.
Curtain rods and ledges where appropriate.
Mid-Level Areas
Furniture surfaces.
Tables.
Shelves.
Window ledges.
Mirrors.
Doors and handles.
Light switches.
Cabinet fronts.
Low Areas
Chair and table bases.
Baseboards.
Floor edges.
Carpets and rugs.
Hard floors.
Final Check
Remove cleaning supplies.
Reset furniture and belongings.
Check visible surfaces for streaks.
Inspect floors.
Look at the room from the doorway.
Routine Cleaning vs Deep Cleaning
Understanding How to Clean Your House Like a Professional also means knowing when routine maintenance is enough and when the condition of your home requires more detailed cleaning.
Routine cleaning focuses on frequently used areas and preventing normal buildup.
Deep cleaning may make more sense when:
Dust has accumulated in overlooked areas.
Kitchens or bathrooms need significantly more detail.
Baseboards and floor edges have fallen behind.
Several rooms require additional attention.
The home has not received detailed cleaning for a long period.
You are preparing for guests, a move, or a major home reset.
If your home needs more than routine maintenance, BA House Cleaning’sDeep Cleaning Services are designed for homes that require additional detailed attention.
This article teaches the cleaning process. The service page exists for homeowners who prefer professional help completing that work.
Can You Get Professional-Level Results at Home?
Yes, you can significantly improve your cleaning results by adopting a systematic process.
The biggest improvements usually come from:
Preparing before you begin.
Working from high to low.
Removing loose soil before wet cleaning.
Matching products to surfaces.
Finishing floors toward the end.
Completing a final inspection.
Professional help may still make sense when your home is large, your schedule is limited, buildup has become difficult to manage, or you simply prefer not to spend your free time completing whole-house cleaning.
BA House Cleaning providesHouse Cleaning Services for homes in Oakland and surrounding East Bay communities, with options for routine maintenance and more detailed cleaning.
Clean Smarter, Not Harder
The real secret behind How to Clean Your House Like a Professional is not one spray, cloth, gadget, or cleaning hack.
It is having a repeatable system.
Prepare the room first. Start high and work downward. Capture dust instead of pushing it around. Choose products according to the surface in front of you. Handle detailed areas before cleaning the floors, and inspect the room before moving on.
Once that process becomes familiar, cleaning becomes easier to organize and far less likely to involve repeatedly cleaning the same surfaces.
If your home needs a professional reset or you would rather leave the detailed work to an experienced team,contact BA House Cleaning to discuss the cleaning service that best fits your home and schedule.
Frequently Asked Questions About How to Clean Your House Like a Professional
What is the best order to clean a house like a professional?
If you are learning How to Clean Your House Like a Professional, start by gathering supplies and removing clutter. Then clean high surfaces, dust furniture and frequently touched areas, complete appropriate wet-cleaning tasks, vacuum, and finish suitable hard floors last.
How do professional cleaners clean a house so quickly?
Professional cleaners rely on consistent systems, suitable tools, and an efficient cleaning order instead of simply rushing. Working methodically, carrying supplies, cleaning from high to low, and avoiding repeated work can significantly improve efficiency.
Should I dust or vacuum first?
For most whole-room cleaning routines, dust above-floor surfaces before the final vacuum so particles that fall while you work can be removed afterward. Extremely dusty floors may benefit from an initial vacuum followed by another pass near the end.
Should I clean one room at a time or clean the whole house by task?
Both approaches can work. Completing similar tasks throughout the house can improve efficiency, while finishing one room at a time creates clear stopping points. The most important factor is using a consistent method instead of moving randomly between unrelated tasks.
Do professional cleaners clean from top to bottom?
Top-to-bottom cleaning is a practical way to reduce repeated work because dust and loose debris from higher surfaces can fall onto areas that have not yet been cleaned.
What cleaning products do professional cleaners use?
There is no universal cleaner suitable for every surface. Product choice depends on the material, type of soil, manufacturer instructions, and intended use. Surface compatibility matters more than using one specific brand or chemical.
Do I need to disinfect my entire house?
Usually not during ordinary household maintenance. Routine cleaning removes dirt and many germs from surfaces, while disinfection may be appropriate in specific circumstances, such as when someone is sick. Follow current CDC guidance and the product label.
How often should I professionally clean my house?
There is no single schedule for every home. Frequency depends on household size, children, pets, activity level, personal expectations, and how much routine cleaning is completed between professional visits.
What areas are most commonly missed when cleaning?
Commonly overlooked areas include ceiling fans, tops of door frames, window ledges, light switches, cabinet handles, chair legs, table bases, baseboards, floor edges, and spaces behind doors.
When should I hire professional house cleaners instead of cleaning myself?
Professional cleaning can make sense when cleaning takes more time than you can realistically give it, several rooms need detailed attention, buildup has become difficult to manage, or you prefer consistent professional maintenance.
Hiring a Housekeeper can be life-altering for the busy family. Now this may seem to be a bit over-the-top, but I am serious. Think about your life-whether single, a couple, or a family you have no time. No time to keep your home as organized or clean as you would like. No time to do the smaller tidying jobs that would make a huge difference.
Keeping your home clean can feel difficult when work, family, errands, appointments, and everyday responsibilities already take up most of your schedule. The solution, however, is not necessarily spending hours cleaning every weekend.
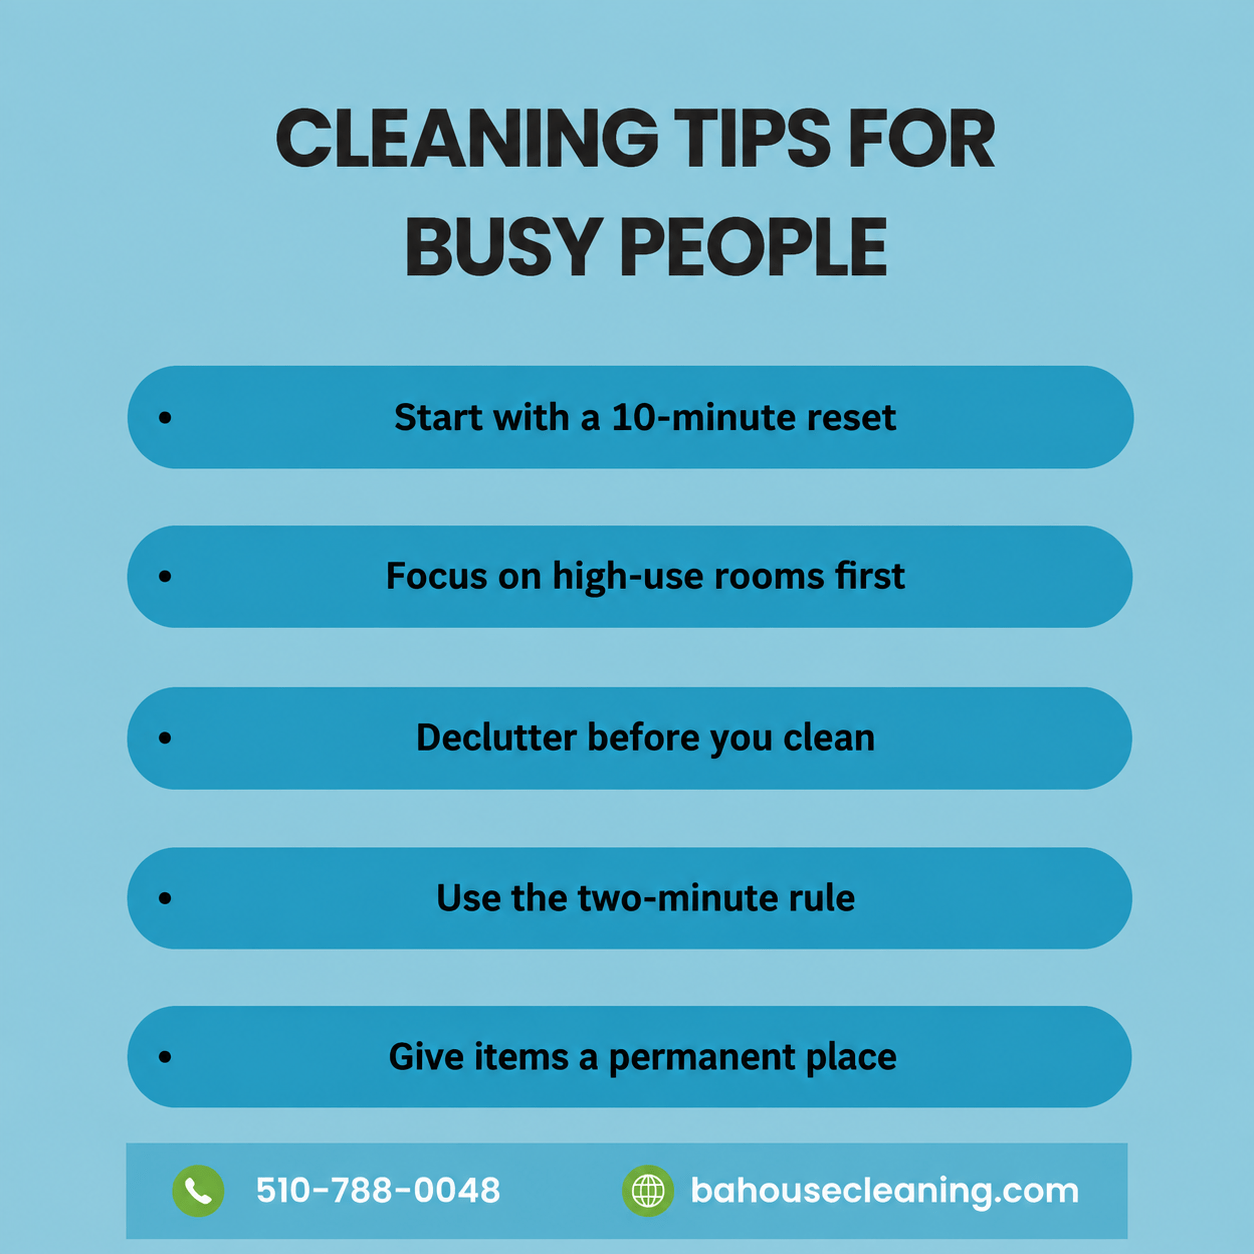
The most effective cleaning tips for busy people focus on consistency, priorities, and small habits that prevent mess from building up. A few minutes each day can often save you from facing a much larger cleaning job later.
Instead of trying to clean your entire home at once, create a routine that fits the amount of time you actually have. This guide shows you how to organize daily and weekly cleaning, what to prioritize first, and how to maintain a comfortable home even during your busiest weeks.
Why Keeping a Home Clean Feels Harder When You Are Busy?
The biggest challenge for busy households is often not cleaning itself. It is the accumulation of unfinished small tasks.
A few dishes remain in the sink. Clothes pile up on a chair. Mail collects on the counter. Bathroom surfaces are postponed for another day. Eventually, several five-minute tasks turn into a long weekend cleaning session.
That is why the most effective cleaning tips for busy people focus on preventing small tasks from building up in the first place.
A realistic cleaning system helps prevent that buildup. Rather than aiming for a perfectly clean home every day, focus on keeping the spaces you use most functional and comfortable.
Your main priorities should be:
Preventing clutter from spreading.
Handling spills and food mess quickly.
Keeping kitchens and bathrooms manageable.
Completing small tasks before they become large ones.
Saving detailed cleaning for the right time.
The goal is not perfection. The goal is making your home easier to maintain.
Try This 15-Minute Home Reset
If you are unsure where to begin, use a simple 15-minute reset.
First 3 Minutes: Remove Visible Clutter
Walk through the main living areas and return obvious items to their proper places.
Focus on:
Clothes.
Shoes.
Toys.
Bags.
Mail.
Dishes.
Items left on countertops.
Do not stop to reorganize drawers or closets. The goal is simply to clear the main surfaces and floors.
Next 4 Minutes: Reset the Kitchen
The kitchen often has the biggest effect on whether a home feels clean.
Use these few minutes to:
Load or wash dishes.
Clear the sink.
Wipe the main counter.
Remove visible food debris.
Throw away trash.
You do not need to deep clean appliances during a daily reset.
Next 3 Minutes: Refresh the Bathroom
Focus on the areas you notice most often:
Wipe the sink.
Clear the counter.
Check the toilet.
Replace towels if necessary.
Empty visible trash.
Final 5 Minutes: Floors and High-Traffic Areas
Quickly vacuum or sweep the spaces people use most frequently, such as:
Kitchen.
Entryway.
Living room.
Hallways.
You may not finish every room, and that is fine. The purpose of this routine is to stop small messes from becoming overwhelming.
If You Only Have a Few Minutes, Do This
You do not need an hour of free time to make a noticeable difference.
Time Available
Best Cleaning Priority
5 minutes
Clear dishes, trash, and visible clutter
10 minutes
Reset the kitchen and main living area
15 minutes
Complete the full quick home reset
20 minutes
Clean one priority room from start to finish
30 minutes
Kitchen, bathroom, and high-traffic floors
60 minutes
Complete your main weekly maintenance tasks
This approach is one of the most useful time-saving cleaning tips because it removes the idea that cleaning is only worthwhile when you have several hours available.
Focus on the Rooms You Use Most
Not every room needs the same level of attention every day. One of the most practical cleaning tips for busy people is to focus first on the spaces that have the biggest effect on your daily comfort.
When your schedule is limited, prioritizing high-use rooms helps you get better results in less time without trying to clean the entire house at once.
Kitchen
Start with dishes, the sink, countertops, spills, and food debris.
Keeping these areas under control makes meal preparation easier and prevents tomorrow’s cleanup from starting with yesterday’s mess.
Bathroom
Prioritize the sink, toilet, frequently touched surfaces, and visible buildup.
Quick maintenance can make your regular bathroom cleaning significantly easier.
Living Room
Remove clutter, straighten cushions, clear tables, and quickly address floors.
These simple tasks can immediately make the home feel more organized.
Bedrooms
Make the bed, collect laundry, clear the floor, and return visible items to their proper places.
Closet organization and detailed cleaning can wait for another day.
Clean One Room at a Time
When you have 20 or 30 minutes available, avoid partially cleaning several rooms.
Pick one area and finish its most important tasks.
For example, a quick bathroom cleaning could include:
Clear the counter.
Clean the sink.
Wipe the mirror.
Clean the toilet.
Wipe the shower or tub where needed.
Empty the trash.
Sweep or mop the floor.
Completing one room gives you a visible result and a clear stopping point.
It is usually more satisfying and practical than ending your cleaning session with five unfinished spaces.
Build a Simple Weekly Cleaning Routine
A short daily routine controls everyday mess, while a weekly cleaning routine takes care of tasks that do not need attention every day.
Here is one simple example:
Day
Main Cleaning Task
Monday
Kitchen surfaces and appliances
Tuesday
Bathrooms
Wednesday
Dusting and living areas
Thursday
Bedrooms and laundry
Friday
Floors and high-traffic spaces
Weekend
Catch-up tasks or deeper cleaning
You do not have to follow this schedule exactly.
Someone who works late during the week may prefer doing more cleaning on Friday or Sunday. A family with children or pets may need to vacuum common areas more often.
Your home cleaning schedule should work around your life, not the other way around.
Declutter Before You Clean
One of the most effective cleaning tips for busy people is to declutter before starting the actual cleaning process. Having fewer items in the way makes every task faster and easier.
Cleaning a crowded countertop takes longer because you first have to move everything before wiping the surface. The same problem happens when clothes, toys, bags, or shoes cover the floor.
Before you start cleaning, spend a few minutes sorting visible clutter into three groups:
Put away.
Throw away.
Deal with later.
For anything that requires more time or a decision, place it temporarily in a basket and continue cleaning.
This prevents a 15-minute cleaning session from unexpectedly becoming a two-hour organization project.
Give Everyday Items a Permanent Place
Another practical part of cleaning tips for busy people is giving frequently used items a permanent place. This simple organizing habit can significantly reduce daily clutter and make quick cleaning sessions much easier.
For example:
Keys go in one tray.
Shoes stay in one area near the entrance.
Mail goes into one organizer.
Laundry goes directly into a basket.
Children’s toys return to designated storage.
When an object does not have a permanent place, it tends to move around the home and create clutter.
Simple organization systems are usually easier for busy households to maintain than complicated ones.
Use the Two-Minute Rule
One of the simplest cleaning tips for busy people is to follow the two-minute rule: if a cleaning task takes approximately two minutes, try to complete it as soon as you notice it.
Examples include:
Wiping a small spill.
Loading a few dishes.
Putting shoes away.
Emptying a full trash bin.
Wiping the bathroom sink.
Returning cleaning supplies to their storage area.
These tiny tasks often create the biggest cleaning backlog when they are repeatedly postponed.
Completing them immediately can keep your next cleaning session much shorter.
Keep Basic Cleaning Supplies Within Easy Reach
Cleaning feels more difficult when you have to search for supplies every time you notice a mess.
Keep frequently used products organized and accessible.
Microfiber cloths are useful for quick everyday cleaning because they can help with:
Dusting.
Countertops.
Mirrors.
Furniture.
Small spills.
General surface cleaning.
Keeping a few clean microfiber cloths available can reduce the number of different tools you need to carry between rooms.
Wash reusable cloths regularly and replace them when they become worn.
Always Clean From Top to Bottom
The order in which you clean can save time.
If you vacuum the floor first and then dust shelves, some of that dust will fall onto the floor and you may need to clean it again.
A simple cleaning sequence is:
Declutter.
Dust higher surfaces.
Wipe countertops and furniture.
Clean fixtures and frequently touched areas.
Vacuum or sweep.
Mop if necessary.
Following the same order every time also removes unnecessary decision-making.
Share Household Cleaning Responsibilities
Another useful part of cleaning tips for busy people is sharing household responsibilities instead of leaving every task to one person. Dividing chores according to age, schedule, and ability can make the entire cleaning routine easier to maintain.
Children may be able to:
Put toys away.
Place dirty clothes in a basket.
Organize their bedrooms.
Clear appropriate items after meals.
Adults can divide larger jobs such as:
Bathrooms.
Kitchen cleaning.
Floors.
Laundry.
Trash.
General maintenance.
Sharing responsibilities prevents one person from spending an entire free day cleaning up after everyone else.
Stop Waiting for the Perfect Time to Clean
One of the biggest mistakes busy people make is waiting until they have enough time to clean the whole house.
That three-hour opening may never appear.
Instead, use the time you already have.
Have 5 minutes? Clear one countertop and load the dishwasher.
Have 10 minutes? Reset the kitchen and living room.
Have 20 minutes? Clean one room properly.
Have 30 minutes? Handle your highest-priority areas.
A quick house cleaning routine works because it fits into real life rather than depending on the perfect schedule.
Know What Needs Cleaning Now and What Can Wait
Not every cleaning task has the same priority.
Priority 1: Daily Function
Handle these first:
Dishes.
Food spills.
Trash.
Visible clutter.
Important bathroom surfaces.
Areas blocking normal use of your home.
Priority 2: Regular Maintenance
These include:
Vacuuming.
Dusting.
Bathrooms.
Bedding.
General floor cleaning.
Laundry.
Priority 3: Detailed Cleaning
These may include:
Baseboards.
Detailed appliance cleaning.
Doors and frames.
Hard-to-reach areas.
Heavy buildup.
Less frequently used spaces.
Knowing the difference prevents you from spending 20 minutes detailing a low-priority area while the kitchen still needs attention.
When Quick Cleaning Is No Longer Enough
Even the best cleaning tips for busy people have limits when a home has gone several weeks without regular maintenance. Short routines work best when the space is already reasonably under control.
If cleaning has been postponed for too long, a few minutes each day may not be enough to bring everything back to a manageable condition.
Your home may need more detailed cleaning when:
Kitchen or bathroom buildup has become difficult to remove.
Dust has accumulated in overlooked areas.
Floors need more detailed attention.
Several rooms have fallen behind at the same time.
Regular cleaning tasks remain unfinished week after week.
In this situation, starting with a more thorough reset can make everyday maintenance easier afterward.
BA House Cleaning offersDeep Cleaning Services for homes that need more attention than routine maintenance.
Once the heavier buildup is handled, shorter daily and weekly routines become much easier to maintain.
When Recurring Cleaning Makes Sense for Busy People
Sometimes the best way to save time is to stop trying to handle every household task yourself.
If your schedule consistently makes it difficult to maintain your home,Recurring Cleaning Services can help prevent mess from building up between busy weeks.
BA House Cleaning provides weekly, biweekly, and monthly cleaning options for households in Oakland and surrounding East Bay communities.
Recurring cleaning may be especially helpful for:
Busy professionals.
Families with demanding schedules.
Parents with young children.
Households with pets.
People who travel frequently.
Anyone who prefers to protect their limited free time.
Professional cleaning works best alongside simple everyday habits.
Small resets between appointments help keep the home comfortable until the next scheduled cleaning.
A Realistic Cleaning Plan for Busy People
If you are wondering how to keep your house clean with a busy schedule, keep the system simple.
Every Day
Spend approximately 5–10 minutes resetting the most frequently used areas.
During the Week
Choose one room or important task each day.
Once a Week
Handle:
Bathrooms.
Floors.
Dusting.
Bedding.
General maintenance.
As Needed
Declutter problem areas and complete more detailed cleaning.
When Life Gets Too Busy
Consider getting professional support instead of allowing several weeks of unfinished cleaning tasks to accumulate.
Some weeks will always be busier than others.
Consistency matters more than following a perfect checklist.
Keep Your Cleaning Routine Realistic
The most useful cleaning tips for busy people are not complicated cleaning hacks. They are habits you can realistically continue even during demanding weeks.
Focus first on the rooms that affect your daily routine. Break large cleaning jobs into small tasks. Declutter before you clean. Give frequently used belongings a permanent place. Use short daily resets to prevent buildup, and stop waiting for an entire free afternoon before doing anything.
Even 10 or 15 minutes can make a noticeable difference when those minutes are spent on the right tasks.
And when your schedule consistently leaves too little time to maintain your home comfortably, professional cleaning can become part of your routine rather than a last-minute solution.
BA House Cleaning helps households in Oakland and the East Bay maintain cleaner, more comfortable homes through flexible cleaning options designed around different needs and schedules.
Frequently Asked Questions About Cleaning for Busy People
What is the fastest way to keep a house clean when you are busy?
Use a short daily reset focused on dishes, visible clutter, trash, kitchen surfaces, and high-traffic areas. Consistent 5–10 minute cleaning sessions can prevent small jobs from becoming larger weekend projects.
How can I clean my house in 20 minutes?
Choose one clear priority instead of trying to clean the entire house. You could reset the kitchen, clean one bathroom, vacuum high-traffic areas, or complete one room from start to finish.
What should I clean every day?
Daily priorities usually include dishes, food spills, visible clutter, trash, and frequently used kitchen or bathroom surfaces. The exact routine depends on your household.
How do I create a weekly cleaning routine?
Divide larger cleaning jobs across different days. For example, clean bathrooms one day, bedrooms another, and floors later in the week. Build the routine around your actual schedule rather than following a rigid template.
What cleaning tips for busy people can save the most time?
The most effective cleaning tips for busy people focus on short daily resets, reducing clutter, prioritizing high-use rooms, and completing small tasks before they build up.
Is it better to clean one room at a time?
Yes, especially when you have limited time. Completing one priority room gives you a clear result and can be more effective than partially cleaning several areas.
How often should a busy household use professional cleaning?
There is no single schedule that works for every household. Weekly, biweekly, or monthly cleaning may be suitable depending on the size of the home, number of occupants, pets, daily activity, and how much maintenance is completed between visits.
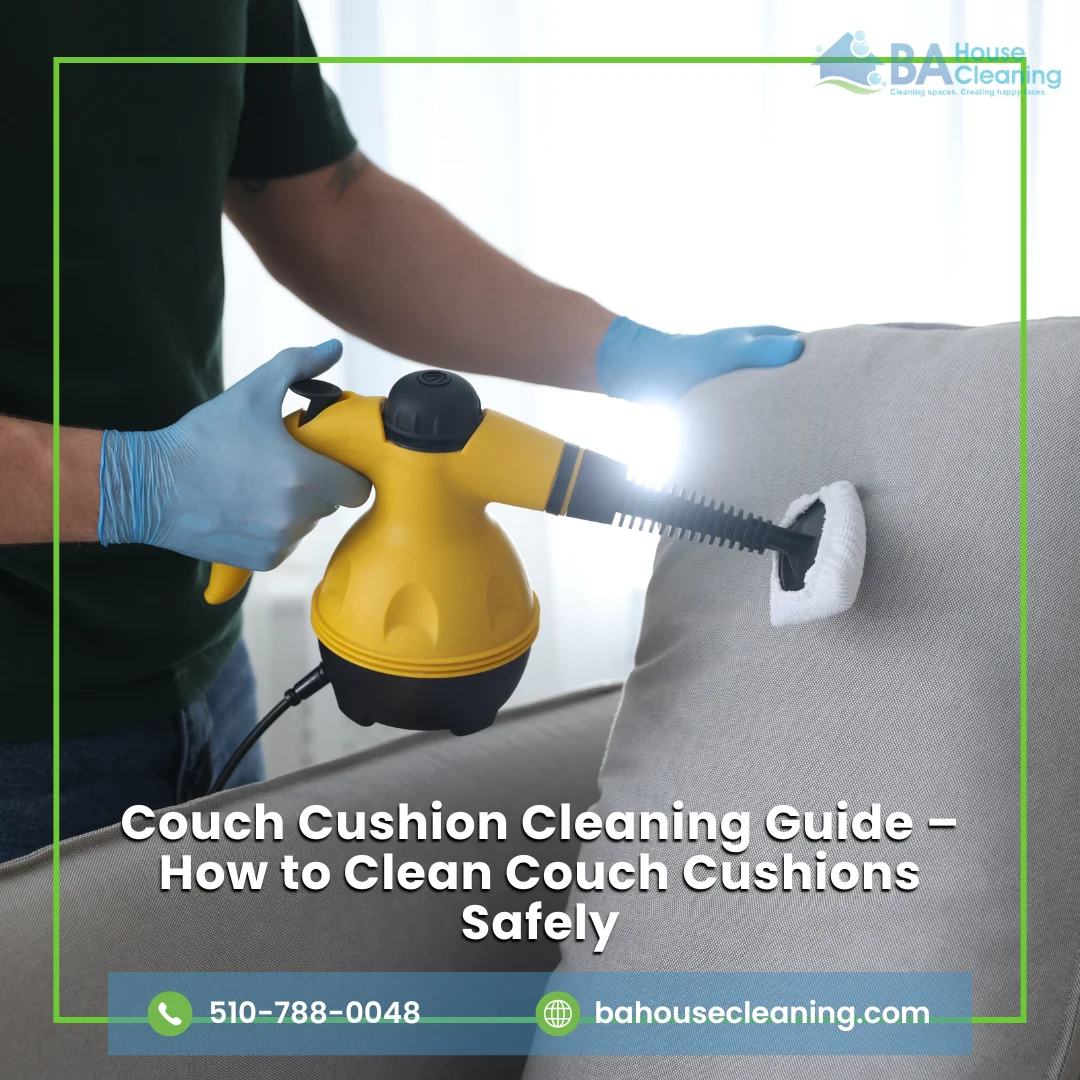
Couch cushions are used every day, yet they are easy to overlook during regular house cleaning. Crumbs disappear into the seams, pet hair settles across the fabric, dust collects beneath removable seats, and small spills can gradually turn into noticeable marks. Even when the rest of the living room looks clean, dull or stained cushions can make the entire sofa appear less fresh.
Learning how to Clean Couch Cushions properly starts with one important step: identifying the fabric and its care instructions before adding water, detergent, or any homemade cleaning solution. Upholstery materials do not all respond to moisture or cleaning products in the same way. A method that works well on one sofa may leave water marks, discoloration, or fabric damage on another.
At BA House Cleaning, we know that the family room often receives some of the heaviest daily use in a home. Furniture collects dust, pillows lose their shape, throws become untidy, and hidden crumbs can build up between cushions. A sensible couch-cleaning routine helps restore a cleaner appearance while also making the entire room feel more organized.
This guide explains how to Clean Couch Cushions safely, how to interpret upholstery cleaning instructions, how to vacuum and spot-clean different areas, what to do about spills and odors, and when a cushion may need more specialized upholstery care instead of another DIY cleaning attempt.
Check the Upholstery Care Instructions Before Cleaning
Before removing a single stain, look for the manufacturer’s care label. It may be attached underneath the sofa, beneath a cushion, or included in the furniture documentation.
Upholstery manufacturers often use cleaning codes to indicate which types of products are suitable for the fabric. For example, a W code generally indicates water-based upholstery products, while an S code indicates water-free solvent cleaning. SW fabrics may permit either method when the manufacturer’s instructions are followed.
Room & Board’s fabric and upholstery care guidance explains these cleaning codes and recommends checking the specific fabric requirements before spot treatment. La-Z-Boy similarly advises testing cleaning products in an inconspicuous location and avoiding oversaturation when treating upholstery.
These instructions should take priority over generic online cleaning recipes. Before deciding how to Clean Couch Cushions, determine what your particular couch can safely tolerate.
Do not assume that a removable cushion cover is automatically machine washable. Some manufacturers specifically advise against removing and laundering cushion casings because washing can affect the fabric, backing, stitching, fit, or finish.
Start With Dry Cleaning Before Adding Moisture
Many couch cushions look significantly better after a thorough dry-cleaning routine alone. Dust, hair, crumbs, lint, and dry soil can make upholstery appear dull even when there are no serious stains.
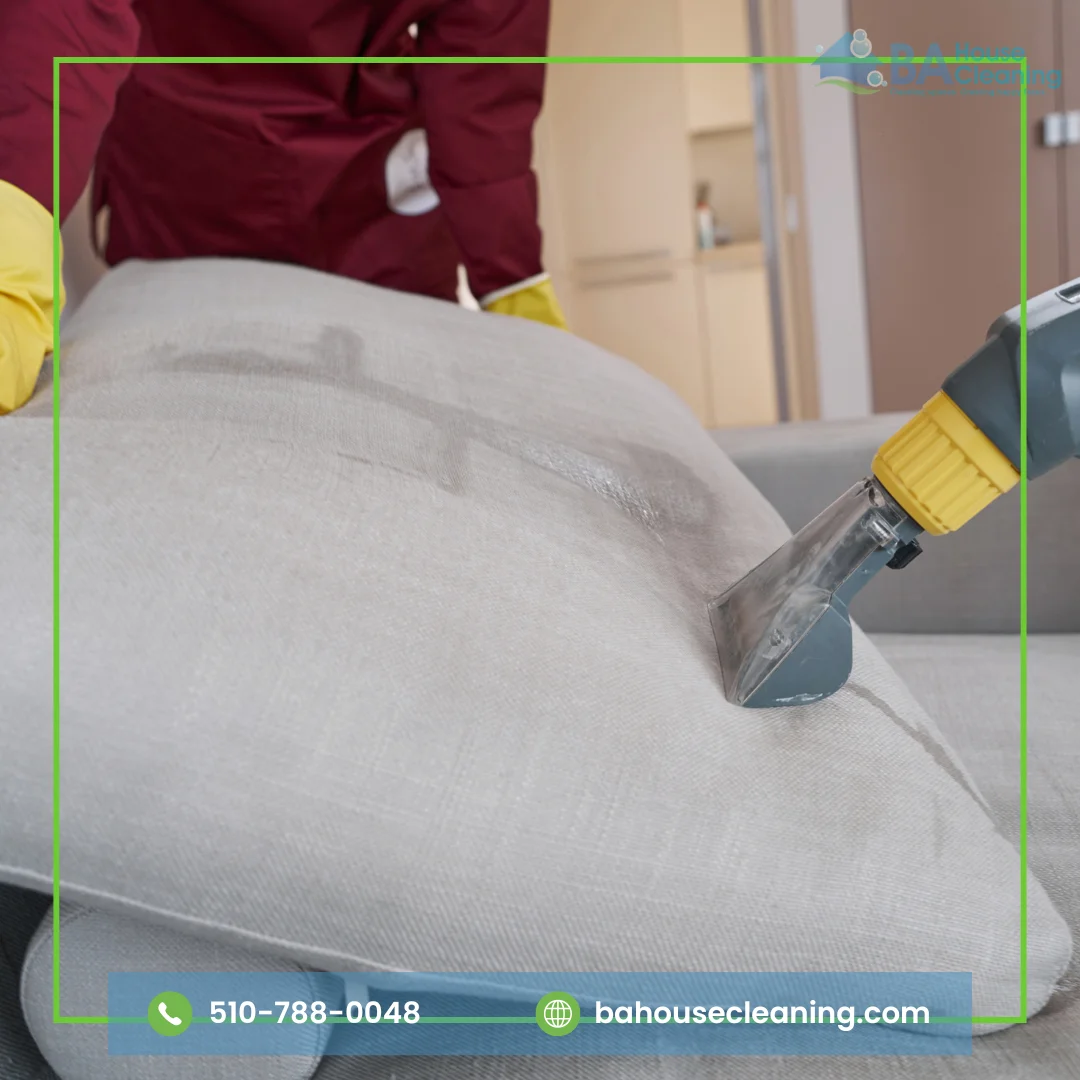
Remove loose cushions if the furniture design allows it. Vacuum the seat deck underneath them first, because this is where crumbs and debris often accumulate. Use an upholstery attachment and move carefully along seams, corners, and the edges of the cushions.
Vacuum both sides of reversible cushions when permitted by the manufacturer. For attached cushions, work carefully along the seams and use a crevice attachment to reach narrow spaces without pulling aggressively on the fabric.
Furniture manufacturers commonly recommend frequent vacuuming or light brushing as part of upholstery maintenance. La-Z-Boy, for example, recommends vacuuming frequently to remove dust and grime before more intensive care is considered.
This is why the first practical answer to How to Clean Couch Cushions is often simpler than people expect: remove as much dry debris as possible before introducing any liquid cleaner.
How to Clean Couch Cushions Step by Step
Once loose debris has been removed and you have checked the fabric instructions, you can decide whether additional spot cleaning is appropriate.
Step 1: Identify Stains and High-Touch Areas
Inspect the cushion in good light. Do not treat the entire surface as one large stain. Look for the specific areas that actually need attention, such as food marks, drink spills, greasy fingerprints, pet-related spots, or darkened fabric along the front edge.
Knowing what you are treating helps reduce unnecessary moisture and product use.
Step 2: Test the Cleaning Method
Even when the cleaning code permits a particular product, test it on a hidden or inconspicuous area first. Allow the test area to dry completely before deciding that the cleaner is suitable.
A wet fabric can temporarily look different from the same fabric when dry, so judging the result too early can be misleading.
Step 3: Blot Instead of Scrubbing Aggressively
For fresh spills, absorb as much material as possible using a clean, absorbent cloth. Blot gently rather than rubbing outward across the upholstery.
Aggressive rubbing can spread a spill, distort the surface texture, or push contamination deeper into the fibers. Manufacturer guidance from La-Z-Boy recommends working stains from the outside toward the center to reduce the chance of creating a visible ring.
Step 4: Use Only the Appropriate Cleaning Product
If the fabric permits water-based cleaning, use a suitable upholstery product according to its instructions. For solvent-only materials, do not substitute water simply because it seems gentler.
Avoid saturating the cushion. Upholstery contains more than the visible fabric. Moisture can reach padding, foam, batting, internal liners, or other materials that may take much longer to dry.
Step 5: Allow the Cushion to Dry Properly
Once the spot has been cleaned, give it enough time to dry completely before returning the cushion to normal use. Good airflow can help, but avoid applying intense heat unless the furniture manufacturer specifically approves it.
Do not place a damp cushion back against walls, other cushions, or enclosed furniture areas. Proper drying is a critical part of How to Clean Couch Cushions, especially when moisture has reached beneath the surface fabric.
How to Handle Fresh Spills on Couch Cushions
A quick response can make a large difference when something spills on upholstered furniture. The longer a liquid remains on the cushion, the more opportunity it has to spread through the fabric or reach the filling underneath.
Begin by removing any solid material carefully without smearing it across a larger area. Then blot liquid using a clean cloth or absorbent towel. Replace the towel section as it becomes wet rather than continuing to press contaminated material back onto the cushion.
Do not immediately pour water over the spill. First check the upholstery cleaning instructions. Water may be suitable for some fabrics but inappropriate for solvent-only upholstery.
Once the fabric code has been confirmed, use the appropriate spot-cleaning process and avoid oversaturation. Work patiently in small areas instead of soaking the entire cushion because of one localized stain.
Learning How to Clean Couch Cushions effectively often has more to do with restraint and correct product selection than with using a large amount of cleaner.
Cleaning Food and Drink Marks From Couch Cushions
Living-room furniture regularly comes into contact with coffee, snacks, sauces, juice, and other food-related residue. These marks can contain different combinations of moisture, sugar, oil, and coloring, which means there is no single homemade mixture that works safely on every sofa.
For a fresh spill, blot first. If dried food remains on the surface, carefully remove loose material before adding a cleaner. Then check the care code and use a fabric-compatible upholstery product.
Avoid creating complicated DIY mixtures simply because several household ingredients are individually known for cleaning. Upholstery fabrics, dyes, backings, and protective treatments can react differently.
If the mark remains after an appropriate spot treatment, repeated scrubbing may cause more harm than the original stain. A persistent or valuable-furniture stain may be better handled by an upholstery-cleaning specialist.
How to Clean Couch Cushions With Pet Hair and Dust
Homes with pets often need a slightly different cushion routine. Hair can collect across the fabric surface, while finer material becomes trapped around seams and between cushions.
Start with vacuuming. An upholstery attachment is usually more controlled than aggressively brushing the fabric. Work slowly in several directions where the upholstery manufacturer allows it, because embedded hair may not release on the first pass.
Remove cushions when possible and vacuum the hidden seat area too. Pet hair often collects beneath cushions even when the visible surface appears relatively clean.
For remaining hair, use a fabric-safe lint-removal method that does not pull or damage the upholstery. Avoid sticky products or rough tools unless you know they are appropriate for the fabric.
Regular vacuuming is one of the most useful habits in How to Clean Couch Cushions because it prevents dry debris from building up to the point where the furniture looks permanently dull.
How to Deal With Odors in Couch Cushions
An odor is usually a sign that you should look for its source rather than immediately trying to cover it with fragrance.
Remove the cushions where possible and inspect the sofa underneath. Crumbs, spilled drinks, pet residue, forgotten food, or moisture may be contributing to the smell.
Vacuum the furniture thoroughly and check whether any visible spot requires treatment according to the upholstery cleaning code. Allow anything that has been cleaned to dry completely.
Be careful with powdered deodorizing methods. Products such as baking soda are commonly recommended online, but not every upholstery manufacturer recommends applying powders or homemade mixtures directly to fabric. Powders can also settle beneath cushions or into seams if they are not completely removed.
If an odor remains after dry debris and visible contamination have been addressed, the source may be deeper inside the cushion or furniture. In those cases, professional upholstery cleaning may be more useful than repeatedly adding fragrance or household products.
Should You Remove Couch Cushion Covers for Washing?
A zipper can make a cushion cover look machine washable even when it is not.
This is one of the most serious mistakes to avoid when researching how to Clean Couch Cushions. Removable construction may exist for manufacturing or repair purposes rather than routine laundering.
Some furniture manufacturers specifically advise against machine washing or dry-cleaning cushion casings because the process can alter the fabric, stitching, backing, or fit. A cover that shrinks slightly may become extremely difficult to reinstall over the original foam insert.
Always look for explicit washing instructions. If the label says machine washing is permitted, follow the recommended cycle, water temperature, detergent, and drying method. If it does not clearly approve laundering, do not assume the zipper permits you.
When in doubt, use the upholstery cleaning code and manufacturer’s care guide as the deciding factors.
Cleaning Foam Cushions Requires Extra Caution
Foam holds moisture differently from surface fabric. Once a large amount of liquid reaches the cushion core, drying can take much longer than expected.
That is why ordinary spot cleaning should focus on controlling moisture rather than soaking the cushion. If a spill has penetrated deeply into the foam, surface wiping may not reach everything inside.
Remove excess liquid as quickly as possible and follow the manufacturer’s instructions for the cushion construction. Allow plenty of airflow during drying and do not return a damp foam cushion to regular use.
Persistent deep odors, extensive liquid contamination, or cushions that remain wet inside may require professional evaluation.
The correct approach to how to Clean Couch Cushions should protect both the visible upholstery and the material underneath it.
Can You Steam Clean Couch Cushions?
Steam cleaning is not automatically suitable for every couch.
Some upholstery fabrics and furniture manufacturers do not recommend hot-water extraction or steam-cleaning methods. La-Z-Boy’s guidance for some performance fabrics specifically states that steam cleaning or hot-water extraction is not recommended.
Before using a rented machine, handheld steamer, or upholstery extractor, check the sofa manufacturer’s instructions and cleaning code.
The common assumption that steam is safe because it does not require a harsh household chemical can be misleading. Heat and moisture are still part of the cleaning process, and both can affect certain fabrics, adhesives, backing materials, dyes, or internal cushion components.
If the upholstery instructions do not clearly support the method, choose an approved alternative or consult a professional.
How to Clean Attached Couch Cushions
Attached cushions cannot be carried to another area for cleaning, so moisture control becomes particularly important.
Vacuum the surface and seams carefully, then identify individual stains. Use the upholstery code to choose an appropriate spot treatment and apply small amounts instead of soaking the area.
Work from the outside of a stain toward the center where appropriate, then allow the area to dry with good airflow.
Avoid repeatedly pressing wet cushions against the sofa frame. Because the filling cannot be removed or positioned separately for drying, oversaturation can create a much more difficult problem.
For attached back cushions, gently smooth and reshape the filling after the fabric has completely dried.
Why Vacuuming Under the Cushions Matters
One of the biggest advantages of cleaning removable couch cushions is access to the space underneath them.
Coins, food crumbs, pet hair, dust, small toys, lint, and other debris can accumulate on the seat deck without being visible during normal use. Cleaning only the top of the cushions leaves this entire area untouched.
Remove everything loose first, then vacuum the surface carefully. Use a crevice attachment around seams and edges where debris becomes trapped.
This is also a logical moment to look around and beneath the sofa if access is safe. Dust can accumulate around furniture legs and along baseboards, making the living room feel less clean even after the cushions themselves have been refreshed.
For homes that need more than a quick furniture reset, BA House Cleaning’s Deep Cleaning Services focus on the wider buildup that routine maintenance can miss.
Fluff and Rotate Cushions After Cleaning
The original version of this article focused heavily on flipping and fluffing. That advice still has value, but it belongs after cleaning, not as the entire topic.
Once removable cushions are clean and completely dry, reshape soft filling with your hands. Push filling back toward empty corners and smooth the surface rather than aggressively beating the cushion.
If the cushion is designed to be reversible, flipping it can help distribute wear. Interchangeable seat cushions may also be rotated between positions, particularly when one part of the sofa receives substantially more daily use.
La-Z-Boy recommends fluffing and rotating applicable cushions to help retain shape and promote more even wear.
Combining this simple maintenance step with How to Clean Couch Cushions gives the sofa a more complete refresh: the surface looks cleaner, hidden debris is removed, and cushions return to a more balanced appearance.
Keep Couch Cushions Cleaner Between Deep Cleaning Sessions
Prevention usually requires less effort than stain removal.
Vacuum furniture regularly, especially in homes with pets or children. Deal with spills quickly rather than leaving them until the next scheduled house-cleaning day, and avoid eating particularly messy foods directly over light-colored or difficult-to-clean upholstery.
Throws can protect frequently used furniture areas when appropriate, but they should also be cleaned according to their own care labels.
Encourage family members to avoid placing dirty shoes, outdoor bags, or oily items directly on upholstered furniture. Small habits reduce the amount of contamination that reaches the cushions.
Regular household cleaning also matters. Dust from floors, nearby surfaces, and the rest of the room eventually reaches furniture. BA House Cleaning’s Recurring Cleaning Services help maintain kitchens, bathrooms, floors, surfaces, and living areas on a weekly, biweekly, or monthly schedule, reducing the overall buildup around furniture.
When Couch Cushion Cleaning Is Part of a Bigger Home Reset
Sometimes dirty cushions are only one visible sign that a room needs more attention.
Dust may have collected on furniture, floors may need detailed vacuuming, baseboards may look dull, and debris can accumulate around hard-to-reach areas. Cleaning the cushion while ignoring everything around it may improve the sofa without producing the fresh feeling you wanted from the room.
A broader deep clean addresses the space as a whole. The BA House Cleaning guide to Deep Cleaning a Home explains why upholstery, carpets, and less-accessible areas can contribute to accumulated dust and debris throughout the property.
BA House Cleaning’s home-cleaning approach also includes details in the family room such as dusting furniture, keeping the room tidy, fluffing pillows, and folding throws. Those small finishing touches work especially well when the rest of the home has also been properly cleaned.
Know When a Cushion Needs Specialist Upholstery Cleaning
Not every upholstery problem should be handled with another round of DIY cleaning.
Consider specialist help when a stain is large or persistent, the fabric is particularly delicate or valuable, the manufacturer specifies professional cleaning, an odor appears to come from deep inside the cushion, or significant liquid has penetrated the padding.
Color transfer, water rings, unknown cleaning codes, and previous damage are also good reasons to avoid experimentation.
BA House Cleaning can support the overall cleanliness of the room and home through professional house cleaning, but specialized upholstery restoration or advanced stain extraction may require a dedicated upholstery-care professional.
Understanding that distinction is an important part of how to Clean Couch Cushions safely. Knowing when not to apply another product can be just as valuable as knowing how to remove ordinary dirt.
Common Couch Cushion Cleaning Mistakes
Several common mistakes can turn a small furniture-cleaning task into a much larger problem.
Using Water Before Checking the Cleaning Code
Some upholstery requires solvent-based care. Do not assume water is automatically the safest option.
Soaking the Cushion
Excess moisture can move beneath the surface fabric into padding or foam where drying becomes more difficult.
Scrubbing a Stain Aggressively
Hard rubbing can spread contamination or alter the fabric texture. Blotting and controlled spot treatment are generally better starting points.
Machine Washing a Cover Because It Has a Zipper
A removable cover is not automatically washable. Follow explicit manufacturer instructions.
Using a Steam Cleaner on Every Fabric
Heat and moisture are not suitable for all upholstery. Check the care instructions first.
Hiding Odors With Fragrance
Find and remove the source instead of simply adding a stronger scent.
Putting Cushions Back Before They Are Dry
Always allow cleaned upholstery and cushion interiors to dry completely before returning them to normal use.
Avoiding these mistakes makes How to Clean Couch Cushions safer and helps protect the furniture from preventable damage.
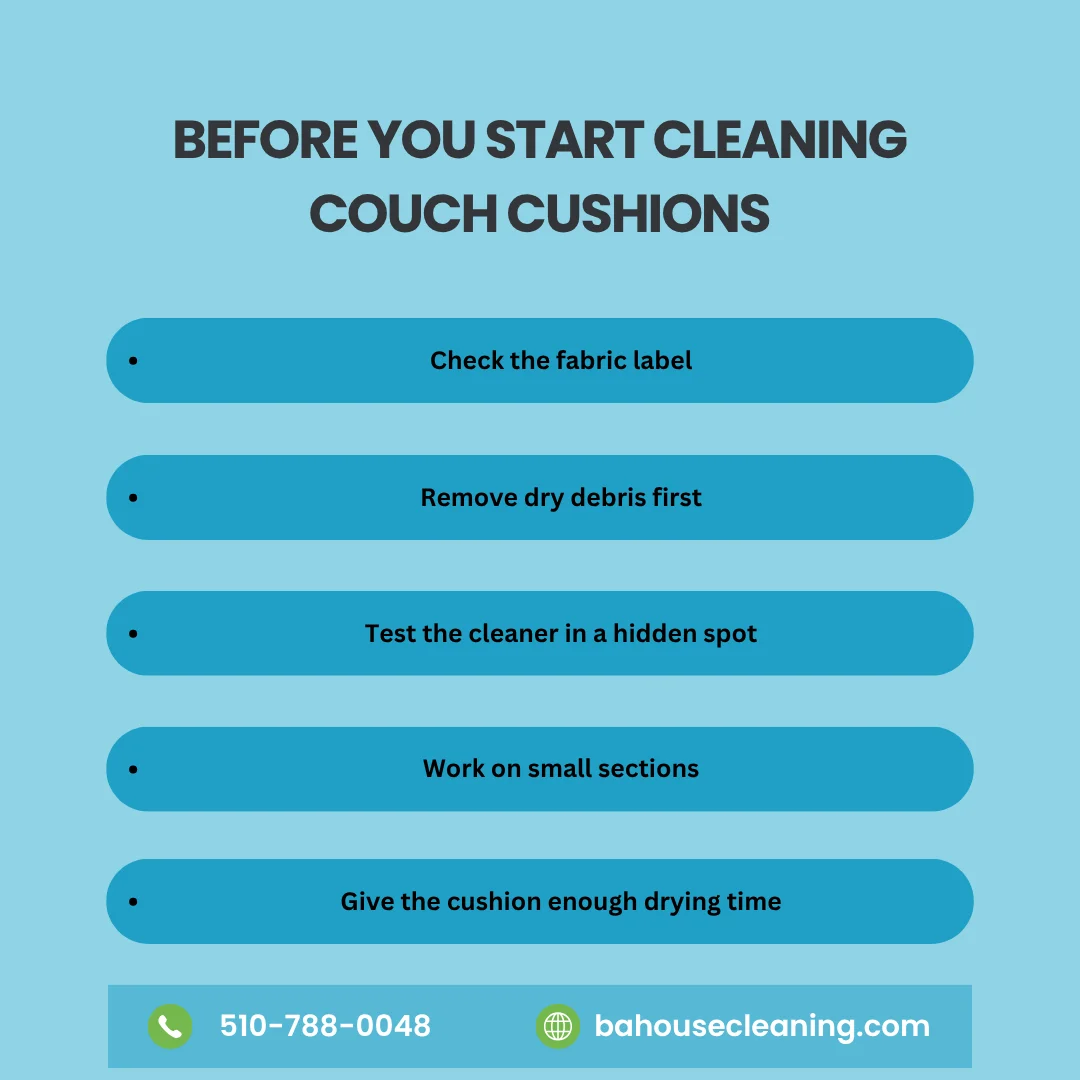
Before You Start Cleaning Couch Cushions
Before using any cleaner on your sofa, take a minute to check the cushion and the surrounding upholstery. A small amount of preparation can prevent water marks, discoloration, or unnecessary moisture from reaching the filling.
Check the fabric label: Confirm whether the upholstery allows water-based cleaning, solvent cleaning, or professional treatment only.
Remove dry debris first: Vacuum crumbs, pet hair, lint, and dust before working on stains or spills.
Test the cleaner in a hidden spot: Let the test area dry completely before applying the product somewhere visible.
Work on small sections: Treat the affected area instead of soaking the entire cushion, especially when the filling cannot be removed.
Give the cushion enough drying time: Do not return damp cushions to the sofa or cover them with throws before the fabric and filling are fully dry.
These simple checks make How to Clean Couch Cushions much safer and help you avoid turning a small cleaning job into an upholstery problem.
Keep Your Sofa and Living Room Feeling Fresh
Learning how to Clean Couch Cushions is not about finding one universal spray that works on every piece of furniture. The safest process begins with the upholstery instructions, followed by thorough vacuuming, careful stain identification, and controlled spot cleaning only when the fabric permits it.
Regular maintenance also makes a difference. Removing crumbs before they settle deeply into seams, addressing spills while they are fresh, vacuuming pet hair, and reshaping removable cushions after they are completely dry can help the sofa look cleaner and more inviting between larger cleaning sessions.
Couch cushions are also only one part of a clean family room. Floors, furniture surfaces, baseboards, surrounding dust, throws, and the rest of the home all contribute to how fresh the room feels. If your property needs more detailed attention, BA House Cleaning offers professional house cleaning and deep cleaning services throughout Oakland and the East Bay.
Want more practical cleaning ideas for maintaining your home? Follow BA House Cleaning on Facebook for home-cleaning tips, useful maintenance advice, and updates from our team.
Frequently Asked Questions
What is the safest way to clean couch cushions?
Start by checking the upholstery cleaning code or manufacturer’s instructions. Vacuum loose dirt first, then spot-clean only with a product approved for the fabric. Avoid soaking the cushion and allow it to dry completely before normal use.
Can I wash couch cushion covers in a washing machine?
Only when the manufacturer specifically says the covers are machine washable. A zipper does not automatically mean the casing can be washed. Some removable covers can shrink, distort, or damage their backing during laundering.
How do I clean couch cushions that cannot be removed?
Vacuum attached cushions carefully, including the seams, then spot-treat stains according to the upholstery cleaning code. Use controlled amounts of cleaner and provide adequate airflow while the area dries.
Can I use a steam cleaner on couch cushions?
Not on every sofa. Some upholstery manufacturers specifically advise against steam or hot-water extraction for certain fabrics. Check the care instructions before using a steam-cleaning machine.
How can I remove odors from couch cushions?
Begin by locating the source of the odor. Vacuum thoroughly, remove hidden food or debris, and treat visible contamination according to the fabric instructions. Persistent odors coming from inside the filling may require professional upholstery cleaning.
How often should couch cushions be cleaned?
Vacuuming can be part of regular furniture maintenance, while spot cleaning should be done when spills or visible marks appear. The need for deeper attention depends on household use, pets, children, fabric type, and the manufacturer’s recommendations.
Should I fluff couch cushions after cleaning?
Yes, when the cushion design and filling allow it. Wait until the cushion is completely dry, then gently redistribute soft filling and rotate or flip reversible cushions according to the furniture manufacturer’s instructions.
A refrigerator works every day to keep food cold, but it can easily become one of the most overlooked appliances in the kitchen when cleaning time comes around. Spilled sauces collect beneath drawers, forgotten containers remain at the back of shelves, crumbs settle into corners, and sticky residue can build up around handles and door seals. Even when the outside looks clean, the interior may need much more attention.
Learning how to Deep Clean a Fridge involves more than quickly wiping the shelves. A thorough clean means safely removing food, checking what should be discarded, taking out removable parts, cleaning spills and residue, paying attention to door seals, drying everything properly, and returning food in an organized way. The process also gives you a chance to check the refrigerator temperature and identify items that may have been forgotten.
Food safety matters throughout the process. Refrigerated perishable foods should not remain at room temperature for extended periods, so preparation is important before you empty the appliance. According to FoodSafety.gov, refrigerators should remain at 40°F (4°C) or below, helping slow the growth of bacteria that can cause foodborne illness.
At BA House Cleaning, we know that a clean refrigerator can make the entire kitchen feel fresher and easier to manage. This guide explains how to Deep Clean a Fridge step by step, how to deal with odors and sticky spills, how to clean shelves, drawers, seals, and exterior surfaces, and how to keep the appliance cleaner between deep-cleaning sessions.
Why Deep Fridge Cleaning Matters
A refrigerator holds many different types of food in a relatively small space. Containers can leak, produce can spoil, bottles become sticky, and raw ingredients may occasionally contaminate shelves or drawers. Regularly checking and cleaning the interior helps prevent old residue from accumulating and makes it easier to notice foods that should no longer be stored.
The USDA recommends wiping refrigerator spills promptly and cleaning interior surfaces with hot, soapy water followed by rinsing. Its refrigeration and food safety guidance also recommends making a weekly habit of checking refrigerated foods and discarding perishable items that should no longer be eaten.
Deep cleaning provides an opportunity to go beyond everyday spill management. Shelves can be removed, hidden corners become accessible, drawer tracks can be cleaned, and food can be reorganized before returning it to the refrigerator.
Understanding How to Deep Clean a Fridge also supports better kitchen maintenance overall. When appliances, cabinets, counters, sinks, and floors are cared for consistently, the entire space becomes easier to maintain. For a broader approach, see our guide to Kitchen Cleaning.
What You Need Before You Start
Preparation makes refrigerator cleaning faster and reduces the amount of time food spends outside refrigeration. Gather everything you need before opening the doors and removing food.
Useful supplies may include:
Microfiber cloths
Soft sponges
Mild dish soap
Warm water
A small soft brush or old toothbrush
Clean towels
Trash bags
A cooler with ice or cold packs when needed
A vacuum with a narrow attachment for accessible exterior areas
A refrigerator-safe cleaner if recommended by your appliance manufacturer
Avoid automatically reaching for the strongest cleaning product in the cabinet. For ordinary fridge residue, warm soapy water is often sufficient. Always check your appliance manual before applying unfamiliar products to interior plastic, glass, stainless steel, painted finishes, or rubber seals.
Having supplies ready is an important first step in How to Deep Clean a Fridge because it allows you to work efficiently rather than leaving food at room temperature while searching for cleaning tools.
How to Deep Clean a Fridge Step by Step
A complete refrigerator cleaning is easier when you work in a logical order. Starting at the top and moving downward also helps prevent crumbs and dirty water from landing on areas you have already cleaned.
Step 1: Remove Food and Check Expiration Dates
Take food out systematically rather than placing everything randomly across the kitchen. Check expiration or use-by information where appropriate and look for spoiled produce, forgotten leftovers, leaking packages, and containers you no longer need.
The CDC advises that perishable foods should not remain out of refrigeration for more than two hours. When cleaning will take longer, store temperature-sensitive items in another refrigerator or a cooler with a cold source. Its refrigerator cleaning guidance also recommends removing shelves, drawers, and other removable parts when a refrigerator requires thorough cleaning.
Do not automatically taste questionable food to determine whether it is still safe. When food appears spoiled or has been stored improperly, follow appropriate food-safety guidance and discard it when necessary.
Step 2: Remove Shelves and Drawers
Once the refrigerator is empty, carefully remove shelves, drawers, bins, and other detachable components according to the manufacturer’s instructions.
Some refrigerator shelves are glass. If they are extremely cold, avoid exposing them immediately to very hot water because sudden temperature changes can potentially stress the glass. Allow components to adjust closer to room temperature and follow the appliance manufacturer’s cleaning instructions.
Removing these pieces exposes areas underneath and behind them where crumbs and spilled liquid often collect.
Step 3: Remove Loose Crumbs and Debris
Before adding water, collect loose food particles.
Use a dry microfiber cloth, paper towel, or a vacuum attachment where appropriate. Pay attention to shelf supports, drawer rails, corners, and the lower part of the refrigerator where crumbs often accumulate.
This dry-cleaning step reduces the amount of muddy residue created once water is introduced and makes the next stage faster.
Step 4: Wash the Interior
Use warm water and mild dish soap to wipe interior walls, shelf supports, door compartments, and other washable surfaces. Work from the top downward so any loose residue falls onto areas that have not yet been cleaned.
The USDA recommends hot, soapy water for cleaning refrigerator spills and surfaces, followed by rinsing. Avoid flooding vents, lights, electrical components, or control panels with cleaning solution.
When learning how to Deep Clean a Fridge, controlled moisture is important. A damp cloth is usually more appropriate than spraying large amounts of liquid directly into the appliance.
Step 5: Clean Shelves and Drawers
Wash removable components separately using warm soapy water when permitted by the manufacturer. Use a soft cloth or sponge and focus on sticky corners, drawer edges, and bottle compartments.
Rinse away soap residue and dry the pieces completely before reinstalling them. Returning wet shelves and bins can leave water trapped in corners and may immediately make the freshly cleaned refrigerator look streaky.
Step 6: Clean the Door Seals
The flexible seal around the refrigerator door is easy to overlook, but crumbs, moisture, and sticky residue can collect in its folds.
Wipe the gasket gently with warm soapy water and a soft cloth. A small soft brush can help reach narrow grooves without using aggressive tools. Dry the seal afterward and check for cracks, loose areas, or visible damage.
The gasket plays an important role in helping the refrigerator door close properly, so avoid pulling, stretching, or scrubbing it aggressively.
Step 7: Dry the Refrigerator Interior
Once every surface is clean, use a dry microfiber cloth or clean towel to remove remaining moisture.
Drying helps reduce streaks and gives you a better opportunity to inspect the interior for residue you may have missed. Allow removable components to dry before returning them to their positions.
This completes the core process of How to Deep Clean a Fridge, but odor control, exterior cleaning, and food organization still deserve attention.
How to Clean Sticky Refrigerator Spills
Sticky residue often develops beneath sauce bottles, drink containers, fruit containers, or leaking packages. Older spills can harden and become difficult to remove with one quick wipe.
Start by placing a warm, damp cloth over the residue briefly to soften it. Then wipe gently with mild soapy water rather than scraping the surface with a metal tool. Repeat the process if necessary.
For narrow corners and shelf tracks, a soft toothbrush or detailing brush can help loosen residue without requiring excessive force.
If raw meat juices or recalled foods have contaminated the refrigerator, follow appropriate USDA or CDC cleaning and sanitizing guidance rather than treating the incident like an ordinary sticky spill. The CDC distinguishes routine cleaning from situations involving recalled food and provides specific instructions for those cases.
The important principle in How to Deep Clean a Fridge is matching the cleaning process to the type of contamination instead of assuming every mess requires the same treatment.
How to Remove Bad Smells From a Fridge
A bad refrigerator smell usually has a source. Before adding a deodorizer, find the cause.
Check produce drawers, containers at the back of shelves, door compartments, leftover boxes, condiment bottles, and areas underneath removable drawers. A small amount of spoiled food can create an odor that spreads throughout the appliance.
Once the source is removed, wash the affected area and dry it thoroughly. If odor remains, continue checking hidden areas rather than simply masking the smell.
Baking soda is commonly used as a refrigerator deodorizer. If you want to understand where baking soda can be useful elsewhere in the home, see our guide toCleaning with Baking Soda.
The USDA also provides guidance for removing refrigerator and freezer odors, particularly when odors are caused by spoiled food. Persistent severe odors may require more intensive cleaning than ordinary weekly maintenance.
How to Clean Refrigerator Shelves and Drawers Properly
Shelves and drawers handle constant contact with food packages, produce, bottles, and containers, so they deserve more than a quick surface wipe during a deep clean.
Remove them whenever the appliance design allows. Wash all reachable surfaces, including undersides, edges, corners, and handles. Produce drawers can collect tiny leaves, vegetable debris, moisture, and residue that may not be visible until the drawer is removed.
Inspect tracks and supporting rails while the compartments are out. These narrow areas can hold crumbs and dried spills that are difficult to reach during normal cleaning.
Knowing how to Deep Clean a Fridge means taking advantage of the empty appliance. Areas that are normally hidden behind food containers are suddenly accessible, so clean them before everything goes back inside.
How to Clean the Refrigerator Door and Handles
Fridge handles are among the most frequently touched surfaces in a kitchen. Food preparation, cooking, unpacking groceries, and opening the refrigerator can transfer fingerprints, oils, and residue onto the handle and door.
Use a cleaner appropriate for the refrigerator finish and wipe handles thoroughly. Pay attention to edges and the areas immediately around the handle where fingertips frequently touch.
For stainless steel refrigerators, check the appliance manufacturer’s recommendations before using a product. Some stainless surfaces have protective coatings that require specific care. Avoid abrasive scrubbers that may scratch the finish.
Wipe in the direction recommended for your appliance and buff with a clean microfiber cloth if necessary.
Do You Need to Clean Under and Behind the Refrigerator?
The visible refrigerator interior may be your main priority, but dust can also collect around the appliance.
If it is safe and practical to access the floor beside or beneath the refrigerator, vacuum loose dust and debris. Do not pull a large refrigerator away from the wall unless you can do so safely and without damaging flooring, water lines, electrical connections, or the appliance itself.
Some refrigerators also have accessible condenser areas that require occasional maintenance. Because designs differ significantly, follow the owner’s manual rather than assuming every refrigerator should be cleaned in the same way.
Deep cleaning should improve the appliance area without creating mechanical or property damage.
How Often Should You Deep Clean a Fridge?
There is no single schedule that works for every household.
A lightly used refrigerator occupied by one person may stay clean much longer than a refrigerator used by a large family that stores cooked meals, fresh produce, children’s snacks, beverages, and frequent leftovers.
Routine maintenance should happen continuously. Wipe spills as they occur, check food regularly, and remove spoiled items rather than waiting for a deep-cleaning day.
A more thorough cleaning can be scheduled whenever drawers become dirty, odors appear, sticky residue accumulates, or the refrigerator has not been emptied and detailed for a long period.
The USDA encourages weekly checks for foods that should be discarded and prompt cleanup of spills. Following those habits reduces the amount of work required when it is time for How to Deep Clean a Fridge from top to bottom.
How to Organize Food After Cleaning
Do not rush to return everything exactly where it was.
A freshly cleaned refrigerator allows you to improve how food is stored. Group similar items together, keep frequently used products accessible, and avoid overcrowding shelves so severely that you cannot see what is stored behind them.
Keep raw foods contained appropriately and separated from ready-to-eat foods to reduce cross-contamination risk. FoodSafety.gov identifies separation as one of the four basic food-safety principles, particularly for raw meat, poultry, seafood, and eggs.
Make sure the refrigerator remains at 40°F (4°C) or below. An appliance thermometer can help confirm the actual internal temperature instead of relying only on the refrigerator’s numbered control setting.
Good organization also makes future How to Deep Clean a Fridge sessions easier because spills, old containers, and forgotten food are more noticeable.
Common Fridge Cleaning Mistakes to Avoid
Deep cleaning can be simple, but several mistakes can create unnecessary work or safety concerns.
Leaving Perishable Food Out Too Long
Do not empty the refrigerator and then spend hours cleaning while dairy products, meat, leftovers, and other perishable foods remain on the counter. Prepare a cooler or another cold storage option when needed.
Using Too Much Cleaning Product
More soap does not necessarily produce a cleaner refrigerator. Excess detergent can create residue that requires additional rinsing.
Spraying Electrical Components
Avoid saturating lights, control panels, vents, and other electrical areas. Apply cleaning solution to a cloth when direct spraying could introduce excess moisture.
Ignoring the Door Seal
The gasket can collect food particles and sticky residue. Include it in the cleaning routine rather than focusing only on shelves.
Returning Wet Shelves
Dry shelves, bins, and drawers before reinstalling them to reduce water spots and trapped moisture.
Masking Odors Instead of Finding the Source
A deodorizer may help with remaining smells, but it cannot replace removal of spoiled food or proper cleaning.
Avoiding these mistakes makes how to Deep Clean a Fridge faster and more effective.
When Fridge Cleaning Is Important During a Move
Moving provides one of the best opportunities to clean a refrigerator thoroughly because the appliance is often nearly empty.
If you are leaving a rental or preparing a property for new occupants, an empty refrigerator can reveal spills and residue that were hidden behind food for months. New residents may also want to clean the refrigerator interior before filling it with groceries.
BA House Cleaning’s Move In/Out Cleaning Services list inside-refrigerator cleaning as an available add-on. That makes refrigerator detailing especially relevant when preparing an empty home for handover or a new move-in.
Our guide to Understanding Move-Out Cleaning also explains how appliance interiors may fit into a broader move-cleaning plan and why clients should confirm which add-ons are included before cleaning day.
When Professional Deep Cleaning Can Help
Cleaning one refrigerator is manageable for many homeowners, but the appliance is often only one part of a kitchen that needs attention.
Grease can accumulate around the stove, cabinet fronts may need wiping, countertops may have residue, sinks can require detailed cleaning, and floors may need more than everyday maintenance. When several areas need attention at the same time, addressing the whole room can be more practical than focusing on one appliance.
BA House Cleaning provides professional Deep Cleaning Services for Oakland and the East Bay, designed for homes that need additional detail beyond routine maintenance. A deeper home cleaning can be particularly helpful before guests arrive, during seasonal cleaning, or when the home has not received detailed attention for some time.
The exact refrigerator service should always be confirmed when booking because standard exterior appliance cleaning and optional interior refrigerator cleaning may be treated differently depending on the selected service.
5 Fridge Cleaning Rules Worth Remembering
If you remember only a few things about how to Deep Clean a Fridge, these five rules will make the biggest difference:
Protect refrigerated food while cleaning. Prepare a cooler or another cold storage option when necessary and avoid leaving perishable items at room temperature for extended periods.
Remove food before detailed cleaning. An empty refrigerator allows you to reach spills, corners, drawer tracks, and hidden residue properly.
Use mild cleaning methods first. Warm soapy water is suitable for many ordinary refrigerator messes, while specialized contamination may require additional food-safety steps.
Dry everything before reassembly. Clean shelves, drawers, and interior surfaces should be dried before food is returned.
Prevent buildup between deep cleans. Wipe spills promptly, check stored food regularly, and keep the refrigerator organized so problems are easier to notice.
These simple habits make refrigerator care more manageable and reduce the amount of heavy cleaning required later.
Keep Your Refrigerator Fresh Between Deep Cleans
Knowing how to clean a Fridge Deep gives you a reliable process for handling more than visible crumbs. Start by preparing a safe place for refrigerated food, empty the appliance, discard unwanted items, remove shelves and drawers, and work through the interior systematically. Clean the door seals, wipe the exterior, dry all surfaces, and return food in an organized way.
Deep cleaning should not replace routine maintenance. Small spills are easier to remove while they are fresh, spoiled food should be discarded promptly, and shelves stay cleaner when leaking containers are dealt with before residue spreads. Regular attention can also prevent a small odor or sticky patch from becoming a much larger cleaning job.
At BA House Cleaning, we believe the easiest homes to enjoy are the ones where cleaning does not have to wait until buildup becomes overwhelming. Whether your kitchen needs detailed attention or the entire home is ready for a deeper reset, professional cleaning can help you get back to a fresher, more manageable space.
Want more practical cleaning advice for your kitchen and the rest of your home? Follow BA House Cleaning on Facebook for useful cleaning tips, home-care ideas, and updates from our team.
Frequently Asked Questions
What is the best way to deep clean a fridge?
Remove food and store perishables safely, take out removable shelves and drawers, clear loose debris, then wash interior surfaces with warm, soapy water. Clean and dry the removable parts separately, wipe the door seals, dry the refrigerator interior, and organize food before returning it.
How long can food stay out while cleaning the refrigerator?
The CDC advises that perishable food should not remain out of refrigeration for more than two hours. If cleaning may take longer, keep temperature-sensitive food in another refrigerator or a cooler with ice or cold packs.
Can I use baking soda when cleaning a fridge?
Baking soda is commonly used for refrigerator odor control, but it should not replace proper cleaning or removal of spoiled food. When using any homemade cleaning method, also check your refrigerator manufacturer’s recommendations for interior materials.
How do I remove a bad smell from my refrigerator?
First, locate and remove the source, such as spoiled food or a leaking container. Clean the affected shelves, drawers, and interior surfaces thoroughly, then dry the refrigerator. If odor remains after the source is removed, additional deodorizing may help.
How often should I deep clean my fridge?
The ideal frequency depends on how heavily the refrigerator is used. Clean spills immediately and check food regularly. Schedule deeper cleaning whenever residue, odors, dirty drawers, or significant buildup begin to appear.
Should I turn off my refrigerator before deep cleaning it?
Requirements vary by refrigerator design and the type of cleaning being performed. Review your appliance manual before unplugging or switching off the unit, especially if you plan to access mechanical areas or move the appliance.
What temperature should a refrigerator be after cleaning?
FoodSafety.gov recommends keeping the refrigerator at 40°F (4°C) or below. Using an appliance thermometer can help confirm the refrigerator is maintaining an appropriate temperature.
To get rid of mildew, clean the affected surface safely, remove visible buildup, dry the area completely, and fix the moisture source that caused the problem. Mildew often returns when humidity, leaks, condensation, or poor ventilation are not corrected.
Small mildew spots on hard surfaces may be manageable with proper cleaning. However, widespread growth, water damage, damaged drywall, or recurring moisture problems may require help from a qualified specialist.
Mildew often starts as a small patch near a shower, window, sink, or another damp area. At first, it may seem like a simple cleaning issue. However, removing the visible mark is only part of the solution.
If moisture remains, mildew can return.
Learning how to get rid of mildew means understanding:
What causes mildew
How to clean different surfaces safely
How to prevent it from returning
When DIY cleaning is enough
When professional help may be necessary
Oakland and East Bay homes can experience mildew because of bathroom humidity, condensation, plumbing issues, limited airflow, and damp areas that do not dry properly.
BA House Cleaning helps homeowners maintain cleaner and more comfortable living spaces through professional residential cleaning services. However, cleaning works best when moisture problems have already been corrected.
Mildew vs Mold: What Is the Difference?
Many homeowners use the terms mildew and mold interchangeably. While both are fungal growths, they may appear differently and require different levels of attention.
Mildew
Mold
Usually appears on surfaces
May grow deeper into materials
Often looks flat or powdery
May appear fuzzy or raised
Common on bathroom surfaces
Can affect drywall, wood, and insulation
Often easier to clean when found early
May require professional assessment
Appearance alone cannot confirm the exact type of growth.
According to theEnvironmental Protection Agency, moisture control is one of the most important steps in managing indoor mold-related problems.
Before deciding how to clean mildew, consider:
How large is the affected area?
What material is affected?
Is there an ongoing moisture source?
Why Does Mildew Keep Coming Back?
The most common reason mildew returns is moisture.
Cleaning removes visible buildup, but new growth can appear if the environment remains damp.
Common causes include:
Cause
Example
High humidity
Bathrooms after showers
Condensation
Moisture around windows
Leaks
Pipes under sinks
Poor airflow
Closed rooms with limited ventilation
Wet materials
Towels and rugs staying damp
The EPA recommends controlling moisture, repairing leaks, and drying wet areas completely to reduce recurring problems.
Signs You May Have a Mildew Problem
Visible spots are the most obvious sign, but other warning signs include:
Musty odors
Recurring stains after cleaning
Damp areas that stay wet
Condensation around windows
Discoloration near ceilings
Dark grout lines
Damp cabinets under sinks
If mildew keeps returning after cleaning, the issue is usually not the cleaning itself. The moisture source needs attention.
Should You Clean Mildew Yourself or Call a Professional?
Not every mildew situation requires professional help. The right approach depends on the size, location, and cause of the problem.
Situation
Best Option
Small mildew spot on tile or glass
Careful DIY cleaning
Surface buildup in bathroom areas
Cleaning + moisture control
Mildew returns repeatedly
Investigate moisture source
Damaged drywall or ceilings
Professional assessment
Flood-related growth
Water damage or remediation specialist
Hidden moisture behind walls
Specialist evaluation
Routine cleaning can help maintain surfaces, but it cannot replace repairs, drying, or mold remediation when there is a larger moisture problem.
How to Get Rid of Mildew on Hard Surfaces
For small areas on washable surfaces such as tile, glass, or sealed counters:
Step 1: Improve Ventilation
Open windows when possible and use exhaust fans to reduce moisture.
Step 2: Protect Yourself
Wear gloves and avoid direct contact with affected areas.
Step 3: Clean the Surface
Use an appropriate cleaning product according to the manufacturer’s instructions.
Step 4: Dry Completely
Removing moisture after cleaning is one of the most important steps.
Step 5: Fix the Cause
Check for:
Leaks
Poor ventilation
Condensation
Water buildup
Cleaning without fixing moisture usually creates only a temporary improvement.
How to Get Rid of Mildew in a Bathroom
Bathrooms are common mildew areas because they combine:
Warm temperatures
Moisture
Limited airflow
To reduce bathroom mildew:
Run exhaust fans during and after showers
Allow shower surfaces to dry
Wash damp towels regularly
Avoid leaving products on wet surfaces
Inspect grout and caulk regularly
How to Clean Mildew From Grout and Caulk
Grout and caulk require extra attention because they can trap moisture.
For grout:
Use a suitable cleaner
Scrub gently
Avoid damaging the surface
Dry completely afterward
For caulk:
If discoloration remains below the surface, cleaning may not solve the issue.
Old or damaged caulk may need replacement because moisture can remain trapped underneath.
How to Remove Mildew From Walls and Ceilings
Walls and ceilings require more caution.
Before cleaning, check:
Is the paint damaged?
Is drywall soft?
Is there swelling?
Is there an active leak?
Small surface marks on washable painted surfaces may be cleaned carefully.
However, damaged drywall or recurring ceiling stains may indicate a larger moisture issue.
Do not paint over active mildew. This may hide the problem temporarily while allowing it to continue underneath.
How to Remove Mildew Smell From a Home
A mildew smell often comes from moisture trapped in fabrics, walls, carpets, or poorly ventilated areas.
To reduce mildew odors:
Remove damp materials
Wash affected fabrics
Improve airflow
Dry moisture sources completely
Check hidden areas such as closets and cabinets
If the smell returns quickly after cleaning, there may be hidden moisture that needs investigation.
Should You Use Bleach to Remove Mildew?
Bleach is commonly suggested for mildew, but it is not suitable for every surface.
The CDC warns that bleach should never be mixed with ammonia or other cleaning products because dangerous fumes can form.
When using any cleaning product:
Follow label instructions
Use proper ventilation
Avoid mixing chemicals
Confirm the product is suitable for the material
The goal is not only removing visible mildew but preventing it from returning.
How Deep Cleaning Services Can Help Prevent Mildew Problems
A detailed cleaning routine can help maintain areas where moisture buildup commonly occurs.
BA House Cleaning helps homeowners maintain cleaner and more comfortable homes through:
Professional residential cleaning
Flexible cleaning schedules
Detailed service options
Local East Bay experience
Customer-focused communication
The team helps maintain kitchens, bathrooms, and living spaces after moisture issues have been addressed.
Frequently Asked Questions About Mildew
How do I get rid of mildew permanently?
Permanent mildew control requires removing visible growth and fixing the moisture source that caused it.
What is the fastest way to remove mildew?
For small areas, clean the surface properly, dry it completely, and correct the moisture problem.
How do I get rid of mildew smell?
Remove damp materials, improve ventilation, clean affected fabrics, and check for hidden moisture sources.
Is mildew the same as mold?
Mildew is a common term used for certain surface fungal growth. Appearance alone cannot identify the exact type.
Can professional cleaners remove mildew?
Professional cleaners can help with routine cleaning and surface buildup within their service scope. Extensive mold or water damage may require specialists.
Why does mildew keep returning in my bathroom?
Recurring bathroom mildew is often caused by humidity, condensation, leaks, or poor ventilation.
Can I paint over mildew?
No. Painting may hide the stain temporarily but does not solve the underlying moisture problem.
When should I call a specialist?
Call a specialist when growth is widespread, connected to flooding, affects drywall or insulation, or returns despite cleaning.
Keep Your Home Cleaner and More Comfortable
Learning how to get rid of mildew is not only about removing visible spots. It is about understanding why mildew appeared and preventing it from returning.
Clean affected areas safely, control moisture, improve airflow, and know when professional help is needed.
Once moisture problems are corrected, BA House Cleaning can help you maintain a cleaner home with professional cleaning solutions designed for Oakland and East Bay homeowners.