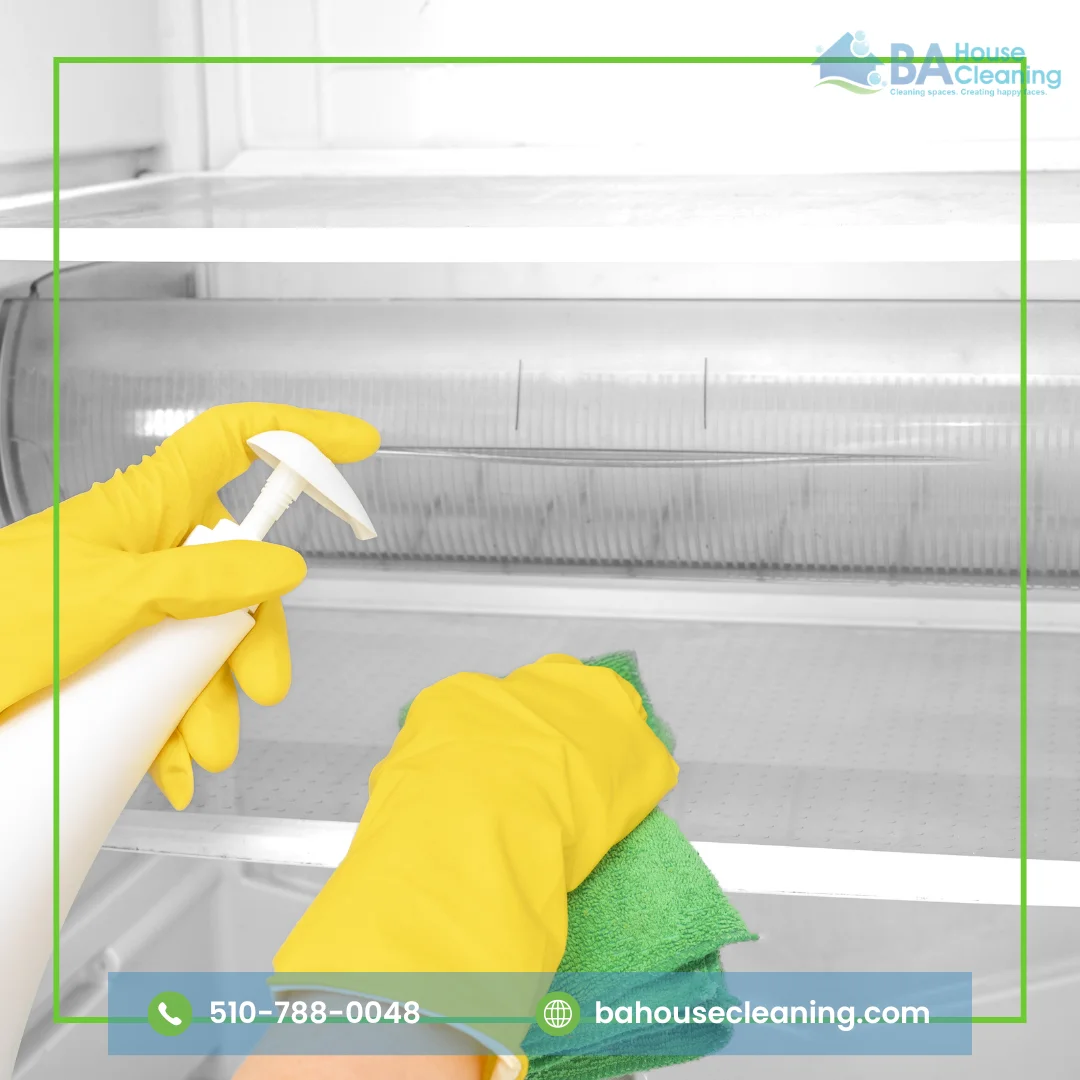
Deep Fridge Cleaning Guide – How to Deep Clean a Fridge Properly

Professional Cleaning Services

Click here to schedule your cleaning and enjoy a spotless space.

A refrigerator works every day to keep food cold, but it can easily become one of the most overlooked appliances in the kitchen when cleaning time comes around. Spilled sauces collect beneath drawers, forgotten containers remain at the back of shelves, crumbs settle into corners, and sticky residue can build up around handles and door seals. Even when the outside looks clean, the interior may need much more attention.

Learning how to Deep Clean a Fridge involves more than quickly wiping the shelves. A thorough clean means safely removing food, checking what should be discarded, taking out removable parts, cleaning spills and residue, paying attention to door seals, drying everything properly, and returning food in an organized way. The process also gives you a chance to check the refrigerator temperature and identify items that may have been forgotten.

Food safety matters throughout the process. Refrigerated perishable foods should not remain at room temperature for extended periods, so preparation is important before you empty the appliance. According to FoodSafety.gov, refrigerators should remain at 40°F (4°C) or below, helping slow the growth of bacteria that can cause foodborne illness.

At BA House Cleaning, we know that a clean refrigerator can make the entire kitchen feel fresher and easier to manage. This guide explains how to Deep Clean a Fridge step by step, how to deal with odors and sticky spills, how to clean shelves, drawers, seals, and exterior surfaces, and how to keep the appliance cleaner between deep-cleaning sessions.

How to Deep Clean a Fridge

Why Deep Fridge Cleaning Matters

A refrigerator holds many different types of food in a relatively small space. Containers can leak, produce can spoil, bottles become sticky, and raw ingredients may occasionally contaminate shelves or drawers. Regularly checking and cleaning the interior helps prevent old residue from accumulating and makes it easier to notice foods that should no longer be stored.

The USDA recommends wiping refrigerator spills promptly and cleaning interior surfaces with hot, soapy water followed by rinsing. Its refrigeration and food safety guidance also recommends making a weekly habit of checking refrigerated foods and discarding perishable items that should no longer be eaten.

Deep cleaning provides an opportunity to go beyond everyday spill management. Shelves can be removed, hidden corners become accessible, drawer tracks can be cleaned, and food can be reorganized before returning it to the refrigerator.

Understanding How to Deep Clean a Fridge also supports better kitchen maintenance overall. When appliances, cabinets, counters, sinks, and floors are cared for consistently, the entire space becomes easier to maintain. For a broader approach, see our guide to Kitchen Cleaning.

What You Need Before You Start

Preparation makes refrigerator cleaning faster and reduces the amount of time food spends outside refrigeration. Gather everything you need before opening the doors and removing food.

Useful supplies may include:

  • Microfiber cloths
  • Soft sponges
  • Mild dish soap
  • Warm water
  • A small soft brush or old toothbrush
  • Clean towels
  • Trash bags
  • A cooler with ice or cold packs when needed
  • A vacuum with a narrow attachment for accessible exterior areas
  • A refrigerator-safe cleaner if recommended by your appliance manufacturer

Avoid automatically reaching for the strongest cleaning product in the cabinet. For ordinary fridge residue, warm soapy water is often sufficient. Always check your appliance manual before applying unfamiliar products to interior plastic, glass, stainless steel, painted finishes, or rubber seals.

Having supplies ready is an important first step in How to Deep Clean a Fridge because it allows you to work efficiently rather than leaving food at room temperature while searching for cleaning tools.

How to Deep Clean a Fridge Step by Step

A complete refrigerator cleaning is easier when you work in a logical order. Starting at the top and moving downward also helps prevent crumbs and dirty water from landing on areas you have already cleaned.

Step 1: Remove Food and Check Expiration Dates

Take food out systematically rather than placing everything randomly across the kitchen. Check expiration or use-by information where appropriate and look for spoiled produce, forgotten leftovers, leaking packages, and containers you no longer need.

The CDC advises that perishable foods should not remain out of refrigeration for more than two hours. When cleaning will take longer, store temperature-sensitive items in another refrigerator or a cooler with a cold source. Its refrigerator cleaning guidance also recommends removing shelves, drawers, and other removable parts when a refrigerator requires thorough cleaning.

Do not automatically taste questionable food to determine whether it is still safe. When food appears spoiled or has been stored improperly, follow appropriate food-safety guidance and discard it when necessary.

Step 2: Remove Shelves and Drawers

Once the refrigerator is empty, carefully remove shelves, drawers, bins, and other detachable components according to the manufacturer’s instructions.

Some refrigerator shelves are glass. If they are extremely cold, avoid exposing them immediately to very hot water because sudden temperature changes can potentially stress the glass. Allow components to adjust closer to room temperature and follow the appliance manufacturer’s cleaning instructions.

Removing these pieces exposes areas underneath and behind them where crumbs and spilled liquid often collect.

Step 3: Remove Loose Crumbs and Debris

Before adding water, collect loose food particles.

Use a dry microfiber cloth, paper towel, or a vacuum attachment where appropriate. Pay attention to shelf supports, drawer rails, corners, and the lower part of the refrigerator where crumbs often accumulate.

This dry-cleaning step reduces the amount of muddy residue created once water is introduced and makes the next stage faster.

Step 4: Wash the Interior

Use warm water and mild dish soap to wipe interior walls, shelf supports, door compartments, and other washable surfaces. Work from the top downward so any loose residue falls onto areas that have not yet been cleaned.

The USDA recommends hot, soapy water for cleaning refrigerator spills and surfaces, followed by rinsing. Avoid flooding vents, lights, electrical components, or control panels with cleaning solution.

When learning how to Deep Clean a Fridge, controlled moisture is important. A damp cloth is usually more appropriate than spraying large amounts of liquid directly into the appliance.

Step 5: Clean Shelves and Drawers

Wash removable components separately using warm soapy water when permitted by the manufacturer. Use a soft cloth or sponge and focus on sticky corners, drawer edges, and bottle compartments.

Rinse away soap residue and dry the pieces completely before reinstalling them. Returning wet shelves and bins can leave water trapped in corners and may immediately make the freshly cleaned refrigerator look streaky.

Step 6: Clean the Door Seals

The flexible seal around the refrigerator door is easy to overlook, but crumbs, moisture, and sticky residue can collect in its folds.

Wipe the gasket gently with warm soapy water and a soft cloth. A small soft brush can help reach narrow grooves without using aggressive tools. Dry the seal afterward and check for cracks, loose areas, or visible damage.

The gasket plays an important role in helping the refrigerator door close properly, so avoid pulling, stretching, or scrubbing it aggressively.

Step 7: Dry the Refrigerator Interior

Once every surface is clean, use a dry microfiber cloth or clean towel to remove remaining moisture.

Drying helps reduce streaks and gives you a better opportunity to inspect the interior for residue you may have missed. Allow removable components to dry before returning them to their positions.

This completes the core process of How to Deep Clean a Fridge, but odor control, exterior cleaning, and food organization still deserve attention.

How to Clean Sticky Refrigerator Spills

Sticky residue often develops beneath sauce bottles, drink containers, fruit containers, or leaking packages. Older spills can harden and become difficult to remove with one quick wipe.

Start by placing a warm, damp cloth over the residue briefly to soften it. Then wipe gently with mild soapy water rather than scraping the surface with a metal tool. Repeat the process if necessary.

For narrow corners and shelf tracks, a soft toothbrush or detailing brush can help loosen residue without requiring excessive force.

If raw meat juices or recalled foods have contaminated the refrigerator, follow appropriate USDA or CDC cleaning and sanitizing guidance rather than treating the incident like an ordinary sticky spill. The CDC distinguishes routine cleaning from situations involving recalled food and provides specific instructions for those cases.

The important principle in How to Deep Clean a Fridge is matching the cleaning process to the type of contamination instead of assuming every mess requires the same treatment.

How to Remove Bad Smells From a Fridge

A bad refrigerator smell usually has a source. Before adding a deodorizer, find the cause.

Check produce drawers, containers at the back of shelves, door compartments, leftover boxes, condiment bottles, and areas underneath removable drawers. A small amount of spoiled food can create an odor that spreads throughout the appliance.

Once the source is removed, wash the affected area and dry it thoroughly. If odor remains, continue checking hidden areas rather than simply masking the smell.

Baking soda is commonly used as a refrigerator deodorizer. If you want to understand where baking soda can be useful elsewhere in the home, see our guide to Cleaning with Baking Soda.

The USDA also provides guidance for removing refrigerator and freezer odors, particularly when odors are caused by spoiled food. Persistent severe odors may require more intensive cleaning than ordinary weekly maintenance.

How to Clean Refrigerator Shelves and Drawers Properly

Shelves and drawers handle constant contact with food packages, produce, bottles, and containers, so they deserve more than a quick surface wipe during a deep clean.

Remove them whenever the appliance design allows. Wash all reachable surfaces, including undersides, edges, corners, and handles. Produce drawers can collect tiny leaves, vegetable debris, moisture, and residue that may not be visible until the drawer is removed.

Inspect tracks and supporting rails while the compartments are out. These narrow areas can hold crumbs and dried spills that are difficult to reach during normal cleaning.

Knowing how to Deep Clean a Fridge means taking advantage of the empty appliance. Areas that are normally hidden behind food containers are suddenly accessible, so clean them before everything goes back inside.

How to Clean the Refrigerator Door and Handles

Fridge handles are among the most frequently touched surfaces in a kitchen. Food preparation, cooking, unpacking groceries, and opening the refrigerator can transfer fingerprints, oils, and residue onto the handle and door.

Use a cleaner appropriate for the refrigerator finish and wipe handles thoroughly. Pay attention to edges and the areas immediately around the handle where fingertips frequently touch.

For stainless steel refrigerators, check the appliance manufacturer’s recommendations before using a product. Some stainless surfaces have protective coatings that require specific care. Avoid abrasive scrubbers that may scratch the finish.

Wipe in the direction recommended for your appliance and buff with a clean microfiber cloth if necessary.

Do You Need to Clean Under and Behind the Refrigerator?

The visible refrigerator interior may be your main priority, but dust can also collect around the appliance.

If it is safe and practical to access the floor beside or beneath the refrigerator, vacuum loose dust and debris. Do not pull a large refrigerator away from the wall unless you can do so safely and without damaging flooring, water lines, electrical connections, or the appliance itself.

Some refrigerators also have accessible condenser areas that require occasional maintenance. Because designs differ significantly, follow the owner’s manual rather than assuming every refrigerator should be cleaned in the same way.

Deep cleaning should improve the appliance area without creating mechanical or property damage.

How Often Should You Deep Clean a Fridge?

There is no single schedule that works for every household.

A lightly used refrigerator occupied by one person may stay clean much longer than a refrigerator used by a large family that stores cooked meals, fresh produce, children’s snacks, beverages, and frequent leftovers.

Routine maintenance should happen continuously. Wipe spills as they occur, check food regularly, and remove spoiled items rather than waiting for a deep-cleaning day.

A more thorough cleaning can be scheduled whenever drawers become dirty, odors appear, sticky residue accumulates, or the refrigerator has not been emptied and detailed for a long period.

The USDA encourages weekly checks for foods that should be discarded and prompt cleanup of spills. Following those habits reduces the amount of work required when it is time for How to Deep Clean a Fridge from top to bottom.

How to Organize Food After Cleaning

Do not rush to return everything exactly where it was.

A freshly cleaned refrigerator allows you to improve how food is stored. Group similar items together, keep frequently used products accessible, and avoid overcrowding shelves so severely that you cannot see what is stored behind them.

Keep raw foods contained appropriately and separated from ready-to-eat foods to reduce cross-contamination risk. FoodSafety.gov identifies separation as one of the four basic food-safety principles, particularly for raw meat, poultry, seafood, and eggs.

Make sure the refrigerator remains at 40°F (4°C) or below. An appliance thermometer can help confirm the actual internal temperature instead of relying only on the refrigerator’s numbered control setting.

Good organization also makes future How to Deep Clean a Fridge sessions easier because spills, old containers, and forgotten food are more noticeable.

Common Fridge Cleaning Mistakes to Avoid

Deep cleaning can be simple, but several mistakes can create unnecessary work or safety concerns.

Leaving Perishable Food Out Too Long

Do not empty the refrigerator and then spend hours cleaning while dairy products, meat, leftovers, and other perishable foods remain on the counter. Prepare a cooler or another cold storage option when needed.

Using Too Much Cleaning Product

More soap does not necessarily produce a cleaner refrigerator. Excess detergent can create residue that requires additional rinsing.

Spraying Electrical Components

Avoid saturating lights, control panels, vents, and other electrical areas. Apply cleaning solution to a cloth when direct spraying could introduce excess moisture.

Ignoring the Door Seal

The gasket can collect food particles and sticky residue. Include it in the cleaning routine rather than focusing only on shelves.

Returning Wet Shelves

Dry shelves, bins, and drawers before reinstalling them to reduce water spots and trapped moisture.

Masking Odors Instead of Finding the Source

A deodorizer may help with remaining smells, but it cannot replace removal of spoiled food or proper cleaning.

Avoiding these mistakes makes how to Deep Clean a Fridge faster and more effective.

When Fridge Cleaning Is Important During a Move

Moving provides one of the best opportunities to clean a refrigerator thoroughly because the appliance is often nearly empty.

If you are leaving a rental or preparing a property for new occupants, an empty refrigerator can reveal spills and residue that were hidden behind food for months. New residents may also want to clean the refrigerator interior before filling it with groceries.

BA House Cleaning’s Move In/Out Cleaning Services list inside-refrigerator cleaning as an available add-on. That makes refrigerator detailing especially relevant when preparing an empty home for handover or a new move-in.

Our guide to Understanding Move-Out Cleaning also explains how appliance interiors may fit into a broader move-cleaning plan and why clients should confirm which add-ons are included before cleaning day.

When Professional Deep Cleaning Can Help

Cleaning one refrigerator is manageable for many homeowners, but the appliance is often only one part of a kitchen that needs attention.

Grease can accumulate around the stove, cabinet fronts may need wiping, countertops may have residue, sinks can require detailed cleaning, and floors may need more than everyday maintenance. When several areas need attention at the same time, addressing the whole room can be more practical than focusing on one appliance.

BA House Cleaning provides professional Deep Cleaning Services for Oakland and the East Bay, designed for homes that need additional detail beyond routine maintenance. A deeper home cleaning can be particularly helpful before guests arrive, during seasonal cleaning, or when the home has not received detailed attention for some time.

The exact refrigerator service should always be confirmed when booking because standard exterior appliance cleaning and optional interior refrigerator cleaning may be treated differently depending on the selected service.

5 Fridge Cleaning Rules Worth Remembering

If you remember only a few things about how to Deep Clean a Fridge, these five rules will make the biggest difference:

  1. Protect refrigerated food while cleaning. Prepare a cooler or another cold storage option when necessary and avoid leaving perishable items at room temperature for extended periods.
  2. Remove food before detailed cleaning. An empty refrigerator allows you to reach spills, corners, drawer tracks, and hidden residue properly.
  3. Use mild cleaning methods first. Warm soapy water is suitable for many ordinary refrigerator messes, while specialized contamination may require additional food-safety steps.
  4. Dry everything before reassembly. Clean shelves, drawers, and interior surfaces should be dried before food is returned.
  5. Prevent buildup between deep cleans. Wipe spills promptly, check stored food regularly, and keep the refrigerator organized so problems are easier to notice.

These simple habits make refrigerator care more manageable and reduce the amount of heavy cleaning required later.

How to Deep Clean a Fridge

Keep Your Refrigerator Fresh Between Deep Cleans

Knowing how to clean a Fridge Deep gives you a reliable process for handling more than visible crumbs. Start by preparing a safe place for refrigerated food, empty the appliance, discard unwanted items, remove shelves and drawers, and work through the interior systematically. Clean the door seals, wipe the exterior, dry all surfaces, and return food in an organized way.

Deep cleaning should not replace routine maintenance. Small spills are easier to remove while they are fresh, spoiled food should be discarded promptly, and shelves stay cleaner when leaking containers are dealt with before residue spreads. Regular attention can also prevent a small odor or sticky patch from becoming a much larger cleaning job.

At BA House Cleaning, we believe the easiest homes to enjoy are the ones where cleaning does not have to wait until buildup becomes overwhelming. Whether your kitchen needs detailed attention or the entire home is ready for a deeper reset, professional cleaning can help you get back to a fresher, more manageable space.

Want more practical cleaning advice for your kitchen and the rest of your home? Follow BA House Cleaning on Facebook for useful cleaning tips, home-care ideas, and updates from our team.

Frequently Asked Questions

  • What is the best way to deep clean a fridge?

Remove food and store perishables safely, take out removable shelves and drawers, clear loose debris, then wash interior surfaces with warm, soapy water. Clean and dry the removable parts separately, wipe the door seals, dry the refrigerator interior, and organize food before returning it.

  • How long can food stay out while cleaning the refrigerator?

The CDC advises that perishable food should not remain out of refrigeration for more than two hours. If cleaning may take longer, keep temperature-sensitive food in another refrigerator or a cooler with ice or cold packs.

  • Can I use baking soda when cleaning a fridge?

Baking soda is commonly used for refrigerator odor control, but it should not replace proper cleaning or removal of spoiled food. When using any homemade cleaning method, also check your refrigerator manufacturer’s recommendations for interior materials.

  • How do I remove a bad smell from my refrigerator?

First, locate and remove the source, such as spoiled food or a leaking container. Clean the affected shelves, drawers, and interior surfaces thoroughly, then dry the refrigerator. If odor remains after the source is removed, additional deodorizing may help.

  • How often should I deep clean my fridge?

The ideal frequency depends on how heavily the refrigerator is used. Clean spills immediately and check food regularly. Schedule deeper cleaning whenever residue, odors, dirty drawers, or significant buildup begin to appear.

  • Should I turn off my refrigerator before deep cleaning it?

Requirements vary by refrigerator design and the type of cleaning being performed. Review your appliance manual before unplugging or switching off the unit, especially if you plan to access mechanical areas or move the appliance.

  • What temperature should a refrigerator be after cleaning?

FoodSafety.gov recommends keeping the refrigerator at 40°F (4°C) or below. Using an appliance thermometer can help confirm the refrigerator is maintaining an appropriate temperature.

Professional Cleaning Services

Click here to schedule your cleaning and enjoy a spotless space.

GET A CLEANING ESTIMATE 

WAIT, THERE'S MORE!