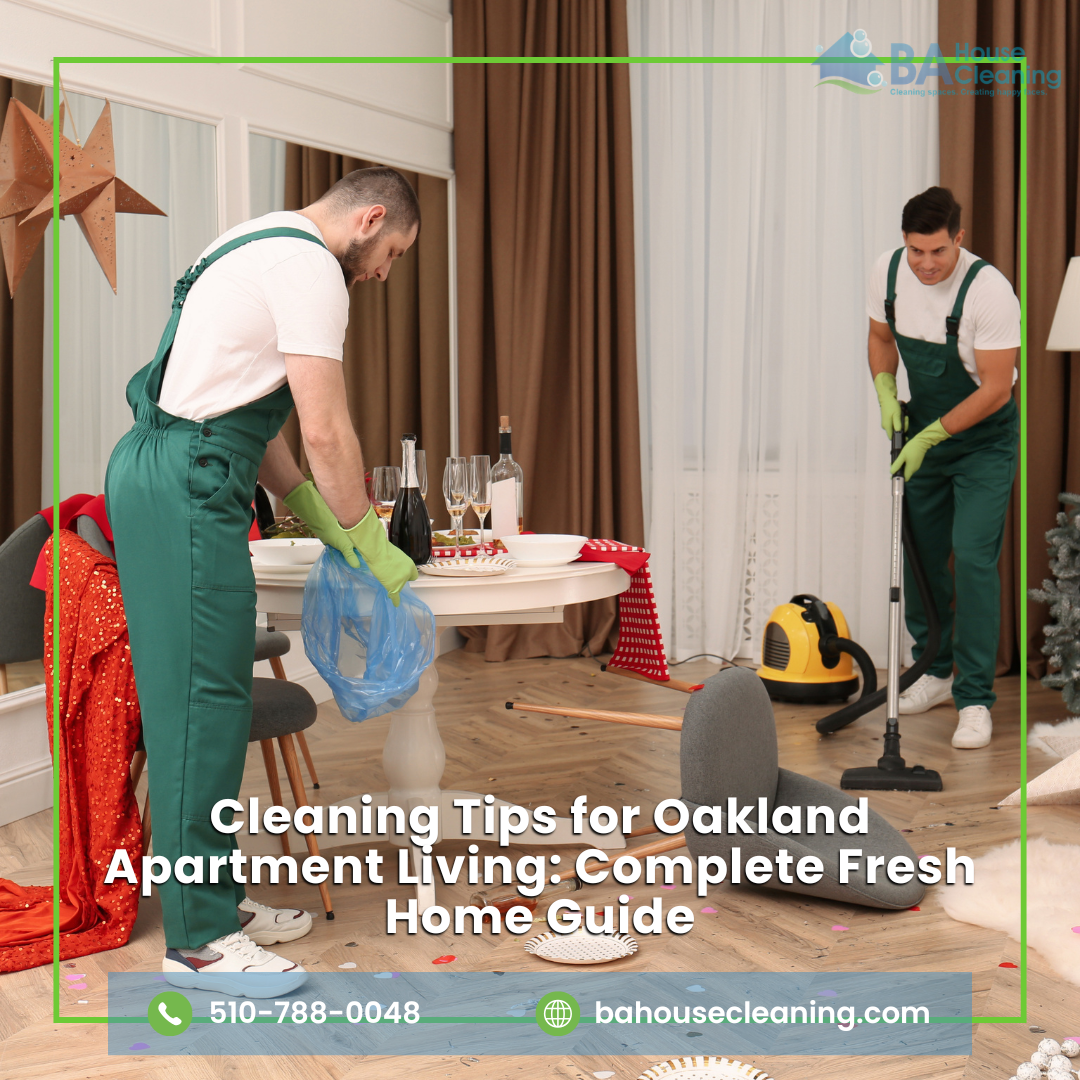
Living in Oakland has its own rhythm. Apartments stay busy, windows collect city dust, and small rooms can feel crowded fast. That is why Cleaning Tips for Oakland Apartment routines matter for anyone who wants a fresher home without losing the whole weekend. With a clear plan, you can keep your apartment neat, healthy, and easy to enjoy.
Many renters and homeowners try to clean only when the mess becomes stressful. However, that usually makes the job harder. A better approach is to use simple habits every day, then schedule deeper cleaning when your home needs extra care. BA House Cleaning helps residents keep apartments, condos, and houses clean with reliable support that fits real life.
This guide shares practical advice for kitchens, bathrooms, bedrooms, living areas, floors, windows, closets, and pet spaces. It also explains when to handle the work yourself and when to call professional cleaning services in Oakland. Most tips are simple, but they can create a major change when you follow them often.
Why Oakland Apartments Need a Smart Cleaning Plan
Oakland apartments can collect dust quickly because of traffic, busy streets, open windows, and daily foot traffic. In addition, many apartments have compact layouts. When space is limited, a small amount of clutter can make the whole home feel messy.
A smart plan keeps the work light. Instead of waiting for a full cleaning day, you divide tasks into small actions. For example, you can wipe counters after cooking, sweep high-traffic areas at night, and clean bathroom surfaces twice a week. As a result, your apartment stays easier to manage.
Cleaning Tips for Oakland Apartment routines also help protect your furniture, floors, and indoor air. Dust and moisture can build up in corners. Food crumbs can attract pests. Soap residue can make bathrooms look older than they are. When you clean on a schedule, you prevent many of these problems before they grow.
Professional Apartment Cleaning services can also help when life gets too busy. A trained team can reset the home, reach missed areas, and give you a better starting point. After that, your weekly routine becomes much easier.
Start With a Room-by-Room Cleaning System
A room-by-room system saves time because it removes confusion. You do not have to wonder where to begin. Instead, you move through the apartment in a clear order.
Start with the rooms that create the most mess. For many people, that means the kitchen and bathroom. These rooms need more attention because they hold food, water, grease, and germs. Next, clean bedrooms and living spaces. Finally, finish with the floors because dust and crumbs fall while you work.
Before you start, gather your supplies. Keep microfiber cloths, a safe all-purpose cleaner, glass cleaner, bathroom cleaner, a broom, a vacuum, a mop, and trash bags nearby. This small step keeps you moving. Moreover, it prevents the common habit of stopping every few minutes to find something.
A strong apartment cleaning routine depends on consistency. You do not need fancy tools for every task. You need a simple routine that you can repeat without stress.
Daily Habits That Keep an Apartment Fresh
Daily habits matter more than one big cleaning session. Small actions stop the mess from spreading. They also make your apartment feel calm at the end of each day.
Make the bed each morning. It takes a few minutes, yet it changes the mood of the bedroom. After breakfast, wash dishes or load the dishwasher. Then, wipe the counter and stove area. In the evening, take five minutes to reset the living room. Fold blankets, clear cups, and put small items back where they belong.
Shoes can also bring dirt inside. Therefore, use a shoe rack near the door. You can also place a washable mat at the entrance. This is especially helpful in Oakland apartments with hardwood, tile, or light-colored floors.
Daily cleaning does not need to feel strict. The goal is progress, not perfection. Still, when you repeat these habits, your home stays cleaner with less effort. BA House Cleaningoften recommends this simple approach between professional visits.
Weekly Cleaning Tasks for Better Results
A weekly routine gives your apartment structure. It also helps you avoid last-minute panic when guests visit.
Choose one day each week for regular cleaning. During that time, dust surfaces, clean mirrors, vacuum carpets, mop hard floors, and sanitize bathroom fixtures. Also, check the refrigerator for old food. This prevents odors and keeps the kitchen safer.
For better flow, group similar tasks together. Dust first. Then wipe surfaces. After that, clean glass and mirrors. Finally, vacuum and mop. This order works well because dust and dirt move downward while you clean.
Cleaning Tips for Oakland Apartment routines should match your lifestyle. If you work long hours, split weekly tasks across two or three days. For example, clean the bathroom on Tuesday, dust on Thursday, and handle floors on Saturday. This method feels lighter and easier to keep.
Monthly Deep Cleaning for Hidden Dirt
Monthly cleaning should reach areas you skip during normal weeks. These tasks can make your apartment look brighter and smell fresher.
Clean behind small appliances. Wipe cabinet fronts. Vacuum under the bed. Dust ceiling fans, vents, window tracks, and baseboards. Also, wash throw blankets, cushion covers, and shower curtains when possible.
A monthly reset also helps you notice small problems early. You may find a leak under the sink, a stained grout line, or a dusty air vent. When you catch these issues early, you can fix them before they affect the whole apartment.
Many residents choose Deep Cleaning Serviceswhen they need this level of detail. A professional team can handle the heavy work faster. Then you can maintain the space with simple weekly habits.
Cleaning Tips for Oakland Apartment Kitchens
The kitchen gets dirtier faster than any other room. Grease, crumbs, spills, and odors build up quickly. Therefore, your kitchen needs both daily care and deeper weekly cleaning.
Start with the sink. Wash dishes, clean the drain area, and wipe the faucet. Next, spray the counters and let the cleaner sit for a short time. Then wipe from back to front. This helps remove crumbs and sticky spots.
Clean the stove after cooking whenever possible. Fresh grease comes off faster than old grease. Also, wipe cabinet handles because your hands touch them often. Once a week, clean the microwave, toaster area, and refrigerator handle.
Do not forget the trash area. Wash the bin when odors appear. Place a liner inside, and take trash out before it overflows. This step helps keep pests away.
If the kitchen feels overwhelming, an apartment deep cleaning service can make a big difference. Professionals can clean grease, baseboards, appliance fronts, and hard-to-reach areas with better speed and detail.
Bathroom Cleaning That Feels Easier
Bathrooms need steady care because moisture creates stains, odors, and buildup. However, you can keep the bathroom fresh with a simple pattern.
First, clear the counter. Put away cosmetics, hair tools, and personal items. Then spray the sink, faucet, and counter. Let the cleaner work while you scrub the toilet. After that, wipe the mirror and return to the sink area.
For the shower, rinse walls after use when possible. This simple habit reduces soap scum. Once or twice a week, scrub the tub, tiles, and glass. Also, wash bath mats often because they hold moisture.
Ventilation matters too. Run the fan during showers, and leave the door open afterward. If your apartment has no strong fan, open a window for a short time when the weather allows.
Cleaning Tips for Oakland Apartment bathrooms should focus on prevention. A quick wipe after use can save a long scrubbing session later.
Bedroom Cleaning for Better Rest
A clean bedroom can help you relax. It can also reduce dust near your bed, pillows, and clothing.
Start by removing laundry from the floor. Place dirty clothes in a hamper and fold clean items right away. Next, dust nightstands, lamps, shelves, and window sills. Then vacuum or sweep the floor, especially near the bed.
Wash sheets weekly if possible. Pillowcases may need cleaning more often if you use skincare products or hair products. Also, rotate comforters and blankets based on the season.
Closets can create hidden stress. If your closet feels packed, sort one small section each week. Donate clothing you no longer wear. Store seasonal items in labeled bins. This method keeps the room lighter without creating a huge project.
Oakland house cleaners can also help with bedroom resets during busy seasons. They can dust, vacuum, change linens if requested, and refresh the room while you focus on other priorities.
Living Room Cleaning for Guests and Daily Comfort
The living room works hard. It may serve as a lounge, office, dining space, or play area. Because of that, it needs flexible cleaning habits.
Begin by removing items that do not belong. Return dishes to the kitchen, put papers in one folder, and place remotes in a basket. Next, dust shelves, tables, electronics, and décor. Use a microfiber cloth because it traps dust better than many paper products.
Vacuum sofas and chairs when crumbs or pet hair appear. If your furniture has removable cushions, clean under them often. This area collects coins, snacks, hair, and dust.
Glass tables and TV screens need gentle care. Use the right cleaner and avoid soaking electronics. Also, clean light switches and door handles because people touch them daily.
Cleaning Service Oakland support can be helpful when your living room needs a deeper reset before visitors, family events, or a busy work week.
Floor Care for Oakland Apartments
Floors show dirt quickly, especially in apartments near active streets. A good floor routine can make your whole home look cleaner.
Sweep or vacuum high-traffic areas several times a week. Entryways, kitchen floors, and hallway paths often need the most attention. If you have rugs, vacuum slowly. This helps lift dust instead of pushing it around.
For hard floors, use a damp mop rather than a soaking wet mop. Too much water can damage some surfaces. Also, choose a cleaner that matches your floor type. Wood, laminate, vinyl, and tile do not all need the same product.
Place mats near entrances. In addition, ask guests to remove shoes when possible. These small habits reduce grit and protect floors from scratches.
Cleaning Tips for Oakland Apartment floors should focus on prevention first. Less dirt coming in means less cleaning later.
Window, Blind, and Track Cleaning
Windows bring light into your apartment, but they also collect dust and marks. Clean glass can make a room feel brighter right away.
Start with dry dusting. Wipe blinds, frames, and sills before using glass cleaner. If you clean the glass first, dust may fall on it again. Next, spray a small amount of glass cleaner on a cloth. Then wipe in a steady pattern.
Window tracks often hide dirt. Use a small brush or vacuum attachment to loosen debris. After that, wipe the track with a damp cloth. This small detail can improve the look of the whole window area.
If you open windows often, clean the surrounding area more frequently. Oakland air can carry dust, pollen, and street particles inside. Therefore, a monthly window routine can help your apartment feel fresher.
Kitchen Storage and Refrigerator Tips
Storage affects cleanliness. When cabinets and refrigerators become crowded, spills and expired food hide more easily.
Check your refrigerator once a week. Remove old leftovers, wipe sticky shelves, and group similar items together. This makes meal prep easier and reduces waste. It also prevents strong odors from taking over the kitchen.
Cabinets need the same attention. Keep dry goods in sealed containers. Wipe shelves when crumbs appear. Also, check under the sink for leaks or product spills.
A clean pantry can help you cook faster. More importantly, it reduces the chance of pests. When you store food well, your kitchen stays healthier.
BA House Cleaning can support busy households with cleaning services that include kitchen surface care, appliance exterior cleaning, and detailed room resets.
Decluttering Before Cleaning
Cleaning works better when clutter is under control. If every surface holds too many items, wiping and dusting take much longer.
Use a simple three-basket method. One basket is for items to keep. Another is for items to donate. The last one is for trash. Work through one small area at a time. This prevents the project from feeling too large.
Start with counters, tables, and the floor. These areas change the look of your apartment fast. After that, move to drawers, closets, and cabinets.
Do not aim to declutter the whole home in one day. Instead, set a timer for 15 minutes. When the timer ends, stop or continue based on your energy. This flexible approach keeps the process realistic.
House Cleaning Tips often work best when they begin with clutter control. Less clutter means faster cleaning and better results.
How to prepare for house cleaners in 10 steps
Professional cleaners can deliver better results when your apartment is ready for the visit. This does not mean you need to clean before they arrive. Instead, you only need to prepare the space so the team can focus on real cleaning tasks. A little preparation saves time, improves access, and helps every room get more attention.
These simple steps are useful before booking a BA House Cleaning or any professional apartment cleaning team.
1. Clear small personal items
Start by picking up small items from floors, tables, beds, and counters. This may include clothes, toys, books, papers, shoes, cups, and personal products. You do not need to organize everything perfectly. However, placing items in the right rooms helps cleaners reach more surfaces.
For example, if the kitchen counter is full of mail, keys, and bags, the cleaner will have less space to wipe. If the bathroom counter is covered with personal care products, the sink area may not get the same level of detail. Therefore, a quick reset before the visit can make a big difference.
This step is especially helpful in smaller Oakland apartments, where limited space can make clutter look bigger.
2. Put valuables in a safe place
Before the cleaning team arrives, store valuable and private items in a safe place. This includes cash, jewelry, watches, documents, medication, fragile keepsakes, and small electronics. Although professional cleaners respect your home, this step protects your peace of mind.
You can use a drawer, cabinet, lockbox, or bedroom area that does not need cleaning. Also, move delicate items that could break easily. This may include glass décor, handmade pieces, or sentimental objects.
As a result, cleaners can work with more confidence. You also avoid worry during the service.
3. Share your priority areas
Every home has different needs. So, tell the cleaning team which areas matter most to you. You may want extra attention on the kitchen, bathroom, floors, baseboards, or dust-heavy areas. Clear instructions help the team focus on what you care about most.
For example, if your bathroom has soap buildup, mention it before the visit. If your kitchen stove needs more attention, point that out too. This helps the team plan the cleaning order and use the right products.
BA House Cleaning can create a better experience when your priorities are clear from the beginning. Good communication leads to better results.
4. Mention special surfaces
Some surfaces need special care. Wood, marble, granite, stainless steel, natural stone, delicate tiles, and certain furniture finishes may require gentle products. Before the visit, tell the cleaners about any surfaces that need extra attention.
This step helps protect your apartment from damage. It also helps the team avoid using the wrong cleaner on sensitive materials. For example, some products can leave streaks on stainless steel. Others may be too strong for natural stone.
If you are not sure about a surface, simply mention it. A professional cleaning team can adjust the cleaning method when needed.
5. Secure pets before the visit
Pets can feel nervous when new people enter the home. Also, cleaners need space to move safely between rooms. For this reason, place pets in a safe area before the cleaning starts.
You can keep your pet in a bedroom, a crate, a balcony, a safe area, or with a friend during the visit. Make sure they have water, comfort, and anything they need. Even if your pet is friendly, it is still best to keep them away from wet floors, open doors, and cleaning supplies.
This step protects your pet and helps cleaners work faster. It also prevents stress for everyone in the home.
6. Move light clutter from counters
Kitchen and bathroom counters are important cleaning areas. Before the visit, move light clutter away from these surfaces. You can place items in a basket, drawer, or cabinet.
In the kitchen, remove food containers, mail, small appliances you do not want moved, and personal items. In the bathroom, move toothbrushes, skincare products, razors, and hair tools. This gives the cleaners more open space to wipe, sanitize, and polish.
You do not need to empty every surface. However, the more access the team has, the better the final result will be.
7. Check access details
Make sure the cleaning team can enter your apartment easily. If your building has a gate code, call box, front desk, parking rule, elevator access, or special entry instruction, share it before the appointment.
This step helps avoid delays. It also makes the visit smoother from the start. If parking is difficult in your Oakland area, give clear parking notes when possible. If you will not be home, explain how the team should enter and lock up after the service.
Good access instructions save time. More importantly, they help the cleaners begin the job without confusion.
8. Remove old food and trash
Take out trash before the visit if the bins are full. Also, remove old food from open areas, tables, counters, and the refrigerator if needed. This helps prevent odors and gives the cleaners a fresher space to work in.
If you want the team to clean around the trash area, make sure it is easy to reach. You can also replace full trash bags with fresh liners. In the kitchen, check for food crumbs, empty containers, and expired leftovers.
This simple step improves the cleaning process. In addition, it helps keep your apartment smelling better after the service.
9. Prepare clean linens if needed
If you want the cleaners to change your bed linens, leave clean sheets in clear view. Place them on the bed or in an easy-to-see spot. This saves time and avoids confusion.
You should also remove any bedding you do not want touched. If there are special instructions for pillows, blankets, or mattress protectors, share them before the visit.
Not every cleaning service includes linen changes, so confirm this before booking. If it is included, preparing linens helps the team finish the bedroom faster and with better results.
10. Ask questions before the visit
Before the appointment, ask any questions you have about the service. You may want to know what is included, how long the visit may take, what products are used, or whether deep cleaning is better for your apartment.
A good cleaning company will explain the process clearly. This helps you choose the right service and avoid wrong expectations. For example, regular cleaning is good for maintenance, while deep cleaning is better for heavy buildup and missed areas.
BA House Cleaning can guide you through the best option for your home. Whether you need regular cleaning, detailed apartment care, or a deeper reset, asking questions helps you get the right service from the start.
When DIY Cleaning Is Enough
DIY cleaning works well when your apartment only needs light upkeep. If you clean often, have the right supplies, and can handle the time, you may not need help every week.
A simple DIY plan includes daily resets, weekly bathroom cleaning, regular vacuuming, and monthly deep tasks. This approach can keep a smaller apartment in good shape. It also gives you control over your schedule.
However, DIY cleaning has limits. You may miss hidden areas. You may also delay harder tasks when life gets busy. Over time, small missed areas can become bigger problems.
Cleaning Tips for Oakland Apartment routines can support DIY cleaning, but they work best when you stay realistic. If your schedule changes, adjust the plan instead of giving up.
When to Book Professional Cleaning
Professional cleaning makes sense when you feel behind, move into a new place, host guests, or need a deep reset. It also helps when work, family, or travel leaves little time for home care.
A trained team brings structure and speed. They know how to move through rooms, clean surfaces in the right order, and focus on details. In addition, professional apartment cleaners can reach areas that many people forget.
You may need support if your kitchen grease feels stuck, your bathroom grout looks dull, or your floors never feel clean after mopping. You may also benefit from the service if allergies worsen indoors.
BA House Cleaning offers Cleaning Service Oakland for apartment residents who want dependable results. Whether you need one visit or routine help, the right service can make your home feel easier to manage.
Choosing the Right Cleaning Company in Oakland
The right cleaning company should feel clear, respectful, and professional. Before booking, review the services offered. Ask what the visit includes. Also, confirm whether the team brings supplies or uses yours.
Look for a company that understands apartment layouts. Small spaces need careful movement and smart cleaning order. A good team should protect your furniture, respect your building rules, and communicate well.
Reviews can help, but your own needs matter too. Some people want basic upkeep. Others need House Cleaning Services Oakland for detailed cleaning, kitchen attention, and bathroom care. Choose a provider that fits your goals.
BA House Cleaning focuses on reliable service, clear communication, and clean results for local homes. That makes it a strong choice for residents who want a cleaner apartment without stress.
Cleaning Products That Work Well in Apartments
You do not need a large collection of products. In fact, too many bottles can create cabinet clutter. A simple kit works better for most homes.
Keep an all-purpose cleaner for counters and hard surfaces. Add a bathroom cleaner for tubs, sinks, and toilets. Use glass cleaner for mirrors and windows. Also, keep microfiber cloths, sponges, a scrub brush, and gloves nearby.
For floors, choose a product that matches your surface. Read labels before using anything new. This protects your flooring and helps avoid sticky residue.
Natural options can work for light cleaning, but stronger products may be needed for grease, mineral buildup, or heavy bathroom stains. Always use products safely. Ventilate the room and avoid mixing cleaners.
Your apartment cleaning product choices should stay simple. When your supplies are easy to find, you clean more often.
Pet-Friendly Cleaning Tips
Pets bring joy, but they also bring hair, odors, and paw prints. A pet-friendly routine helps your apartment stay fresh without making your pet uncomfortable.
Vacuum pet areas often. Wash pet bedding every week or two. Also, wipe food and water areas daily. These spots can collect crumbs and moisture.
Use lint rollers or reusable brushes on sofas and chairs. If your pet sheds heavily, cover favorite resting spots with washable blankets. This protects furniture and makes cleanup faster.
Choose safe products around pets. Keep cleaners away from bowls, toys, and beds until surfaces dry. If you have questions, ask your cleaning provider about product options.
Storage plays a major role in cleaning. When every item has a place, your apartment stays neat longer.
Use vertical space when possible. Shelves, hooks, and over-door organizers can free up floors and counters. Also, use bins inside closets to group similar items. Clear labels help you find things quickly.
Avoid filling every open space. Space makes cleaning easier. It also helps your apartment feel bigger.
Try a one-in, one-out rule. When you buy something new, remove something old. This simple habit prevents clutter from building again.
Cleaning Tips for Oakland Apartment storage should support daily life. The best system is the one you can keep using.
Move-In and Move-Out Cleaning
Moving creates dust, boxes, and stress. A proper cleaning plan can make the process smoother.
Before moving in, clean cabinets, drawers, closets, bathroom fixtures, and floors. Even if the apartment looks clean, these areas may need a fresh start. After moving furniture in, some spots become harder to reach.
Before moving out, focus on visible details. Clean the kitchen, bathroom, floors, windows, baseboards, and inside cabinets. Also, remove marks from walls when safe to do so.
A move-out cleaning can help you leave the space in better condition. It may also reduce stress during a busy week. BA House Cleaning can help residents plan cleaning around move dates and apartment access.
Seasonal Cleaning for Oakland Homes
Seasonal cleaning keeps your apartment ready for weather changes and lifestyle shifts. It also gives you a chance to refresh areas that collect dust over time.
In spring, focus on windows, closets, bedding, and air vents. In summer, clean fans, entry areas, and floors more often. During fall, organize storage and prepare cozy living spaces. In winter, pay attention to moisture, mats, and indoor air freshness.
Seasonal cleaning also helps you reduce clutter. Each season, review clothing, supplies, and décor. Keep what you use. Let go of what no longer fits your home.
Luxury house cleaning in oakland may be the right option when you want a detailed seasonal refresh. This service style can support higher-detail cleaning for homes that need extra care.
Cleaning for Allergies and Better Air
Dust, pet hair, pollen, and fabric particles can affect indoor comfort. A cleaner apartment can help reduce these irritants.
Dust with microfiber cloths because they trap particles well. Vacuum slowly, especially on rugs and upholstery. Wash bedding often. Also, clean vents and replace filters based on your building setup or appliance needs.
Do not forget curtains and blinds. They collect dust quietly. If they are washable, clean them based on care labels. If not, vacuum them with a brush attachment.
Cleaning Tips for Oakland Apartment: allergy control should focus on repetitive habits. A single deep clean helps, but regular dust control matters more.
Common Apartment Cleaning Mistakes
Many people make cleaning harder without realizing it. Fortunately, small changes can fix most mistakes.
One mistake is using too much product. An extra cleaner can leave residue, which attracts more dirt. Another mistake is cleaning floors before counters. Dust falls, so floors should come last.
Skipping drying time can also cause problems. Wet surfaces may collect streaks or moisture. In bathrooms, moisture can lead to odors and buildup.
Another common issue is keeping old cleaning tools. Dirty sponges and mop heads spread grime. Replace or wash them often.
A tips cleaning service approach can help you clean smarter. The goal is not more work. Instead, the goal is better order and better habits.
Green and Simple Cleaning Habits
Many apartment residents want a clean home with fewer harsh smells. Simple habits can support that goal.
Open windows when the weather allows. Use washable cloths instead of many disposable wipes. Buy refillable products when practical. Also, choose mild cleaners for everyday surfaces when they work well.
Green cleaning should still be effective. For bathrooms, kitchens, and high-touch areas, cleanliness matters. Choose products that fit the job and use them correctly.
BA House Cleaning can discuss cleaning preferences before service. That helps create a plan that feels comfortable for your household.
Cleaning High-Touch Areas
High-touch areas need more attention because hands spread dirt and germs. These spots often look clean, yet they collect buildup quickly.
Focus on door handles, light switches, remote controls, cabinet pulls, faucets, appliance handles, and chair backs. Wipe them several times a week. Also, clean phone screens and keyboards based on product safety instructions.
This habit takes only a few minutes. However, it makes your apartment feel cleaner and more cared for. It also supports a healthier routine during busy weeks.
Cleaning Tips for Oakland Apartment: High-touch care should be simple. Keep a cloth and safe cleaner ready, then make it part of your evening reset.
How Often Should You Clean Each Area?
Every apartment is different, but a basic schedule helps.
Clean kitchen counters daily. Wash dishes daily. Take out trash as needed. Clean bathroom sinks and toilets weekly, or more often in shared homes. Vacuum high-traffic floors two or three times a week. Dust surfaces weekly. Mop hard floors weekly or as needed.
Deep tasks can happen monthly. These include baseboards, window tracks, cabinet fronts, appliance sides, and closet refreshes. Seasonal tasks can include curtains, storage bins, and larger organizing projects.
If your apartment has pets, children, or frequent guests, increase the schedule. If you live alone and travel often, you may need less frequent service.
oakland house cleaning support can fill the gaps when your routine becomes too hard to maintain.
Why Professional Detail Matters
Professional cleaning adds value because it brings time, order, and detail. Cleaners follow a system. They move through rooms with purpose. Also, they notice areas that many people overlook.
For example, a cleaner may focus on baseboards, behind small items, under furniture edges, and around fixtures. These details improve the final look of the home. They also help the apartment feel truly refreshed.
Professional help does not replace your daily habits. Instead, it supports them. After a deep clean, your home becomes easier to maintain. This is one reason many residents book regular cleaning services.
A routine only works when it fits your real life. If your plan feels too strict, you may stop following it. Therefore, build a routine around your schedule and energy.
Start with three daily habits. Make the bed, clean dishes, and reset one room. Then add weekly tasks. Choose a day for bathrooms, another for floors, and another for dusting. Keep the routine simple at first.
Use reminders if needed. A checklist on your phone can help. You can also place supplies where you use them. For example, keep bathroom cloths under the sink and kitchen cloths near the counter.
Cleaning Tips for Oakland Apartment routines should reduce stress. They should not create more pressure. The right plan helps you feel in control.
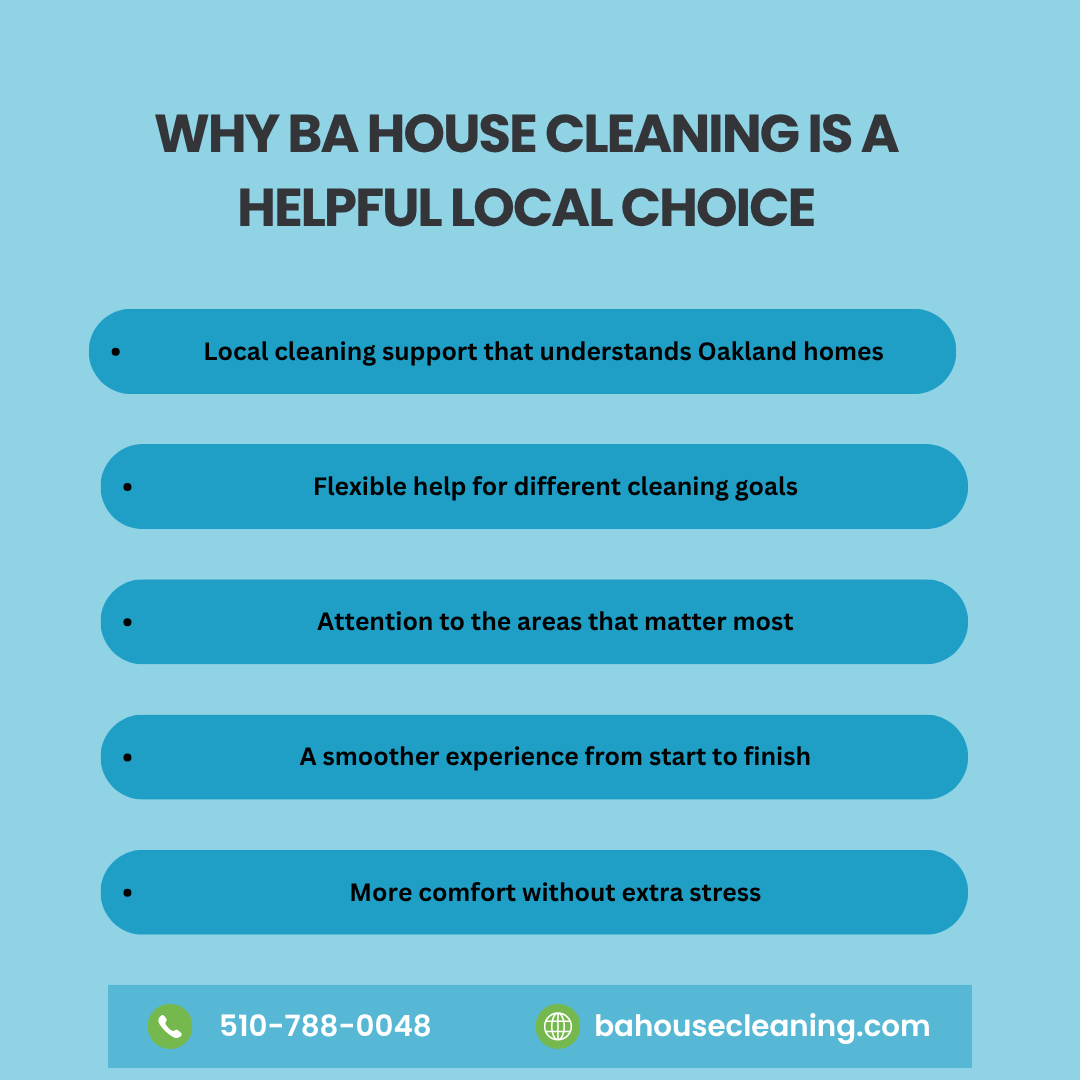
Why BA House Cleaning Is a Helpful Local Choice
Choosing the right cleaning team can make a big difference in how your home feels after each visit. BA House Cleaning gives residents reliable support designed around real home needs, busy schedules, and everyday cleaning challenges. Instead of offering a one-size-fits-all approach, the team focuses on making your space cleaner, easier to manage, and more comfortable to live in.
Here is what makes BA House Cleaning a strong choice:
Local cleaning support that understands Oakland homes Apartments and houses can vary in layout, size, and cleaning needs. BA House Cleaning knows how to handle different spaces with care.
Flexible help for different cleaning goals You may need a quick refresh, regular upkeep, or a deeper clean before guests arrive. The team can help you choose the right level of service.
Attention to the areas that matter most Kitchens, bathrooms, floors, bedrooms, living areas, and dust-heavy spaces all need the right cleaning approach.
A smoother experience from start to finish Clear communication helps you explain your priorities, ask questions, and feel confident before the cleaning visit begins.
More comfort without extra stress When your home feels clean, your routine feels easier. You can enjoy your space instead of spending your free time catching up on chores.
If you are looking for oakland house cleaners who respect your time, your home, and your cleaning needs, BA House Cleaning is ready to help. Whether you need one-time support or ongoing care, our team can help create a cleaner home that feels fresh, calm, and ready to enjoy.
Keep Your Oakland Apartment Fresh, Healthy, and Ready to Enjoy
A clean apartment does not happen by chance. It comes from small habits, smart planning, and the right support when you need it. With these Cleaning Tips for Oakland apartments, you can keep your home fresher, reduce stress, and make cleaning feel easier.
Start with daily resets. Then add weekly tasks and monthly deep cleaning. Focus on kitchens, bathrooms, floors, windows, storage, and high-touch areas. Over time, your apartment will feel lighter, healthier, and more comfortable.
If your schedule is full or your home needs a deeper reset, BA House Cleaning is ready to help. The right cleaning plan can save time, improve comfort, and give you a space you feel proud to live in.
Ready to enjoy a cleaner apartment without spending your free time scrubbing, dusting, and organizing? Contact BA House Cleaning today and book a service that fits your home, schedule, and cleaning needs. From regular cleaning to detailed apartment care, our team is here to help you create a fresher, more relaxing space in Oakland.
Frequently Asked Questions
What are the best Cleaning Tips for Oakland Apartment residents?
The best tips are simple and consistent. Clean dishes daily, wipe kitchen counters, reset the living room, and vacuum high-traffic areas often. Also, schedule deeper cleaning every month. These habits keep your apartment fresh without making cleaning feel too heavy.
How often should I book a professional cleaning service?
Most apartments benefit from weekly, biweekly, or monthly service. The right schedule depends on your lifestyle, pets, guests, and cleaning habits. If your home gets messy fast, regular service can help you stay ahead.
Do I need to clean before BA House Cleaning arrives?
You do not need to clean before the team arrives. However, it helps to pick up personal items, dishes, clothing, and papers. This allows the cleaners to focus on surfaces, floors, bathrooms, and kitchen areas.
What areas should I clean every day?
Focus on dishes, kitchen counters, trash, and quick clutter removal. These areas affect the whole apartment. When you handle them daily, your home feels cleaner with very little effort.
What is included in apartment cleaning?
Apartment cleaning often includes dusting, vacuuming, mopping, bathroom cleaning, kitchen surface cleaning, mirror cleaning, and general room resets. The exact details can depend on the service you choose.
When should I choose deep cleaning instead of regular cleaning?
Choose deep cleaning when your home has buildup, heavy dust, grease, soap scum, or missed areas. It is also useful before hosting guests, after moving, or when your routine has fallen behind.
Are professional cleaners helpful for small apartments?
Yes. Small apartments can get messy quickly because every item is more visible. Professional cleaners can reset the space, clean tight areas, and help your home feel more open.
How can I keep my apartment clean with pets?
Vacuum pet areas often, wash pet bedding, wipe feeding spots, and use washable covers on furniture. Also, schedule regular cleaning if pet hair or odors build up quickly.
What makes BA House Cleaning a good choice in Oakland?
BA House Cleaning offers local cleaning support with a focus on reliable service, clear communication, and detailed care. The team can help with routine cleaning, deeper apartment cleaning, and home refreshes.
Can regular cleaning improve indoor comfort?
Yes. Regular cleaning reduces dust, odors, crumbs, and clutter. As a result, your apartment can feel fresher, calmer, and more comfortable every day.
At Deluxe Cleaning, we are committed to redefining the standards of home cleanliness. With our meticulous attention to detail and dedication to customer satisfaction, we aim to outrank the competition and become your go-to source for superior cleaning services.
Our Approach to Cleaning Excellence
1. Comprehensive Cleaning Plans
At Deluxe Cleaning, we understand that no two homes are the same. Each home has its own unique layout, surfaces, and cleaning needs. That’s why we don’t offer one-size-fits-all cleaning solutions. Instead, we take a comprehensive approach to creating customized cleaning plans for every client.
Our process starts with an initial assessment of your home. During this assessment, our experienced team evaluates the specific cleaning requirements of each room and area. We take note of any special requests or areas that require extra attention. This detailed evaluation forms the basis of your personalized cleaning plan.
Whether it’s a deep clean of your kitchen, a meticulous bathroom scrub, or a thorough dusting of your living spaces, our cleaning plans are designed to ensure that every corner of your home receives the care and attention it deserves.
2. Experienced Cleaning Professionals
The backbone of our commitment to excellence is our team of experienced cleaning professionals. We understand that entrusting someone with the cleanliness of your home is a significant decision, which is why we only hire the best in the industry.
Our cleaning professionals undergo rigorous training to ensure they are well-equipped to handle a wide range of cleaning tasks. They are knowledgeable about the latest cleaning techniques, products, and safety measures. Their experience allows them to work efficiently and effectively, ensuring that your home is not just clean but spotless.
3. Eco-Friendly Cleaning Practices
Deluxe Cleaning is dedicated to environmental responsibility. We recognize the importance of using cleaning products that are safe for your family and the planet. That’s why we prioritize eco-friendly cleaning practices.
Our cleaning products are carefully selected to meet stringent environmental standards. They are free from harmful chemicals and toxins, making them gentle on your home’s surfaces and the environment. With Deluxe Cleaning, you can enjoy a sparkling clean home without compromising your commitment to sustainability.
4. Thorough Cleaning Process
Our cleaning process is designed to leave no stone unturned. We take pride in our meticulous approach to cleaning, ensuring that every surface and every nook and cranny in your home is thoroughly cleaned.
From dusting and disinfecting to vacuuming and mopping, we cover all aspects of your cleaning needs. We pay special attention to high-touch areas and often-overlooked spots, leaving your home not only clean but also hygienic and safe.
5. Quality Assurance
We believe that the quality of our work speaks for itself. To ensure that your home meets our high standards, we conduct a rigorous quality assurance check after every cleaning session.
Our team goes through a detailed checklist, ensuring that every task has been completed to perfection. If there are any areas that require additional attention, they are addressed promptly. Your satisfaction with our cleaning service is of utmost importance to us, and we take every measure to achieve it.
Why Choose Deluxe Cleaning Services?
1. Exceptional Results
When you choose Deluxe Cleaning, you can expect nothing less than exceptional results. Our dedication to excellence means that your home will not only look clean but also feel clean. We go above and beyond to ensure that your space is spotless and inviting.
2. Time-Saving Convenience
We understand that your time is valuable. Cleaning can be a time-consuming task, and we’re here to save you the hassle. By entrusting your cleaning needs to us, you free up your schedule to focus on the things that matter most to you.
3. Peace of Mind
Your peace of mind is a top priority for us. That’s why we’re fully bonded and insured. When you choose Deluxe Cleaning, you can relax knowing that your home is in safe hands. We take the security of your space seriously.
4. Affordable Luxury
A clean home should be a luxury everyone can afford. Deluxe Cleaning offers competitive pricing to ensure that you receive the best value for your money. Experience the luxury of a clean home without breaking the bank.
In summary, our approach to cleaning excellence is defined by comprehensive planning, experienced professionals, eco-friendly practices, a thorough cleaning process, and unwavering quality assurance. When you choose Deluxe Cleaning Services, you’re choosing exceptional results, time-saving convenience, peace of mind, and affordable luxury for your home.
When it comes to house cleaning, there’s a difference between ordinary and extraordinary. At BA House Cleaning, we believe in going beyond the standard to deliver an exceptional cleaning experience that leaves your home feeling truly refreshed and revitalized. Introducing our Deluxe Cleaning service, your gateway to a spotless haven of tranquility.
Our Deluxe Cleaning service is the epitome of meticulousness and attention to detail.
We’ll tackle every nook and cranny of your home with expert precision:
Kitchen: We’ll conquer the grease and grime, leaving your appliances sparkling and your countertops polished to perfection.
Bathrooms: We’ll banish stubborn stains and eliminate lingering odors, transforming your bathrooms into spa-like retreats.
Living Areas: We’ll dust every surface, vacuum every corner, and fluff every cushion, ensuring a clean and inviting atmosphere.
Bedrooms: We’ll create a serene sanctuary for relaxation, leaving your bedroom dust-free, vacuum-clean, and refreshed.
But that’s not all! Our Deluxe Cleaning service includes these extras:
Window cleaning: We’ll let the natural light flood in by cleaning your windows, both inside and out.
Ceiling fan cleaning: We’ll remove dust and cobwebs from your ceiling fans, ensuring clean air circulation.
Light fixture cleaning: We’ll polish your light fixtures, brightening up your home and removing any accumulated grime.
With our Deluxe Cleaning service, you’ll experience:
A home that feels brand new: Your home will be so clean and fresh, you’ll feel like you’ve just moved in.
Reduced stress and anxiety: A clean home promotes a sense of calm and well-being.
More time for the things you love: Spend less time cleaning and more time enjoying your life.
BA House Cleaning’s Deluxe Cleaning service is the ultimate investment in your home and your well-being.
Contact Deluxe Cleaning Today!
Ready to experience the Deluxe Cleaning difference? Contact us today to schedule your next cleaning service. Say goodbye to the hassle of cleaning and hello to a cleaner, healthier, and happier home.
If you’re facing the challenge of cleaning grout, you’d know that this is not an easy task. However, it’s not impossible if you know what to do and have the best tools at hand.
Grout is notoriously difficult to clean, particularly in areas such as bathrooms and kitchens where it is exposed to moisture, dirt, and grime. However, with the right tools and techniques, you can keep your grout looking clean and fresh. In this article, we’ll share some tips and techniques for cleaning grout effectively.`
Grout is prone to staining because of its light color and porous composition. It definitely depends on where’s the grout located, if it’s in a tiled entry or mudroom, dirt and grime are your enemies. If it’s in the kitchen, grease, and food spills are your culprits. If it’s in the bathroom, mold, soap, and mildew will make it difficult to maintain clean.
As there are a lot of options when choosing a cleaning solution, it is best to start off with the mildest one. Test it in a hidden space of your entry, kitchen, or bathroom and see how it reacts.
Soft Cleaning Methods
Water is the universal solvent, and there’s a good reason for it. Use plain water and a stiff-bristled brush. Spray warm water on the grout lines and scrub in a circular motion, then let dry. You can even use an old electric brush for this purpose.
Hydrogen peroxide is also an option, but please be careful with the fumes. Buy it at any drug store and apply it over the dirty parts, scrub, rinse, and let it dry. You can also apply it mixed with baking soda (in the form of a paste).
Have you considered using a steam cleaner? It’s an effective and environmentally-friendly method.
For heavier dirt and mild stains, vinegar comes to the rescue. Fill a spray bottle with 50% warm water and 50% vinegar, spray it on the grout, let it sit for 5 minutes, and scrub with a brush.
Baking soda is also a savior, in fact. Make a paste of it mixed with water, put it on the grout lines, and spray some of the 50/50 vinegar-water solutions. There’s chemistry! – literally. When the mixture stops creating foam, scrub the lines, then rinse.
If all of the above cannot beat tougher stains and really hard grout, use oxygen bleach. Read and follow the manufacturer’s directions—and open your windows! The place has to be well-ventilated. Apply the oxygen bleach solution and let it sit for 10 or 15 minutes, then rinse with clean water.
Extreme cases require extreme solutions. Chlorine bleach and commercial cleansers can be used when there’s not any other option that can clean a really stubborn grout. Remember that long-term use of caustic cleaners erodes grout, so be careful!
As always, the best way for cleaning grout is to clean it frequently with soft techniques. Do you have any comments or suggestions for us? Let us know in the section below!
Porcelain is a ceramic material that not only looks great as tiles but also is extremely strong and durable because of its virtually non-porous properties—it won’t absorb liquids, at least not as easily as marble, a material we addressed in a previous article.
You can obtain Porcelain Tiles Cleaning—made entirely from porcelain—that has a layer of glass added to the surface. This is used for protection, but it’s not entirely necessary. You can have tiles that are not “glazed” and polish your tile to any level of shininess.
However, sometimes these tiles get stained, and, definitely, they get dirty when the home inhabitants walk over them.
First Things First: Identify Your Porcelain Tile
Is it glazed or not? To know this for sure is a little bit complex. It’s said that glazed porcelain tends to have a complex design. On the other hand, unglazed porcelain tiles will all look basically the same—their design and shade are monotonous.
A good test is to drip water on the tiles and let them sit for five minutes. Wipe the water off and see the tile’s color: it remains the same as before? It’s glazed. Does it darken? It’s definitely unglazed.
How to Clean Your Porcelain Tiles
Common dirtiness is easy to clean, use your vacuum and remove any loose dirt and debris.
If your tiles are unglazed, vacuuming should be enough. If you have an awful stain on them, use warm water with a small amount of disinfectant added and remove it with clear water. Let it dry.
If your tiles are glazed, remove heavy stains with a poultice, water, and a white nylon scouring pad. Instead of a poultice, you can use a mix of vinegar and hot water. Don’t rush! Doing the cleaning in small sections is best. Rinse with clear water, let the tiles dry, and seal with Pro-Solve 10.
Always test any cleaning product you intend to use in a small—almost hidden—area. If there are adverse effects, you can refrain from ruining all your tiles.
Extra Tip For Porcelain Tiles Cleaning!
Mix 1 tablespoon of ammonia with 2 tablespoons of Borax (laundry whitener) with 1 gallon of water (adjust the amounts depending on the amount of water used). Wash the floor with a Chamois mop – not a sponge mop. Rinse the mop under running water in the sink—not in the ammonia/Borax/water mix. This next step is important—while the floor is still wet/damp wipe dry with a chamois cloth. Your floors will turn out absolutely gorgeous and shiny.
Let us know your comments and tips in the comment section!
Vinegar can become one of your best allies when cleaning any kitchen device and the dishwasher is one of the most benefited by it.
In a previous article, we discussed cleaning the dishwasher —our main conclusions being that yes, it is a thing that we have to do, and no, the dishwasher does not really wash itself.
Why Cleaning Your Dishwasher is Important
Your dishwasher is a hard-working appliance that saves you a lot of time and effort in the kitchen. However, it’s easy to forget that it needs some TLC too. Neglecting to clean your dishwasher can lead to unpleasant odors, buildup of food particles, and even damage to the dishwasher itself. That’s why it’s important to make cleaning your dishwasher a regular part of your kitchen cleaning routine.
Make sure to have 1 cup of white vinegar, 1 cup of baking soda, and warm, soapy water.
First Step: The Filter
We’re heading directly to the dirtiest parts: the filter and filter tray. Unscrew the filter and filter tray from the bottom of your dishwasher. Take a bowl of warm, soapy water and submerge the items in it. It’s absolutely not recommended to scrub the filter with a sponge. Let the items submerge for about ten minutes, rinse, and replace them in their original place.
Second Step: The Vinegar
Measure 1 cup of white vinegar, and pour it over the bottom of the dishwasher. Then, run the heavy cleaning cycle on your dishwasher (it has to be empty).
Third Step: Baking Soda for the Odors
Sprinkle 1 cup of baking soda on the bottom of your dishwasher, and allow it to sit for 6 hours. Then, run an empty cycle.
Extra Tips:
As Christmas is only a few days away, we know that nobody wants to spend their holidays washing dishes. That’s why we offer the following extra tips in order to have a clean and optimal dishwasher that does the job for you:
Before starting the cycle, turn on the faucet and run until the water is hot.
Clean the dishwasher filter periodically —with vinegar, as explained before.
Clean the dishwasher seals, which are the rubber gasket in the door and the soap door. Make sure to give them a once-over with a damp towel to keep the grime down.
Scrape off food bits and crumbs before loading up.
The dishwasher has to be full, not overcrowded. It’s better to wash a few pieces by hand than it is to rerun an entire load because things were too tightly packed.
Use the correct cycle depending on the state of your dishes, i.e. when the dishes are harder to clean, use the heavy cycle.
There’s no need to invest a large amount of time cleaning your dishwasher and maintaining it in ideal conditions. Every solution is very simple, remember that your goal is that all the dishes are grime-free and have a fresh smell. Have you found other practices for keeping your dishwasher running well?
For many of us, the dishwasher is a kitchen hero, silently battling greasy plates and stubborn stains. But like any hero, it requires proper care to maintain its power and prevent it from turning into a villain of smelly odors and ineffective cleaning. Fear not, grime warriors! This comprehensive guide will unlock the secrets of dishwasher cleaning, ensuring your machine shines brighter than a freshly washed fork.
The Anatomy of a Dirty Dishwasher:
Before diving into cleaning solutions, let’s understand the enemy. Dishwasher cleaning starts with identifying the culprits behind grime and malfunction.
Food Debris: Leftover food particles lodge in filters, drains, and spray arms, hindering water flow and attracting bacteria.
Mineral Buildup: Hard water deposits leave white film on dishes and the machine’s interior, reducing cleaning effectiveness.
Grease and Oil: Fatty residues accumulate on filters, spray arms, and even the walls, creating a pungent odor and impacting performance.
Mold and Mildew: Damp environments encourage mold and mildew growth, compromising hygiene and causing unpleasant smells.
The Cleaning Arsenal:
Now, to combat these foes, assemble your cleaning arsenal! You’ll need:
Dishwashing detergent: Opt for a natural, dishwasher-safe formula for effective cleaning without harsh chemicals.
Baking soda: This natural wonder neutralizes odors, absorbs grease, and tackles mineral buildup.
White vinegar: A powerful all-natural disinfectant and deodorizer that cuts through grime and leaves your dishwasher sparkling.
A toothbrush or bottle brush: Ideal for reaching tight spaces and scrubbing filters and spray arms.
Microfiber cloths: Gentle yet effective for wiping down the interior and exterior.
Rubber gloves: Protect your hands while cleaning.
The Deep Clean Ritual:
Once equipped, embark on your dishwasher cleaning ritual:
Empty the dishwasher and remove the racks: Toss any food debris and scrape off any stuck-on bits. Remove the racks for thorough cleaning.
Clean the filters: Take out the main filter and any smaller filters. Scrub them with hot, soapy water and baking soda, paying particular attention to any trapped food particles. Rinse thoroughly and reinstall.
Tackle the spray arms: Unscrew the spray arms, if possible, and soak them in a mixture of hot water and vinegar for 30 minutes. Scrub away any buildup with a toothbrush. Rinse and reinstall.
Deodorize the interior: Place a cup of white vinegar on the bottom rack and run a hot water cycle without detergent. This will break down grease and eliminate odors.
Remove mineral buildup: Sprinkle baking soda liberally on the bottom rack and run a normal cleaning cycle with dishwashing detergent. This will combat hard water deposits.
Wipe down the interior and exterior: Use a damp microfiber cloth with a few drops of vinegar to wipe down the walls, door seal, and control panel. Polish the exterior for a gleaming finish.
Maintain good habits: Regularly rinse out the filter and wipe down the door seal to prevent food debris build-up. Run a hot water cycle with vinegar once a month to maintain freshness.
Beyond the Deep Dishwasher Cleaning:
Remember, prevention is key! These practices will extend your dishwasher’s lifespan and keep it squeaky clean:
Scrape, don’t rinse:Scrape off large food particles from dishes before loading them to minimize filter clogging.
Load strategically: Place dishes strategically for optimal water flow and cleaning. Refer to your dishwasher’s manual for recommended loading patterns.
Avoid overloading:Don’t overcrowd the racks; dishes need space to get adequately cleaned.
Choose the right detergent: Use the recommended amount of dishwasher detergent and choose a formula suitable for your water hardness.
Don’t let it sit:Don’t leave dirty dishes in the dishwasher for extended periods to prevent odor development.
Run regular maintenance cycles: Run a hot water cycle with vinegar or baking soda periodically to keep your machine squeaky clean and prevent build-up.
Troubleshooting Tips:
Even with proper dishwasher cleaning, glitches can occur. Here’s how to handle common issues:
Dishes aren’t clean: Check the filters for clogs, ensure proper detergent usage, and adjust the spray arm position if needed.
White film on dishes: Run a vinegar cycle to combat mineral buildup.
Dishwasher smells: Try a deep clean with vinegar or baking soda and ensure proper ventilation within the appliance.
Leaking dishwasher: Contact a qualified repair person immediately.
Bonus Tips For Dishwasher Cleaning:
Run the Garbage Disposal: Before running the dishwasher, run the garbage disposal to clear any food particles that might clog the drain.
Clean the Door Seal: Don’t neglect the door seal! Wipe it down with a damp cloth and mild detergent to prevent mold growth and ensure a proper seal.
Regular Checkups: Pay attention to your dishwasher’s performance. If you notice any changes in cleaning effectiveness, unusual sounds, or leaks, it’s time to investigate and potentially consult a professional.
By incorporating these advanced techniques and preventative measures, you can transform your dishwasher cleaning routine from a chore to a satisfying ritual of appliance care. With a little extra effort, you can ensure your dishwasher operates at peak performance, delivers sparkling clean dishes, and contributes to a greener, more sustainable home. So, grab your baking soda paste and vinegar spray, and get ready to unlock the full potential of your dishwasher!
Investing in Brilliance:
Caring for your dishwasher isn’t just about sparkling dishes; it’s an investment in the appliance’s lifespan and efficiency. By implementing these tips and tricks, you can ensure your dishwasher continues to be a reliable and hardworking member of your household team. So, roll up your sleeves, embrace the deep clean, and unlock the secrets of a dazzling dishwasher and a lifetime of sparkling dishes!
Remember, a clean dishwasher is a happy dishwasher, and a happy dishwasher means you can reclaim precious time and spend it on the things that truly matter.
Welcome to BA House Cleaning, your trusted service provider for all your cleaning needs. In this comprehensive guide, we will walk you through the step-by-step process to clean a bathtub. A clean and sparkling bathtub is not only visually appealing but also promotes good hygiene. With our expert tips and tricks, you’ll be able to maintain a clean bathtub effortlessly.
Before you begin the cleaning process, it’s essential to gather all the necessary supplies. Here’s a list of items you’ll need:
Rubber gloves
Baking soda
Vinegar
Dish soap
Microfiber cloth
Soft-bristle brush
Old toothbrush
Spray bottle
Step 2: Remove Debris and Pre-Treat Stains
Start by removing any debris, such as hair or soap scum, from the bathtub. Use a soft-bristle brush or your hands to collect the debris and dispose of it properly. Next, pre-treat any stubborn stains using a mixture of baking soda and water. Apply the paste to the stained areas and let it sit for a few minutes before proceeding to the next step.
Step 3: Clean the Bathtub Surface
Fill a spray bottle with equal parts of vinegar and water. Spray the solution onto the bathtub surface, focusing on the stained areas. Vinegar is a natural cleaner that effectively removes soap scum and mineral deposits. Let the solution sit for about 10 minutes to allow it to break down the grime.
Step 4: Scrub and Rinse
After the solution has had time to work its magic, use a soft-bristle brush or sponge to scrub the bathtub surface. Apply gentle pressure and work in circular motions to loosen the dirt and stains. For hard-to-reach corners and crevices, an old toothbrush can come in handy.
Once you’ve scrubbed the entire bathtub, rinse it thoroughly with warm water. Make sure to remove all traces of cleaning solution and residue.
Step 5: Address Tough Stains
If you encounter any tough stains that are resistant to regular cleaning methods, try using a mixture of vinegar and baking soda. Sprinkle baking soda directly onto the stain and spray vinegar over it. The mixture will create a foaming reaction that helps lift stubborn stains. Let it sit for a few minutes before scrubbing and rinsing as usual.
Step 6: Dry and Shine
After rinsing, use a clean microfiber cloth to dry the bathtub. This will help prevent water spots and keep the surface looking shiny. Wipe down all the surfaces, including the fixtures and handles.
Maintaining a Clean Bathtub
To keep your bathtub looking clean and fresh, it’s important to establish a regular cleaning routine. Here are some additional tips to help you maintain a sparkling bathtub:
Wipe down the bathtub after each use to remove soap residue and prevent the build-up of grime.
Avoid using harsh abrasive cleaners that can damage the bathtub surface. Stick to gentle and non-toxic cleaning products.
Regularly inspect and clean the drains to prevent clogs and unpleasant odors.
Consider using a bathtub mat or non-slip strips to prevent accidents and protect the surface from scratches.
There are at least 7 key ingredients you can use to clean your bathtub
(and yes, we’re including a popular beverage):
Baking Soda: The amazing baking soda helping us again. For dirt and grease removal, apply a paste of 2 parts baking soda and 1 part hydrogen peroxide (this can be bought in pharmacies). Let the paste set for 30 minutes. Scrub with enthusiasm and rinse well.
Coke: Yes, use Coke Cola as a bathtub cleaner. This is perfect for water stains. Pour the cola directly on the area and wipe it with a rag. You can also unclog hair and debris in your pipes when you pour it down them.
Cream of Tartar: Mix cream of tartar and hydrogen peroxide in a small, shallow cup or dish. Remember that you’re creating a paste, so drip slowly the hydrogen peroxide on the cream. Apply to any stain your bathtub has and let it dry. Remove the paste with a cloth and rinse it.
Oven Cleaner: This is for hardcore stains and only for white bathtubs. Spray the stains with oven cleaner and let it sit for two hours. Rinse thoroughly.
Salt: This is a dedicated solution for the yellow spots. Mix up a solution of salt and turpentine in equal parts. Remember to use rubber gloves. Use the mix over the discoloration and then rinse.
Shampoo: Well, yes, the closest cleaning ingredient for your bathtub. This is especially useful over soap scum, just apply it over the scum and scrub it with a cloth. Rinse it clean!
Vinegar: The best friend of baking soda. This is the best way to shine back your porcelain bathtub. Use with vinegar in a cloth and scrub your bathtub then rinse with cold water. If there are stains that are really hard to remove, pour in 3 cups of white vinegar under running hot tap water. Fill the tub up over the stains and allow it to soak. Four hours should be enough. Drain the water and scrub off the stains.
These ingredients are easy to find and very effective. Do you know any other ingredient useful for maintaining a clean bathtub? Let us know!
Frequently Asked Questions
FAQ 1: How often should I clean my bathtub?
It is recommended to clean your bathtub at least once a week to prevent the build-up of grime and soap scum. However, the frequency may vary depending on usage and personal preference.
FAQ 2: Can I use bleach to clean my bathtub?
While bleach can be effective in removing stains, it is not recommended for regular bathtub cleaning. Bleach is a harsh chemical that can damage the bathtub surface and may pose health risks if not used properly.
FAQ 3: How do I remove mold and mildew from my bathtub?
To remove mold and mildew, mix equal parts of vinegar and water in a spray bottle. Spray the solution onto the affected areas and let it sit for about 15 minutes. Then, scrub the mold or mildew with a brush and rinse thoroughly.
FAQ 4: Can I use a magic eraser to clean my bathtub?
Magic erasers can be effective in removing stains and scuff marks from bathtubs. However, be cautious when using them on delicate surfaces, as they can cause abrasions or remove the finish.
FAQ 5: What should I do if my bathtub has hard water stains?
If your bathtub has hard water stains, you can use a mixture of vinegar and baking soda to remove them. Apply the paste to the stained areas, let it sit for a few minutes, and then scrub and rinse.
FAQ 6: How can I prevent my bathtub from becoming slippery?
To prevent slips and falls in the bathtub, consider using a non-slip mat or adhesive strips. These provide traction and reduce the risk of accidents.
Conclusion
A clean bathtub not only enhances the overall appearance of your bathroom but also ensures a hygienic environment. By following the step-by-step guide provided by BA House Cleaning, you can easily maintain a sparkling bathtub. Remember to establish a regular cleaning routine and use gentle cleaning products to preserve the bathtub’s surface. For any stubborn stains or professional cleaning needs, don’t hesitate to reach out to BA House Cleaning for expert assistance.
Have you ever wondered if there’s a more natural and cost-effective solution for your household cleaning needs? Look no further than the amazing baking soda. This simple and readily available ingredient has been a secret weapon in households for generations, thanks to its remarkable cleaning properties. From banishing odors to removing stains and tackling various cleaning challenges, it proves to be a versatile and powerful ally. In this article, we unveil the magic of it and delve into its numerous applications, offering you an array of practical tips and tricks to harness its full potential. Say goodbye to expensive cleaning products and embrace the wonders of it for a cleaner and fresher home. Get ready to be amazed by the extraordinary capabilities of this unassuming pantry staple.
Have you ever considered how much money you spend on cleaning products? It tends to be a high amount if you buy a different cleanser for every piece of furniture or tool: the windows, the curtains, the kitchen, the sink, the refrigerator, the floors… the list can be very long—as the store receipt.
In our recent posts, you might have noted that vinegar is a great helper for the mentioned purpose. However, there’s another easy-to-use, very soluble, and effective component.
Why is it amazing?
It is non-toxic, multi-purpose and it’s definitely cheap. The cost of it (especially when you purchase a large measure of it) is far less than that of any other specialized cleaning agent.
Baking soda is also known as bicarbonate of soda and it’s created from sodium carbonate. You can use it for the following cleaning purposes:
To eliminate odors
A box or small bowl of baking soda in the refrigerator, freezer, or any cupboard will keep away unpleasant odors.
It will keep away garbage odors: sprinkle the bottom of the pail, and then sprinkle again after you put a new bag in.
To remove stale smells from food containers, rinse them out with hot water and baking soda. If the smell persists, let the container soak overnight in the baking soda and water mixture.
To remove scents from a carpet, sprinkle with it. Let stand for at least fifteen minutes and then vacuum. Repeat as needed.
If there is a smoker in the house, put it in the bottom of each ashtray to keep away some of the stale smoke smell.
Baking soda in the letterbox will help prevent odors.
To quickly clean pets and remove “wet dog” odor, sprinkle with it and brush out their fur.
To clean surfaces, sprinkle baking soda on a damp cloth. Wipe, then rinse with clean water.
If they are stubborn stains, use a baking soda paste (3 parts baking soda, one part water). Apply, let stand, then scrub or wipe clean.
To clean silver, use a paste of 3 parts baking soda to one part water. Rub the paste onto each item, then rinse with warm water and dry with a soft cloth.
To remove scuff marks or grease spills from the floor, sprinkle with it and then wipe with a warm, damp cloth. This is even safe for no-wax floors!
Children’s toys can be cleaned using 1/4 cup of it in 1 quart of warm water. Submerge in this mixture (or wipe with a cloth dampened in it), then rinse with clear water.
Baking Soda Hacks for Various Cleaning Needs and Household Maintenance
Grease fires can be put out by sprinkling them with baking soda.
For burnt-on food in the bottom of pots, sprinkle with it, then add hot water. Let soak overnight; the dried-on food will come loose much more easily.
In the bathroom, if you want to avoid clogged drains, pour 1/4 cup baking soda down weekly. Rinse through with hot water.
Replace half of each measure of laundry detergent with it to keep clothing fresh.
Pretreat diapers in their pail with it. This will keep odors from becoming overpowering between washings.
Baking soda increases the effectiveness of chlorine bleach. Add 1 / 2 cup to your laundry, along with the usual amount of bleach.
The children’s pool can be cleaned and have mildew removed by washing with it in warm water.
Before packing away your camping gear after a trip, sprinkle with it.
Try it out and then let us know what results you obtained. We’re sure you will never stop using the amazing baking soda!
Clean your coffee maker for a fresher, delicious taste!
Sometimes we forget to clean the most useful kitchen utensils. This is (usually) the coffee maker’s destiny. If your morning coffee starts to taste bitter, or if you find strange bits of an unknown origin inside of it (coffee sediments), it’s time to clean it!
Doing this attains multiple benefits: your coffee will taste fresher, hard water spots from the carafe will be removed and stains will be a forgotten story. It will also remove mineral buildup and clean out the coffee oils that get left behind and turn rancid.
White vinegar (enough to fill up half your carafe)
Hot soapy water
Sponge
Damp dish towel
Dry dish towel
How to clean your coffee maker?
Empty and rinse the carafe and dump out any coffee grounds left in the filter—actually, you must do this regularly for better maintenance.
Fill the water chamber to its full capacity with equal parts white vinegar and water. You can use the carafe to measure equal parts of each.
Start a brew cycle. Midway through the brew cycle, turn off the coffee maker and let it sit for an hour.
After an hour, turn on the coffee maker and let the brew cycle finish.
After the brew cycle has been completed, pour out the vinegar-water solution and fill the water chamber with fresh water (no vinegar). Run a whole new brew cycle just with the water. Repeat two more times, allowing your coffee maker to cool slightly between brews.
Wipe down the exterior of your coffee maker, and wash the carafe and filter basket in hot, soapy water.
Reassemble and brew a great cup of coffee!
Extra Tips!
Dhow’s writer, Donna Porter, offers some tips for better maintenance of your coffee maker:
Put a glass marble in the water chamber to attract mineral deposits from hard water. Wash it once a week.
Instead of a pitcher, you can use the sprayer from your sink to fill the coffee maker without spilling!
Does your pot have hard-to-reach areas? Use a wooden chopstick with a paper towel to get in there.
Use a baby bottle brush inside for stubborn stains.
You can put ice cubes and a little water in a pot and swirl them around, for harder stains put some table salt in a pot and swirl it around for a few minutes, and then rinse.
Heat a toothbrush by the bristles enough that you can bend it to a 90° angle. This makes a perfect brush for cleaning the filter basket.
Never use the coffee pot to pour water into the reservoir. This will transfer oils and impurities from the pot, and eventually give the coffee a nasty taste. Instead, use a pitcher that is reserved for water only.
For tough stains, scrub the pot using a paper towel or a clean (not soapy) dish towel. Rinse thoroughly.
Never wash the coffee pot with soap. This will bind with the oils deposited by the coffee and will leave a taste behind. Do not wash in the dishwasher for the same reason.
The humble microwave – our culinary sidekick, reheating hero, and occasional popcorn popper extraordinaire. But let’s be honest, after one too many splattered cheese pizzas and experimental turmeric lattes, its once pristine interior can resemble a Jackson Pollock painting gone wrong. Fear not, fellow foodies! Before you resign yourself to another round of nuclear-strength chemical cleaners, unlock the secrets of cleaning the microwave using readily available kitchen staples. Prepare to say goodbye to grime and hello to a sparkling oven once again, all with ingredients lurking in your pantry.
The Power of Citrus: From Zest to Shine
Lemons, the undisputed stars of natural cleaning, hold the key to dissolving baked-on grime and neutralizing lingering odors. Slice a lemon in half, fill a bowl with water, and toss in the citrusy halves. Nuke it on high for five minutes, and watch the steam work its magic! Let the mixture cool for a few minutes, then grab a cloth and clean the microwave walls, ceiling, and turntable with ease. The citric acid will cut through food residue like a champion, leaving behind a fresh, lemony scent.
Baking Soda Bonanza: The Stain Slayer Strikes Again
Baking soda, the king of versatility, shines when it comes to cleaning the microwave. Mix two tablespoons of baking soda with enough water to form a paste. Spread this magic potion on stubborn stains and let it sit for 15 minutes. The alkalinity of the baking soda will break down the grime, making it easy to wipe away with a damp cloth. Bonus points for tackling burnt popcorn messes – baking soda is like kryptonite to those pesky kernels!
Vinegar’s Tangy Triumph: Deodorizing Diva Takes the Stage
White vinegar, the cleaning world’s answer to a magic wand, tackles odors like a boss. Fill a small bowl with a cup of water and a quarter cup of vinegar. Microwave on high for two minutes, allowing the steam to fill the oven. The vinegar will neutralize any lingering food smells, leaving your microwave smelling like…nothing! Yes, you read that right, cleaning the microwave with vinegar leaves it odor-free. Now, you can finally reheat your fish dish without fear of its aroma haunting your future popcorn sessions.
The Salt Solution: Simple Yet Effective
Salt, everyone’s favorite seasoning, doubles as a crime-fighting hero. Sprinkle coarse salt on a damp cloth and gently scrub stubborn splatters and stains. The salt acts as a gentle abrasive, helping to lift away food particles without scratching the surface. This method is particularly effective for cleaning the microwave door, where greasy fingerprints love to congregate.
Beyond the Basics: Hacks for the Discerning Chef
1. Coffee Ground Goodness: For tackling burnt-on messes, try rubbing a damp cloth with leftover coffee grounds. The gritty texture cuts through grime like a dream, leaving your microwave spotless. Pro tip: use cold coffee grounds to avoid spreading the heat and setting the stains further.
2. Honey Trap: Sticky spills? Don’t fret! Drizzle a little honey on a damp cloth and dab the affected area. Honey’s natural stickiness attracts food residue, making it easy to remove without harsh scrubbing. Just like that, your microwave cleaning woes are a thing of the past.
3. Hot Towel Heroics: Don’t underestimate the power of a hot towel! Wet a cloth with hot water, wring it out, and place it inside the microwave for a minute. The steam will loosen dirt and food particles, making them easier to wipe away. This quick trick is perfect for a weekly microwave cleaning routine.
Remember:
Always dilute vinegar and lemon juice with water before using them for cleaning the microwave to avoid etching the surface.
Never scrub with abrasive cloths or scouring pads, as they can scratch the interior.
Let the microwave cool completely before wiping it down to prevent burns.
Wash and dry all clothes thoroughly after cleaning the microwave to prevent the spread of bacteria.
From Stained to Sparkling: Embrace the Joy of a Clean Microwave
So ditch the harsh chemicals and embrace the power of kitchen staples! With a little lemon, vinegar, baking soda, and creativity, you can clean the microwave like a pro, leaving it sparkling clean and smelling fresh. Remember, a clean microwave is a happy microwave, and a happy microwave makes for happy mealtimes. So go forth, conquer the grime, and let your culinary creativity shine in a pristine oven!