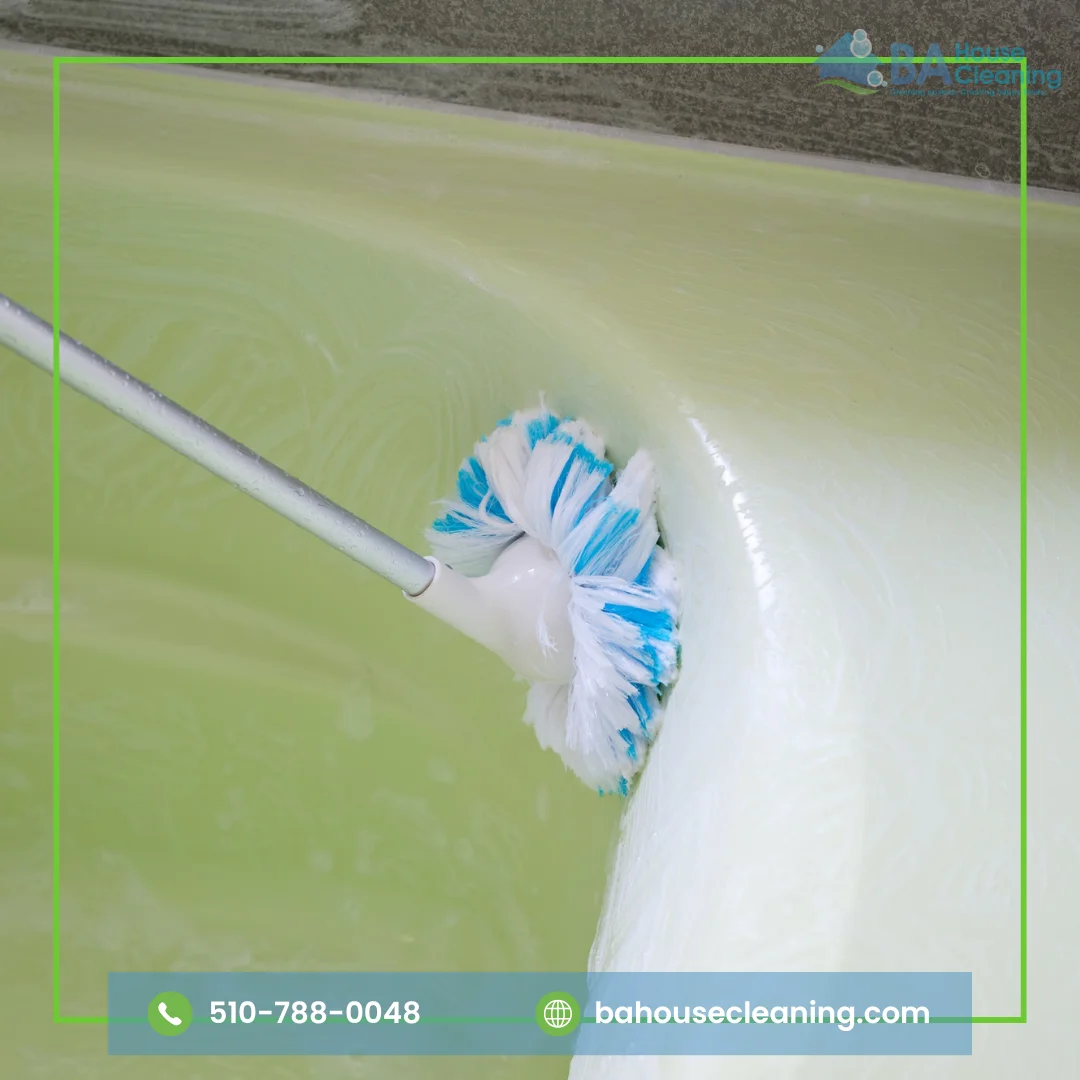
A bathtub can collect more than visible dirt. Soap residue, body oils, hard-water minerals, loose hair, bath products, and moisture may settle across the basin, ledges, drain, fixtures, and areas around the caulk. When these materials remain on the surface, they can create a dull film that becomes harder to remove with every use.
Learning how to clean a bathtub starts with identifying what the tub is made from. Acrylic, fiberglass, porcelain enamel, cast iron, and stone-based materials do not always tolerate the same products or scrubbing tools. A method that removes buildup from one finish may scratch, discolor, or dull another.
At BA House Cleaning, we understand that a clean bathroom depends on more than quickly wiping the center of the tub. The faucet base, overflow plate, drain cover, corners, wall joints, and surrounding floor also contribute to how fresh and comfortable the room feels. This guide explains how to clean common bathtub materials, address soap scum and mineral marks, deal with bathroom moisture, and avoid methods that may damage the finish.
Identify the Bathtub Material Before Cleaning
Before selecting a cleaner, determine whether the bathtub is acrylic, fiberglass, porcelain enamel, enameled cast iron, or another specialty material. Check the manufacturer’s label, purchase information, or care manual when the surface is difficult to identify.
Acrylic and fiberglass tubs often feel warmer and lighter than cast iron. Porcelain-enamel and enameled cast-iron surfaces usually feel harder and colder, but appearance alone does not always provide a reliable answer.
The safest approach is to begin with warm water, mild dish soap, and a soft cloth. Do not apply acidic, abrasive, or heavily alkaline products until you confirm that the manufacturer allows them.
Bathtub manufacturers commonly advise homeowners to use non-abrasive cleaners and soft sponges on acrylic surfaces because rough pads, scrapers, and abrasive powders may scratch or dull the finish.
What to Use to Clean a Bathtub
A basic bathtub-cleaning kit may include:
Rubber or household cleaning gloves
Mild liquid dish soap
Warm water
A soft microfiber cloth
A non-abrasive sponge
A soft nylon brush
A small brush for corners and grout
A bucket or removable shower sprayer
Clean towels for drying
A cleaner approved for the bathtub material
Open a window or operate the bathroom exhaust fan while cleaning. Apply commercial products according to their labels, and never combine cleaners unless their manufacturers specifically state that the combination is safe.
Avoid steel wool, metal scrapers, rough scouring pads, and unidentified cleaning mixtures. Even a durable bathtub may contain a slip-resistant coating, glossy finish, repair layer, or decorative surface that requires special care.
The Safest Basic Method for Bathtub Cleaning
For routine bathtub cleaning, remove bottles, toys, mats, and personal items from the tub. Clear loose hair and debris from the drain area before adding water or cleaner.
Rinse the surface with warm water to loosen fresh residue. Add a small amount of mild dish soap to a damp sponge or dilute it in a bucket of warm water. Begin at the upper ledges and work toward the drain so dirty water moves away from completed areas.
Wipe the basin, walls, corners, faucet base, overflow cover, and drain area using gentle pressure. Allow the soap solution to remain on light buildup for a few minutes, but do not let it dry.
Rinse the bathtub thoroughly and inspect it under good lighting. Repeat the process on any remaining marks rather than immediately switching to an abrasive product. Finish by drying the surface and metal fixtures with a clean microfiber cloth.
How to Clean an Acrylic Bathtub
Acrylic bathtubs require gentle products and non-abrasive tools. Use warm water, mild liquid dish soap, or a cleaner labeled as safe for acrylic.
Apply the cleaner with a soft cloth or sponge and wipe without aggressive scrubbing. Rinse promptly and dry the tub so cleaning residue and water spots do not remain on the glossy finish.
Do not use steel wool, hard brushes, abrasive powders, paint removers, or harsh solvents unless the manufacturer gives specific instructions for a particular problem. Kohler and American Standard both warn against abrasive products on acrylic bath surfaces, while MAAX recommends non-abrasive cleaning products and tools that will not scratch or dull the finish.
For model-specific instructions, use the manufacturer’s official acrylic bathtub cleaning guidance rather than relying on a universal household recipe.
How to Clean a Fiberglass Bathtub
Fiberglass bathtubs may develop a dull appearance when soap film and minerals remain on the surface. Because fiberglass can scratch, begin with mild dish soap, warm water, and a soft sponge.
Work in small areas and rinse frequently. Avoid pressing harder when a stain remains. Give the cleaner additional time to soften the buildup or switch to a product approved for fiberglass.
Do not use stiff wire brushes, powdered abrasives, or cleaning erasers unless the tub manufacturer confirms that they are safe. Sterling’s care instructions for its Vikrell bath material similarly recommend a soft cloth or sponge and advise against abrasive brushes and scouring pads.
Dry the surface after rinsing to reveal any film that still remains. A cloudy appearance may come from leftover cleaner rather than a permanent stain.
How to Clean a Porcelain or Enameled Bathtub
Porcelain-enamel and enameled cast-iron tubs have a hard outer finish, but that coating can chip, scratch, or lose its shine when cleaned incorrectly.
For general cleaning, use warm water, liquid dish detergent, and a soft cloth or non-abrasive sponge. Rinse the cleaner completely and dry the surface afterward.
Avoid metal scrapers, wire brushes, steel wool, highly acidic cleaners, and heavily alkaline products. Kohler’s enameled cast-iron guidance recommends non-abrasive products and cautions that improper cleaners may permanently affect slip-resistant areas.
If the enamel has chipped and exposed the underlying metal, cleaning alone will not repair the damage. Rust may continue to form around the damaged section, so consider an appropriate repair or refinishing assessment.
How to Remove Soap Scum from a Bathtub
Soap scum forms when soap residue combines with minerals, body oils, and other materials on the surface. It often appears as a cloudy or slightly sticky film around the waterline, corners, ledges, and lower walls.
Start with warm water and mild dish soap. Apply the solution generously and allow it to soften the residue for several minutes. Use a soft sponge to move across the surface with light, overlapping strokes.
Rinse and repeat when necessary. Several gentle applications are safer than one aggressive scrubbing session.
A diluted vinegar solution may help with soap scum on some tubs, but only use it when the manufacturer permits acidic cleaners. Do not assume that vinegar is suitable for natural stone, repaired finishes, specialty coatings, or every acrylic product.
How to Remove Hard-Water Stains
Hard-water stains often appear as white, gray, or chalky marks around faucets, drains, and areas where water repeatedly dries.
Begin with the mildest method suitable for the tub. Warm water and dish soap may remove surface film, while a manufacturer-approved mineral-deposit cleaner may be necessary for more established marks.
When the care instructions permit vinegar, apply a diluted solution to a cloth rather than soaking the entire tub. Place the damp cloth over the affected area briefly, then wipe, rinse, and dry.
Do not leave acidic products on metal fixtures, grout, natural stone, or unknown finishes. The best way to clean a bathtub is not to use the strongest available product but to match the cleaner to the material and type of buildup.
How to Address Yellow Bathtub Stains
Yellow discoloration can develop from minerals, product residue, age, rust, or wear within the finish. Different causes require different responses.
Clean the area first with mild soap to determine whether the mark is removable surface residue. If it remains, check the manufacturer’s recommendations for stain removal.
Avoid using salt, turpentine, oven cleaner, chlorine bleach, or other strong chemicals as general-purpose stain treatments. These products may create fumes, affect the finish, or react with residue from another cleaner.
A yellow mark that returns quickly may relate to water quality, corrosion, damaged enamel, or an aging finish rather than incomplete cleaning.
Cleaning Bathtub Fixtures and the Overflow Plate
Bathtub faucets, handles, spouts, drains, and overflow plates often collect water spots and product residue even when the basin looks clean.
Use mild soap and a soft damp cloth. Wipe around fixture bases and narrow joints where moisture remains, then rinse and dry the metal immediately.
Do not leave vinegar or acidic cleaners on chrome, brushed finishes, plated fixtures, or decorative coatings without checking the manufacturer’s instructions. Some finishes require only water and mild soap.
Avoid spraying cleaner directly into openings or behind the overflow plate. Apply the product to the cloth so you can control where the moisture travels.
How to Clean the Bathtub Drain Area
Remove visible hair and loose debris from the drain cover while wearing gloves. Clean the surrounding surface with mild soap and a small soft brush.
Do not push hair or solid material further into the drain. If the water flows slowly, use the drain-cleaning method recommended for the plumbing and bathtub manufacturer.
Avoid pouring random combinations of baking soda, vinegar, bleach, commercial drain opener, or other chemicals into the drain. Products left from a previous treatment may react with the next one.
A recurring blockage, sewage odor, or standing water may require plumbing service rather than additional surface cleaning.
Cleaning Caulk and Grout Around the Bathtub
Caulk seals the joint between the bathtub and surrounding wall. Grout fills gaps between tiles. Both areas may collect soap residue and discoloration, but damaged material cannot always be restored through cleaning.
Use mild detergent, water, and a soft brush for routine care. Avoid scraping caulk with metal tools or scrubbing grout so aggressively that the material begins to erode.
Cracked, separated, or missing caulk allows moisture to travel behind the surface. Replace failed caulk rather than covering the opening with cleaner.
Dark staining that remains inside the caulk may indicate that discoloration has penetrated the material. In that case, removal and replacement may provide a better result than repeated chemical treatment.
How to Deal with Mold and Mildew Around a Bathtub
Bathroom mold often develops where moisture lingers around caulk, grout, ceilings, walls, or fixtures. Cleaning the visible mark without addressing humidity, leaks, or poor ventilation allows the problem to return.
For a small area on a hard surface, the EPA recommends scrubbing with detergent and water and drying the surface completely. Homeowners should also repair leaks and correct the source of moisture. Porous materials may require replacement when mold has grown inside them.
Follow the EPA’s mold cleanup guidance when deciding whether the affected area is appropriate for household cleaning.
Never mix bleach with ammonia, vinegar, or another cleaner. Open windows or doors when using cleaning products, follow label instructions, and consider professional evaluation when mold covers a large area or repeatedly returns.
Can You Use Baking Soda and Vinegar on a Bathtub?
Baking soda and vinegar appear in many household cleaning guides, but they are not suitable for every bathtub.
Baking soda provides mild abrasive action, which may dull glossy acrylic, fiberglass, repaired coatings, or other delicate finishes when applied too aggressively. Vinegar is acidic and may affect stone, grout, metal fixtures, and surfaces whose manufacturers do not approve acidic products.
When the bathtub’s care instructions permit either ingredient, use a small amount, test a hidden section, and rinse thoroughly. Do not assume that combining the two creates a stronger cleaner. Their visible fizzing comes from an acid-base reaction, but the ingredients begin neutralizing each other.
For routine maintenance, mild soap and a soft sponge remain the safer starting point.
Cleaning a Whirlpool or Jetted Bathtub
A jetted bathtub requires care beyond wiping the visible basin. Water remains inside internal lines, jets, and air channels that ordinary surface cleaning cannot reach.
Follow the exact cleaning or flushing procedure in the owner’s manual. Manufacturers may specify water level, cleaner type, cycle duration, and rinsing steps for each model.
Do not pour bleach, dishwashing detergent, oils, or homemade mixtures into the jet system unless the manufacturer permits them. The wrong product may create excessive foam, damage components, or leave residue inside the plumbing.
Stop using the system and seek appropriate service if the jets release dark material repeatedly, leak, fail to operate, or produce an electrical smell.
Common Bathtub Cleaning Mistakes
Avoid these mistakes when deciding what to use to clean a bathtub:
Treating all bathtub materials as though they have the same finish
Using oven cleaner as a general stain remover
Scrubbing acrylic or fiberglass with steel wool
Leaving acidic cleaner on faucets or grout
Mixing bleach with vinegar, ammonia, or other products
Allowing cleaner to dry on the surface
Ignoring the underside of bath mats
Applying excessive force to slip-resistant textures
Pouring chemicals into a slow drain without checking previous treatments
Continuing to clean damaged enamel instead of repairing it
Covering mold without correcting the moisture source
Returning bottles and mats before the tub dries
The right process should remove buildup without creating scratches, chemical residue, damaged caulk, or discoloration.
How Often Should You Clean a Bathtub?
The appropriate schedule depends on how often the tub is used, the number of people in the home, water hardness, ventilation, and the types of bath products used.
Rinse fresh residue after bathing and remove loose hair before it reaches the drain. Wipe the tub lightly during the week when several people use it, and complete a more detailed cleaning when soap film, mineral marks, or discoloration begin to appear.
Drying wet ledges and improving bathroom ventilation can reduce the moisture that supports recurring buildup. Manufacturer guidance for acrylic and other bath materials also commonly recommends wiping the surface with a soft cloth after use and avoiding abrasive tools.
When the Bathroom Needs More Detailed Cleaning
Cleaning the bathtub may improve one major bathroom surface, but dust, product residue, hair, soap film, and moisture often collect in several areas at once.
BA House Cleaning’s Deep Cleaning Services provide additional attention for Oakland and East Bay homes that need a more detailed reset. The service is designed for homes that require more extensive scrubbing and care than routine maintenance.
After a detailed clean, Recurring Cleaning Services can help maintain bathrooms and other frequently used areas through weekly, biweekly, or monthly visits. BA House Cleaning lists tubs, bathroom tiles, shower doors, sinks, and countertops among the areas addressed during its standard recurring service.
Professional house cleaning does not replace repairs, plumbing work, mold remediation, or the manufacturer’s maintenance instructions. It can, however, help prevent routine household buildup from spreading across several bathroom surfaces.
Five Habits That Keep a Bathtub Cleaner for Longer
A practical maintenance routine can reduce soap film, water spots, and difficult stains:
Rinse after bathing: Remove shampoo, soap, bath oil, and loose residue before they dry on the surface.
Dry the wettest areas: Wipe ledges, corners, fixtures, and the area around the drain with a soft cloth.
Improve ventilation: Run the exhaust fan or open an appropriate window to help bathroom moisture escape.
Store products away from standing water: Bottles and containers can trap residue beneath them and leave rings on the tub ledge.
Use the correct cleaner consistently: Keep a manufacturer-approved product available instead of switching between strong household mixtures.
These habits make routine cleaning easier and reduce the need for heavy scrubbing that could affect the bathtub finish.
Give Your Bathroom the Detailed Care It Needs
A clean bathtub can improve the appearance of the entire bathroom, but maintaining the room also requires attention to floors, sinks, fixtures, mirrors, toilets, and surrounding surfaces.
Connect with BA House Cleaning on Facebook to discuss professional home cleaning in Oakland and the East Bay. Choose dependable support for routine bathroom maintenance or a more detailed cleaning when soap residue, dust, and household buildup have become difficult to manage.
Frequently Asked Questions
What is the best way to clean a bathtub?
Identify the bathtub material first. Begin with warm water, mild dish soap, and a soft, non-abrasive sponge. Rinse thoroughly, and use stronger products only when the manufacturer confirms they are safe for the finish.
How do I remove soap scum from a bathtub?
Apply warm water and mild dish soap, allow the solution to soften the film, then wipe gently with a soft sponge. Repeat the process rather than using a harsh scrubber. A manufacturer-approved soap-scum remover may help with heavier buildup.
Can I use vinegar to clean a bathtub?
Some manufacturers permit diluted vinegar on selected bathtub materials, while others recommend different products. Avoid using vinegar on natural stone, unknown coatings, sensitive fixtures, or any surface whose care instructions prohibit acidic cleaners.
Can I use baking soda on an acrylic bathtub?
Baking soda may create fine scratches or dull a glossy surface when used aggressively. Check the acrylic tub manufacturer’s instructions before applying it, use minimal pressure, and test a hidden area first.
How do I clean a fiberglass bathtub without scratching it?
Use warm water, mild liquid soap, and a soft cloth or non-abrasive sponge. Avoid steel wool, stiff brushes, abrasive powders, and cleaning tools that may dull the fiberglass finish.
How can I remove hard-water marks from a bathtub?
Start with mild soap and water. When the manufacturer permits an acidic cleaner, use diluted vinegar or an approved mineral-deposit remover on the affected section. Rinse and dry the surface immediately afterward.
Can bleach damage a bathtub?
Bleach may discolor or damage some acrylic, fiberglass, coated, or decorative surfaces. Do not use it unless the manufacturer approves it for that exact material, and never combine it with vinegar, ammonia, or another cleaner.
How often should I clean my bathtub?
Remove hair and rinse fresh residue after use. Complete a more thorough cleaning weekly or whenever soap film, stains, or mineral deposits begin to appear. Usage, water hardness, and ventilation affect the ideal schedule.
Why do bathtub stains return after cleaning?
Recurring marks may come from hard water, damaged enamel, leaking fixtures, standing moisture, soap residue, mold growth, or products stored on wet ledges. Identify and correct the source instead of repeatedly treating the visible stain.
When should I replace bathtub caulk?
Replace caulk when it cracks, separates from the wall or tub, develops gaps, remains deeply discolored, or no longer forms a watertight seal. Cleaning cannot restore caulk that has physically failed.
A coffee maker may look clean from the outside while coffee oils, water spots, loose grounds, and mineral deposits gradually collect inside its removable parts and internal water system. Over time, this buildup can affect the way the machine operates and may leave coffee tasting bitter, stale, or different from the flavor you normally expect.
Learning how to clean a coffee maker involves more than rinsing the carafe after breakfast. The filter basket, lid, water reservoir, warming plate, reusable filter, exterior controls, and internal brewing system all require different types of care. Some parts need washing after every use, while the internal system may require a separate descaling cycle based on the manufacturer’s instructions.
At BA House Cleaning, we understand that small kitchen routines can make a noticeable difference in how clean and comfortable the complete room feels. Regularly cleaning the coffee station, removing spills, and wiping surrounding countertops can prevent sticky residue and scattered grounds from becoming part of a larger kitchen mess.
This guide explains how to clean a drip coffee maker, wash the carafe and removable components, remove mineral buildup, use vinegar safely, clean without vinegar, care for a single-serve brewer, and avoid common mistakes that may damage the machine.
Why Coffee Makers Need Regular Cleaning
Every brewing cycle brings coffee grounds, natural oils, heat, and water into contact with different parts of the machine. Grounds may collect around the basket, while brewed coffee can drip onto the warming plate or exterior. Water also leaves minerals behind as it moves through the reservoir, tubes, and heating system.
These types of buildup require different cleaning methods. Warm water and dish soap can remove coffee residue from washable components, but they cannot always reach mineral deposits inside the internal water pathway. That is why a complete coffee maker cleaning routine includes both surface cleaning and periodic descaling.
Cuisinart explains that coffee oils, residue, and hard-water deposits can affect flavor, brewing speed, and the machine’s operation. Its guidance separates washing the carafe and filter basket from descaling the internal system.
Cleaning Versus Descaling a Coffee Maker
Cleaning and descaling are related, but they do not solve the same problem.
Routine Cleaning
Routine cleaning removes visible coffee grounds, spills, oils, stains, and residue from accessible components. It normally covers the carafe, lid, brew basket, reusable filter, removable water reservoir, warming plate, and exterior surfaces.
The parts that come into direct contact with coffee should receive the most frequent attention because oils and damp grounds can remain behind after brewing.
Descaling
Descaling targets mineral deposits left by the water used in the machine. These deposits may develop inside the reservoir, tubing, heating system, or other areas that a cloth cannot reach.
A descaling cycle usually involves running a manufacturer-approved solution through the machine without coffee grounds. Depending on the model, the recommended product may be diluted vinegar or a branded descaling solution.
Because coffee makers vary, always check the manual before selecting a solution or starting a cleaning cycle.
What You Need Before Cleaning
Gathering the right supplies helps you clean the machine without using harsh or unsuitable products.
You may need:
Warm water.
Mild, unscented dish soap.
A soft sponge or microfiber cloth.
A small soft-bristled brush.
White distilled vinegar, when approved for the model.
A manufacturer-approved descaling solution.
A clean, dry towel.
A paper coffee filter, when required for the cleaning cycle.
Avoid steel wool, abrasive scouring pads, sharp tools, bleach, and commercial oven cleaners. These products may scratch removable components, damage finishes, or leave unwanted residue.
Unplug the machine and allow it to cool before cleaning the exterior, warming plate, or removable parts. Never immerse the electrical base, power cord, or plug in water.
How to Clean a Coffee Maker After Every Use
A quick cleaning after brewing prevents grounds and coffee oils from remaining inside the machine until the next day.
Once the coffee maker cools, remove the used paper filter and grounds. Empty and rinse the carafe, then wash the brew basket, reusable filter, and lid if the manufacturer identifies them as washable.
Use warm water, mild dish soap, and a soft sponge. Rinse each component thoroughly so no soap remains, then allow the parts to dry before returning them to the machine.
Wipe coffee drips from the warming plate and surrounding exterior with a damp cloth. Apply the water to the cloth rather than pouring or spraying it directly onto electrical components.
How to Clean the Coffee Carafe
The carafe often develops a brown film when coffee remains inside for several hours or when the pot receives only a quick rinse after use.
Start by washing the carafe with warm water, mild dish soap, and a non-abrasive sponge. Pay attention to the pouring lip, underside of the lid, handle connection, and corners where coffee may collect.
For a stubborn stain, add warm water and a small amount of baking soda to the carafe. Allow it to sit briefly, then clean the surface gently with a soft sponge or bottle brush. Rinse several times before using the carafe again.
Avoid sudden temperature changes with a glass pot. Do not pour cold water into a hot carafe because thermal shock may crack the glass.
Cuisinart recommends washing the carafe and filter basket with warm soapy water and identifies a baking soda paste as an option for deeper carafe stains.
How to Clean the Brew Basket and Reusable Filter
The brew basket and reusable filter come into direct contact with wet coffee grounds and oils. When residue remains in the small openings, it may interfere with drainage or carry an old flavor into the next pot.
Remove both parts according to the manual. Empty all loose grounds, rinse the pieces, and wash them with warm water and mild dish soap.
Use a soft brush to reach mesh, corners, or narrow openings without bending or puncturing the filter. Rinse carefully and allow the components to dry completely.
Check whether the manufacturer allows dishwasher cleaning. A removable part may look dishwasher-safe but still require hand washing, so rely on the model instructions rather than appearance.
How to Clean the Water Reservoir
Empty standing water when the coffee maker will not be used for an extended period. A removable reservoir can usually be washed more thoroughly than a fixed one, but the correct method depends on the machine.
When the reservoir is removable and washable, use mild soap, warm water, and a soft cloth. Rinse it well so no detergent remains.
For a fixed reservoir, wipe only the accessible areas with a clean damp cloth. Do not pour dish soap directly into the internal water system unless the manufacturer specifically instructs you to do so.
Avoid using baking soda in a non-removable reservoir because undissolved particles may remain inside the machine. Baking soda is better suited to accessible surfaces such as the carafe.
How to Clean a Drip Coffee Maker with Vinegar
White vinegar can help remove mineral deposits from many traditional drip coffee makers, but the correct water-to-vinegar ratio varies by brand and model.
Before starting:
Empty the carafe.
Remove the coffee grounds.
Wash the basket.
Remove a charcoal water filter when the manual requires it.
Check that the manufacturer permits vinegar.
Fill the reservoir with the recommended vinegar-and-water solution. Place the empty carafe beneath the basket and run the machine without coffee grounds.
Some models complete the process in one cleaning cycle. Others instruct the user to pause halfway, allow the solution to sit, and then finish the cycle.
Afterward, empty and rinse the carafe. Fill the reservoir with clean water and run one or more full brewing cycles until the vinegar smell disappears.
Cuisinart’s official coffee maker cleaning guide recommends checking the individual manual because its models may use different vinegar ratios and cleaning functions. The company also recommends running a fresh-water cycle after descaling.
Can You Use Undiluted Vinegar?
Do not assume that stronger vinegar will provide better results. Undiluted vinegar may leave a powerful odor and may not match the manufacturer’s instructions for the machine.
Some coffee makers use a three-parts-water-to-one-part-vinegar mixture, while others use different amounts. Certain manufacturers prefer a dedicated descaling solution instead.
Follow the instructions for the exact machine rather than applying a universal ratio from a general cleaning article. This is particularly important for machines with filters, sensors, pumps, specialized tubing, or built-in cleaning programs.
How to Clean a Coffee Maker Without Vinegar
Some people dislike the smell of vinegar, while some manufacturers recommend a branded descaling product instead.
To clean a coffee maker without vinegar, use the descaling solution listed in the appliance manual. Measure and dilute the product exactly as directed, run the required cleaning cycle, and complete all recommended rinsing cycles.
Do not replace a commercial descaler with lemon juice, citric acid, bleach, dishwashing liquid, or baking soda unless the manufacturer approves that substitute.
Baking soda can help clean an accessible carafe, but running it through internal tubing may leave particles behind when it does not dissolve completely.
The safest vinegar-free option is the product and method approved for the specific coffee maker.
How to Clean a Single-Serve Coffee Maker
Single-serve brewers include components that differ from a traditional drip machine. These may include a pod holder, entrance needle, exit needle, removable drip tray, water reservoir, and replaceable water filter.
Unplug the brewer and allow it to cool. Remove and wash the drip tray, reservoir, lid, and pod holder when the manufacturer permits it.
Coffee grounds may collect around the pod holder and needles. Follow the manual’s procedure carefully because these needles are sharp and may require a special maintenance tool.
Descale the internal water system according to the brewer’s instructions. Keurig states that descaling removes calcium deposits from parts that come into contact with water and provides model-specific procedures for activating the correct descaling cycle.
Avoid copying the button sequence from a different brewer. Even machines from the same company may use different controls and descaling modes.
How to Clean a Coffee Maker with a Grinder
A grind-and-brew coffee maker requires additional care because coffee oils and fine grounds may remain inside the grinder, chute, and basket.
Unplug the machine before cleaning the grinder area. Remove loose grounds using the brush supplied with the appliance or another manufacturer-approved tool.
Do not introduce water into a grinder unless the manual identifies the component as removable and washable. Moisture inside the grinding mechanism may cause grounds to clump or affect electrical parts.
Wash the removable brew basket and carafe separately, then clean and descale the brewing system according to the model instructions.
How to Remove Coffee Odors
Old coffee smells often come from damp grounds, residue inside the basket, coffee left in the carafe, or spills on the warming plate.
Empty the grounds immediately after brewing and wash all removable coffee-contact components. Clean beneath the filter basket and around the carafe lid, where residue may remain less visible.
A small amount of baking soda can help deodorize a washable carafe, but rinse it thoroughly afterward.
Avoid masking the smell with perfume, essential oils, or heavily scented cleaners. Any product used on coffee-contact surfaces should rinse away completely.
Signs Your Coffee Maker Needs Descaling
A calendar provides a useful reminder, but the way the machine operates may also indicate mineral buildup.
Common signs include:
Brewing takes longer than usual.
The machine produces less coffee than expected.
Water flow appears uneven.
The brewer makes unfamiliar sounds.
A clean or descale indicator appears.
Coffee develops an unusual flavor despite fresh grounds.
White mineral residue appears around accessible water-contact areas.
These signs may have causes other than scale. Stop using the machine and contact the manufacturer when you notice leaking, electrical odors, sparks, damaged wiring, or repeated error messages.
How Often Should You Clean a Coffee Maker?
Clean the carafe, filter basket, lid, and reusable filter after each use or according to the appliance manual. Wipe the warming plate and exterior whenever you notice drips or loose grounds.
Descaling frequency depends on water hardness, brewing frequency, the machine’s design, and whether it uses a water filter. Cuisinart recommends descaling some machines every one to three months depending on water hardness, while Mr. Coffee advises cleaning selected models every 40 to 80 brewing cycles. Keurig commonly recommends descaling supported brewers every three to six months or when the descale indicator appears.
These schedules are general brand guidance, not universal rules. Follow the manual and indicator lights for the specific model.
Common Coffee Maker Cleaning Mistakes
Avoid these mistakes when cleaning or descaling the machine:
Starting before the coffee maker cools.
Immersing the electrical base or power cord in water.
Running dish soap through the internal brewing system.
Using vinegar without checking the manual.
Forgetting to remove the water filter before descaling.
Brewing coffee before completing the rinse cycles.
Scrubbing the carafe with steel wool.
Cleaning grinder components with water when they are not washable.
Returning wet parts to the machine.
Ignoring a persistent leak or electrical smell.
A cleaning method should match both the type of machine and the manufacturer’s recommendations.
Keep the Complete Coffee Station Cleaner
Cleaning the brewer is easier when the surrounding coffee station also receives regular attention. Grounds may spread across countertops and floors, while coffee, milk, sweeteners, and water may leave sticky marks on cabinet fronts, handles, and nearby appliances.
BA House Cleaning’s Recurring Cleaning Services help Oakland and East Bay homeowners maintain kitchens and other frequently used areas through weekly, biweekly, or monthly appointments. The service page states that standard cleaning can include kitchen counters, sinks, appliance exteriors, stovetops, floors, and other routine household surfaces.
Professional house cleaning does not replace the internal maintenance required by the coffee maker’s manufacturer. It can, however, help keep the surrounding kitchen cleaner and reduce the everyday buildup that develops around a busy coffee station.
Five Habits That Make Coffee Maker Cleaning Easier
A consistent routine prevents small spills and loose grounds from turning into stubborn buildup:
Empty grounds after brewing: Remove the used filter and wet coffee grounds instead of leaving them inside the basket for several hours.
Wash coffee-contact parts regularly: Clean the carafe, lid, filter basket, and reusable filter according to the manufacturer’s instructions.
Wipe spills while they are fresh: Allow the warming plate to cool, then remove coffee drips before heat causes them to dry onto the surface.
Follow a descaling schedule: Use the appliance manual, water hardness, brewing frequency, and descale indicator to decide when the internal system needs attention.
Complete every rinse cycle: After using vinegar or descaling solution, run the required fresh-water cycles before brewing coffee again.
These habits create a simpler coffee maker cleaning routine and help keep the brewer, carafe, and surrounding coffee station easier to manage.
Start Every Morning with a Cleaner Kitchen
A clean coffee maker supports a fresher morning routine, but it represents only one small part of the kitchen. Counters, floors, cabinet fronts, sinks, and frequently touched surfaces also require consistent attention throughout the week.
Connect with BA House Cleaning on Facebook to learn more about dependable home cleaning in Oakland and the East Bay. Build a recurring schedule that keeps your kitchen and living spaces cleaner, more comfortable, and ready for everyday use.
Frequently Asked Questions
What is the best way to clean a coffee maker?
Wash the removable coffee-contact parts with warm water and mild dish soap, wipe the exterior, and descale the internal water system according to the manufacturer’s instructions. The correct descaling solution and frequency depend on the model.
Can I clean a coffee maker with vinegar?
Many drip coffee makers allow diluted white vinegar, but not every machine follows the same ratio or procedure. Check the manual before adding vinegar to the reservoir, then complete all required fresh-water rinses.
How do I descale a coffee maker?
Empty the machine, remove filters when instructed, add the approved descaling solution, and run the designated cleaning or brewing cycle. Rinse the reservoir and complete the recommended water-only cycles afterward.
How often should I descale my coffee maker?
The schedule depends on the model, water hardness, and brewing frequency. Some manufacturers recommend every one to three months, while others recommend every three to six months or when a descale light appears. Follow the manual for the specific brewer.
Can I use baking soda to clean a coffee maker?
Baking soda can help clean stains and odors from an accessible carafe. Avoid running it through internal tubing unless the manufacturer specifically approves the method, because undissolved material may remain inside the machine.
How can I clean a coffee maker without vinegar?
Use the branded or manufacturer-approved descaling solution listed in the manual. Follow the dilution, cycle, and rinsing instructions exactly.
Why does my coffee taste bitter after cleaning the machine?
Cleaning solution may remain inside the water system when the machine has not completed enough rinse cycles. Run the manufacturer-recommended fresh-water cycles and wash the carafe and filter basket again before brewing.
Should I wash the coffee carafe after every use?
Regular washing helps remove coffee oils and prevents stains from building up. Use warm water, mild dish soap, and a soft sponge unless the manufacturer provides different instructions.
Can coffee maker parts go in the dishwasher?
Some carafes, lids, reservoirs, and filter baskets are dishwasher-safe, while others require hand washing. Check the manual before placing any removable component in the dishwasher.
Why is my coffee maker brewing slowly?
Mineral buildup may restrict water flow, but slow brewing can also have other causes. Descale the machine according to its instructions. Contact the manufacturer if the problem continues after cleaning.
Mildew often begins as a small patch near a shower, window, sink, or another damp surface. At first, it may look like a minor cleaning problem. However, wiping away the visible mark does not always solve the underlying cause. If moisture remains, the same patch can return within days or weeks.
Learning how to get rid of mildew requires two important steps. First, you need to clean the affected surface safely. Second, you must reduce the moisture that allowed the growth to develop. Skipping either step can lead to recurring odors, stubborn stains, and new surface growth.
Oakland homes can develop mildew for several reasons. Bathrooms may stay damp after showers, condensation can collect around windows, and slow plumbing leaks may keep cabinets or walls moist. Wet towels, laundry, poor airflow, and high indoor humidity can also create suitable conditions for mildew.
BA House Cleaning helps Oakland and East Bay homeowners maintain cleaner, fresher, and more comfortable living spaces. While routine cleaning can help manage small surface-level buildup, the source of moisture must also be addressed to prevent mildew from returning.
This guide explains how to identify common mildew, clean small affected areas, protect different materials, and reduce the chance of regrowth. It also explains when professional cleaning services may help and when the situation requires a qualified mold remediation specialist instead.
What Is Mildew?
Mildew is a common name for certain types of surface-level fungal growth. People often use the word to describe flat, powdery, or patchy growth found in damp household areas. It may appear white, gray, brown, green, or dark in color.
In everyday home care, the difference between mildew and mold is less important than the moisture source. Both depend on damp conditions. Both can spread when the surface stays wet. In addition, appearance alone cannot confirm the exact species.
The National Institute of Environmental Health Sciences explains that mold is a type of fungus that thrives in wet places. Leaks, flooding, humidity, and poor ventilation can all support indoor growth. Therefore, the most effective response begins with moisture control rather than surface cleaning alone.
Mildew may grow on shower grout, window frames, painted walls, fabrics, wood, rubber seals, and other materials. Some surfaces can be cleaned successfully. However, porous materials may hold growth below the visible surface and may need replacement when the contamination is extensive.
Mildew vs. Mold: Is There a Real Difference?
Homeowners often describe a flat patch as mildew and a thicker or fuzzy patch as mold. This can be a useful visual description, but it is not a reliable diagnostic test.
Mildew usually appears to sit on the surface. It may look powdery and spread in a relatively flat pattern. Mold may appear raised, fuzzy, slimy, or irregular. Still, color and texture vary widely. Dark growth is not automatically a specific type of “toxic mold,” and light-colored growth is not automatically harmless.
For practical cleaning decisions, focus on three questions:
How large is the affected area?
What material is affected?
Is there an ongoing leak, flooding issue, or hidden moisture source?
A small patch on a hard bathroom surface may be suitable for careful household cleaning. Growth across drywall, insulation, ceiling materials, carpet padding, or HVAC components requires a different level of caution. If the moisture source is hidden, cleaning the visible area may only delay the problem.
Why Mildew Keeps Returning
The main reason mildew returns is simple: the surface remains damp. Professional cleaning services can remove visible residue and surface buildup, but the growth may return when humidity, condensation, leaks, or poor ventilation continues.
The EPA identifies moisture control as the key to managing mold. Its guidance recommends fixing leaks, cleaning hard surfaces with detergent and water, and drying everything completely. It also notes that moldy porous materials may be difficult or impossible to clean fully.
Common causes include:
Bathrooms that stay humid after showers
Kitchen steam without effective ventilation
Leaking faucets, pipes, toilets, or roofs
Condensation around windows and exterior walls
Damp laundry left in baskets or washing machines
Furniture placed tightly against a cold wall
Wet carpet, padding, or fabric that dries slowly
Indoor humidity that remains too high
The CDC recommends keeping indoor humidity no higher than 50% when possible. Air conditioning, dehumidifiers, exhaust fans, and better airflow can help maintain a drier indoor environment.
Therefore, learning how to get rid of mildew is not only about cleaning. It also requires better ventilation, property maintenance, and complete drying.
Signs You May Have a Mildew Problem
Visible spotting is the most obvious sign. However, mildew may also appear as a recurring stain or dull film that returns after normal wiping.
A persistent musty odor can also indicate damp materials or hidden growth. The smell may be stronger after the room has remained closed. In bathrooms, it may come from grout, caulk, shower curtains, bath mats, or areas behind stored products.
Other warning signs include:
Discoloration near windows or ceiling corners
Peeling paint or bubbling wall finishes
Soft or swollen drywall
Repeated condensation
Damp cabinet interiors
Staining beneath a sink
Musty towels or clothing after washing
Dark residue on appliance seals
Do not ignore water stains, even when no growth is visible. They may indicate a plumbing, roof, or condensation problem. Fixing the source early can prevent a much larger cleanup later.
Safety Steps Before You Start Cleaning
Before deciding how to get rid of mildew, assess the area honestly. Small surface patches are different from widespread growth following a leak or flood.
Protect your skin and eyes from both the growth and the cleaning product. Wear gloves and use eye protection when splashing is possible. Increase ventilation by opening a window or running an exhaust fan that vents outdoors.
Read the product label before use. Never mix bleach with ammonia or any other cleaner. The CDC specifically warns that mixing bleach with ammonia or other cleaning products can create dangerous fumes.
Keep children and pets away from the work area until the surface is clean, rinsed when required, and completely dry. Also, avoid aggressive dry brushing. It can disturb particles and spread them into the surrounding area.
People with asthma, severe allergies, chronic lung conditions, weakened immune systems, or other health concerns should avoid direct exposure and seek appropriate medical or professional guidance.
How to Get Rid of Mildew on Hard, Washable Surfaces
For a small patch on tile, glass, sealed counters, or another hard washable surface, begin with detergent and water. The goal is to remove the growth physically, clean the residue, and dry the surface thoroughly.
Follow these steps:
Improve ventilation in the room.
Put on gloves and eye protection.
Remove nearby personal items.
Apply a suitable detergent solution according to its label.
Gently scrub the affected hard surface.
Rinse if the product instructions require it.
Dry the area completely.
Correct the moisture source.
The EPA recommends scrubbing mold from hard surfaces with detergent and water, then drying the surface completely.
Avoid soaking seams, unsealed wood, drywall edges, or cracked grout. Excess liquid can move deeper into the material and create another moisture problem.
After cleaning, check the area again over the next several days. If the spotting or odor quickly returns, the visible patch may not be the full problem.
How to Get Rid of Mildew in a Bathroom
Bathrooms provide moisture, warmth, and repeated condensation. As a result, showers, grout lines, caulk, ceilings, and window frames are common problem areas.
Start by running the exhaust fan during the shower and for a reasonable period afterward. Leave the shower door or curtain open so wet surfaces can dry. Remove bottles and bath products that trap moisture against tile or tub edges.
For small patches on tile or sealed surfaces, use a product approved for that material. Scrub gently and dry the area afterward. Do not combine different cleaning agents in an attempt to create a stronger solution.
Caulk deserves special attention. Surface staining may clean up, but growth can penetrate old or damaged caulk. When discoloration remains below the surface, replacing the caulk may provide a better result than repeated scrubbing.
Check the ceiling, especially above the shower. Recurring spots can indicate poor ventilation, roof issues, or condensation on a cold surface. Cleaning alone will not correct those causes.
How to Get Rid of Mildew on Grout and Caulk
Grout is more porous than smooth tile. Therefore, it can hold moisture and discolor more easily. Start with the gentlest method suitable for the grout type and sealer.
Use a soft brush rather than a metal tool that may damage the joint. Apply the cleaner for the label’s recommended contact time, then scrub and rinse as directed. Dry the surface carefully.
When grout remains dark after cleaning, the issue may be deep staining, deteriorated sealer, or growth below the surface. Regrouting or resealing may be necessary.
Caulk can be even harder to restore. If it has separated, cracked, softened, or developed staining beneath its surface, remove and replace it after the area is fully cleaned and dried. Fresh caulk should not be applied over damp or contaminated material.
Preventive care matters. Squeegee shower walls, spread towels to dry, and avoid leaving wet bath mats against the floor.
How to Get Rid of Mildew on Painted Walls and Ceilings
Painted surfaces require caution because aggressive scrubbing can remove the finish. Before cleaning, determine whether the wall is simply spotted or whether the material feels soft, swollen, or damaged.
A small surface patch on sound, washable paint may respond to gentle detergent cleaning. Test the method in an inconspicuous area first. Use as little moisture as possible, and dry the wall promptly.
Do not paint over active mildew. New paint may temporarily hide the mark, but the problem can return through the coating. First, identify the moisture source. Then clean and dry the surface according to the material’s requirements.
If drywall has softened, crumbled, or developed widespread staining, replacement may be safer than repeated surface treatment. Porous materials can hold growth inside spaces that a cloth cannot reach.
Ceiling spots require extra investigation. Check for roof leaks, plumbing above the room, poor bathroom ventilation, or condensation. When the cause is unclear, contact an appropriate property professional.
Cleaning Mildew Around Windows
Windows often develop condensation when warm indoor air meets cold glass or frames. Water can collect along tracks, sills, seals, and nearby walls.
Begin by wiping away condensation when you notice it. Clean tracks and frames with a product suitable for their material. Then dry each groove carefully. Avoid allowing dirty water to drain into wall cavities.
Check the condition of window seals and exterior caulking. Damaged seals may allow moisture to enter. Curtains, blinds, and furniture can also limit airflow around the glass.
To reduce recurrence, improve room ventilation and monitor humidity. A small hygrometer can help you track conditions. If condensation occurs every day, the issue may require more than cleaning.
When staining extends into drywall or wood framing, ask a qualified professional to assess the moisture source.
How to Handle Mildew on Fabric, Towels, and Clothing
Fabric can develop a musty smell or spotting when it remains damp. Act quickly because growth can spread through fibers.
Take washable items outdoors or to a well-ventilated area when practical. Follow the care label and use the warmest water allowed for the fabric. Add an appropriate laundry product according to its instructions. Dry the item completely before storing it.
Do not place a still-damp item back into a closet or hamper. Clean the storage area as well, especially if it smells musty.
Some staining may remain even after the growth is removed. Delicate, valuable, or dry-clean-only items may need professional textile care. Heavily affected porous materials may not be worth saving.
Prevent future problems by moving laundry promptly from the washer to the dryer or drying rack. Allow towels to spread out instead of remaining folded while wet.
How to Clean Mildew From Wood
Wood varies greatly. Sealed wood may tolerate gentle surface cleaning, while unfinished wood can absorb moisture and growth.
First, identify the finish. Use a cleaner approved for that surface and test a small hidden area. Avoid soaking the wood. Wipe with minimal moisture and dry it immediately.
If the wood is warped, soft, deeply stained, or affected across a large area, stop treating it as a routine cleaning job. A carpenter, restoration professional, or mold specialist may need to inspect it.
Furniture placed against exterior walls may trap humid air. Leave a small gap to improve circulation. Also, avoid storing damp items in wooden cabinets or closets.
Should You Use Bleach for Mildew?
Bleach is not the automatic answer for every mildew problem. It may damage finishes, discolor materials, create irritating fumes, or fail to reach growth inside porous surfaces.
The CDC states that bleach or dish detergent may be used in some home cleanup situations. It also advises using no more than one cup of household bleach in one gallon of water and never mixing bleach with ammonia or other cleaners.
However, the product label and surface manufacturer’s guidance still matter. Never use bleach on a surface that the manufacturer warns against. Increase ventilation and wear appropriate protection.
For many small patches on hard surfaces, detergent and water, followed by complete drying, may be sufficient. The moisture source remains the most important part of the solution.
When DIY Cleaning Is Not Enough
Knowing how to get rid of mildew also means knowing when to stop. A routine house cleaning company is not the same as a licensed mold remediation or water-damage restoration specialist.
Seek specialist help when:
Growth covers a large area
The problem followed flooding or sewage
Drywall, insulation, carpet padding, or ceilings are affected
The odor persists without a visible source
HVAC systems may be involved
The material is structurally damaged
The growth returns quickly after cleaning
A resident has significant health concerns
The moisture source cannot be identified
The CDC’s disaster cleanup guidance recommends protective equipment and stresses that drying the home and removing water-damaged materials are essential after major water events.
BA House Cleaning can support routine household cleaning and maintenance. However, extensive mold, contaminated building materials, flooding, and hidden moisture require the appropriate remediation, plumbing, roofing, or restoration professional.
How Deep Cleaning Services Support Mildew Prevention
Deep Cleaning Services can help address the dirt, soap residue, dust, and buildup that collect in moisture-prone areas. A detailed visit may include closer attention to bathroom surfaces, kitchen areas, baseboards, reachable fixtures, and other locations included in the selected checklist.
However, deep cleaning does not replace leak repair, moisture testing, structural drying, or mold remediation. The service works best after the underlying moisture problem has been corrected and when the affected area is within the safe scope of routine residential cleaning.
For example, a detailed cleaning can help refresh shower surfaces, window sills, sink areas, and other reachable hard surfaces. It can also help homeowners establish a cleaner baseline for ongoing maintenance.
Discuss visible staining, odors, leaks, and damaged materials before booking. Accurate information allows the cleaning company to determine whether the request fits its service or requires a specialist.
Where Sanitizing Cleaning Services Fit Into the Process
Sanitizing Cleaning Services focuses on selected surfaces and high-touch areas according to the booked service. They should not be confused with mold remediation.
Cleaning removes dirt and organic residue. Sanitizing reduces certain microorganisms on suitable surfaces when the correct product and contact time are used. Mildew control still requires physical removal, complete drying, and correction of the moisture source.
If you request Sanitizing Cleaning Services, tell the company about delicate finishes, pets, allergies, ventilation concerns, and product preferences. The team can then explain what the service includes.
For a recurring mildew problem, start with the moisture source. Sanitizing a damp surface without correcting humidity or leaks will not prevent future growth.
Choosing Cleaning Services in Oakland for Moisture-Prone Homes
When comparing cleaning services in Oakland, choose a provider that sets realistic boundaries. A trustworthy company should not promise to solve extensive mold problems through ordinary house cleaning.
Ask what the service includes and whether the team can work safely on the affected material. Also, explain the size of the area, the location, the surface, and whether a leak has been repaired.
Professional cleaning services can help maintain kitchens, bathrooms, bedrooms, common areas, and other parts of the home. Regular care can reduce the buildup that makes damp spaces feel dirty or musty. Still, maintenance works best when ventilation and repairs keep the property dry.
Oakland homes include older properties, apartments, modern buildings, and spaces with different airflow challenges. A local provider should record access instructions, cleaning priorities, pets, and material concerns before the visit.
How to Prevent Mildew From Returning
After learning how to get rid of mildew, prevention becomes the next priority. A clean surface will not stay clean if moisture continues.
Keep Humidity Under Control
Use a dehumidifier or air conditioner when indoor humidity remains high. The CDC recommends keeping humidity no higher than 50% when possible.
Improve Ventilation
Run bathroom and kitchen exhaust fans that vent outdoors. Open windows when weather and security allow. Keep interior doors open when better airflow is needed.
Fix Leaks Promptly
Repair dripping faucets, pipe leaks, roof problems, and damaged seals. After repairs, dry the affected material completely.
Dry Wet Items Quickly
Spread towels, bath mats, and cleaning cloths so they can dry. Move laundry out of the washer promptly. Do not store damp items inside closets or cabinets.
Reduce Condensation
Wipe window condensation and improve airflow around exterior walls. Avoid placing large furniture tightly against cold surfaces.
Maintain a Regular Cleaning Routine
Routine cleaning removes soap film, dust, and organic residue from moisture-prone surfaces. It also makes new discoloration easier to notice.
Inspect Hidden Areas
Check under sinks, behind appliances, inside cabinets, and around toilets. Early detection can prevent a small leak from becoming a larger problem.
Why Oakland Homeowners Choose BA House Cleaning
BA House Cleaning helps local homeowners maintain cleaner, more comfortable living spaces through organized residential cleaning options.
Cleaning Plans Based on Your Home
Customers can share priorities, surface concerns, pets, entry instructions, and rooms that need extra attention before the visit.
Detailed Service Options
Homeowners can choose ongoing cleaning, Deep Cleaning Services, Sanitizing Cleaning Services, move-related care, and other available solutions based on their needs.
Local Oakland Experience
A local team understands the scheduling, parking, access, and layout differences found across Oakland and the East Bay.
Clear Service Boundaries
Responsible cleaning services should explain what routine cleaning can handle and when water damage, structural issues, or extensive mold require a specialist.
Support Beyond the Cleaning Visit
Customers can contact the company about scheduling, service questions, updates, or concerns rather than depending only on one cleaner.
BA House Cleaning is a practical choice when you want help maintaining moisture-prone rooms after leaks and ventilation problems have been addressed. The team can provide regular cleaning within the agreed scope while you focus on keeping the home dry.
Create a Cleaner, Drier Home With BA House Cleaning
Mildew is easier to manage when you respond early. Clean small surface areas safely, dry them completely, and correct the source of moisture. If the affected material is porous, damaged, widespread, or connected to flooding, contact a qualified specialist rather than relying on household cleaning alone.
Once the property is dry and the problem falls within routine cleaning, BA House Cleaning can help you maintain kitchens, bathrooms, bedrooms, and shared areas. Choose the service level that matches the condition of your home and share any problem areas before the appointment.
Send BA House Cleaning a message on Facebook to describe your cleaning priorities and explore a suitable service for your Oakland home. Build a routine that keeps moisture-prone spaces cleaner, easier to inspect, and more comfortable throughout the year.
Frequently Asked Questions
What Is the Fastest Way to Remove Mildew?
For a small patch on a hard, washable surface, use a suitable detergent, scrub gently, and dry the area completely. Also, fix the moisture source. Fast surface cleaning will not prevent regrowth when the area stays damp.
Can I Permanently Remove Mildew?
You can remove many small surface patches, but lasting control depends on moisture. Repair leaks, improve ventilation, reduce humidity, and dry wet materials quickly.
Is Mildew the Same as Mold?
Mildew is a common term for certain surface-level fungal growth and is generally treated as a type of mold. Appearance alone cannot reliably identify the exact species.
Can Vinegar Remove Mildew?
Some homeowners use vinegar, but official guidance commonly emphasizes detergent and water for hard surfaces. Always follow surface and product instructions, and never mix cleaning chemicals.
Does Bleach Kill Mildew?
Bleach may be suitable in some situations, but it is not appropriate for every material. Never mix it with ammonia or other cleaners. Follow the label and use proper ventilation.
Why Does Mildew Keep Returning in My Bathroom?
The bathroom may remain humid after showers, have weak ventilation, or contain damp grout and caulk. Run the exhaust fan, dry surfaces, and check for leaks or condensation.
Can I Paint Over Mildew?
No. Painting may hide the spot temporarily, but it does not solve active growth or moisture. Clean and dry the area first, then correct the cause before repainting.
When Should I Throw Away a Moldy Item?
Porous materials may be difficult to clean when growth penetrates deeply. Heavily affected carpet padding, ceiling tiles, insulation, or damaged drywall may require removal. Seek specialist advice for extensive contamination.
Can Professional Cleaning Services Remove All Mildew?
Routine cleaning services may clean small reachable surface areas within their scope. They do not replace mold remediation, structural drying, plumbing repair, or water-damage restoration.
How Can I Stop Mildew in Closets?
Keep clothing dry, improve airflow, avoid overpacking, and monitor humidity. Do not place damp shoes, towels, or laundry inside. Check nearby walls and floors for hidden leaks or condensation.
Let’s be honest: the term “spring cleaning” often evokes groans and memories of backaches. However, what if your home wasn’t just cleaned seasonally, but maintained as a healthy, year-round sanctuary? Enter the “home clean” philosophy—a concept that goes beyond spotless surfaces and taps into the powerful connection between a tidy space and a healthier, happier you.
Think about it: your home is your sanctuary. It’s a place where you rest and recharge. But when clutter and dust take over, this haven can transform into a source of stress, allergies, and illness. It’s time to take back control and create a healthy space. Let’s explore the key health reasons why making your home clean today is the ultimate act of self-love.
How a Tidy Home Can Keep Germs at Bay
We all know a clean home feels good, but it also plays a crucial role in maintaining your family’s health. By keeping your home clean, you can reduce the presence of harmful germs, thus creating a healthier environment for everyone.
Germs Everywhere!
Every surface and corner in your home is a potential breeding ground for germs. From common cold viruses to foodborne bacteria, germs can thrive on doorknobs, light switches, countertops, and even your favorite throw blanket.
Cleaning to the Rescue
The good news is that cleaning doesn’t have to be overwhelming. By adopting a few simple habits, you can significantly reduce the number of germs in your home:
Declutter regularly: Clutter provides more places for germs to hide. Remove unnecessary items and organize your belongings, making cleaning easier and more effective.
Wipe down high-touch surfaces: Doorknobs, light switches, faucet handles, and remote controls collect germs easily. Clean them daily with a disinfectant wipe or solution.
Don’t forget the floors: Regular sweeping or vacuuming, especially in high-traffic areas, reduces dust and germs. Use a mop with disinfectant for a deeper clean.
Wash linens and bedding: Germs can live in your sheets and pillowcases. Wash them weekly in hot water to remove bacteria and allergens.
Keep the kitchen spotless: Food spills attract not only germs but pests too. Disinfect countertops, appliances, and the inside of your fridge regularly.
Manage moisture: Damp areas promote mold and mildew, which can worsen respiratory conditions. Use fans and exhaust vents to control moisture in bathrooms and kitchens.
Beyond Germ Warfare
A clean home isn’t just about keeping germs at bay. It can also improve your overall well-being:
Reduced stress: Cluttered spaces increase stress. A clean, organized home promotes calm and peace of mind.
Improved sleep: Sleeping in a clean bedroom has been shown to enhance sleep quality. Fewer allergens in the air contribute to better rest.
Boosted productivity: A tidy workspace helps you focus. Keeping work areas clean boosts productivity and efficiency.
The Mental Health Benefits of a Clean Space
It’s no secret that a messy home can be mentally draining. Shoes scattered across the floor, dishes piling up, and clutter in every corner can overwhelm your mind. But did you know that a clean home can significantly improve your mental well-being?
A tidy home isn’t just about looking good—it creates a sanctuary for your mind. Here are some of the ways making your home clean can benefit your mental health:
Reduced Stress and Anxiety
Clutter often reminds us of unfinished tasks. This can lead to feelings of anxiety and overwhelm. A clean, organized space, however, provides a sense of order and calm, helping to reduce stress.
Improved Focus and Productivity
When your environment is cluttered, distractions are everywhere. This makes it hard to focus. A clean space, on the other hand, helps you stay focused on tasks and boosts productivity.
Enhanced Mood and Self-Esteem
Living in a clean and organized environment boosts self-esteem and confidence. A tidy space promotes positive feelings, making you feel accomplished and more at ease in your own home.
Better Sleep
A messy bedroom can make it difficult to sleep. Clutter disrupts relaxation, while a clean bedroom fosters a calming atmosphere that encourages better sleep.
Increased Sense of Control
A cluttered home can make you feel like you’re losing control. By cleaning and organizing, you regain control over your space, which boosts feelings of empowerment and satisfaction.
Create a Calm and Serene Sanctuary in Your Bedroom
The bedroom is your personal haven, a place to rest and unwind. But with clothes, work, and general chaos, it can easily become cluttered. Here’s how you can transform your bedroom into a peaceful retreat:
Step One: Declutter and Cleanse
Start with a deep decluttering session. Sort through your belongings, getting rid of items you no longer need. Once the clutter is gone, give your room a thorough clean—dust surfaces, vacuum, and tackle forgotten corners. A clean bedroom is a peaceful bedroom.
Step Two: Embrace Softness and Serenity
Choose soft, calming colors like pale blues, lavenders, and sage greens for your walls and decor. Add cozy textures with plush blankets and pillows. Let natural light fill the room, and consider adding warm, soft lamps for evening relaxation.
Step Three: Banish Electronics
The blue light from screens disrupts your sleep. Keep electronics out of your bedroom and replace them with relaxing activities such as reading or meditation.
Step Four: Add Nature’s Touch
Bring the outdoors inside with plants. Low-maintenance plants like succulents or snake plants not only add beauty but also improve air quality and mood. Place them near windows, bedside tables, or hang them from the ceiling.
Step Five: Personalize Your Sanctuary
Surround yourself with meaningful items. Display artwork, photos, or elements from your favorite hobbies to make the space uniquely yours. A personalized bedroom is a space that feels both comforting and inspiring.
Breathe with Confidence with BA House Cleaning Experts
Imagine stepping into a sparkling clean home. Surfaces gleam, the air feels fresh, and a wave of calm washes over you. BA House Cleaning Experts are committed to making this a reality.
A clean home is more than just tidy—it’s a healthy home. Our professional cleaning services provide:
Deep Cleaning Expertise: We don’t just dust and mop; we focus on tough-to-reach areas where dirt and allergens hide.
Eco-Friendly Products: We use non-toxic, biodegradable cleaning products, safe for your family and pets.
Customized Cleaning Plans: We understand every home is unique. We tailor our cleaning services to your needs.
Reliable and Trustworthy: Our trained and insured team gives you peace of mind while we work.
The benefits of a truly clean home with BA House Cleaning go far beyond just looking good:
Improved Health: Reduced allergies, asthma triggers, and germs lead to a healthier family.
Enhanced Well-Being: A clean space promotes relaxation and reduces stress.
Increased Productivity: A clean, organized home helps you stay focused and productive.
Higher Property Value: A clean, well-maintained home adds value and appeal.
Let BA House Cleaning Be Your Seasonal Wellness Partner
As the seasons change, so should your approach to home cleaning. Embrace the “home clean” philosophy all year round. It’s not just about aesthetics—it’s about creating a living space that supports your well-being through every season.
Spring Awakening: As the weather warms, open windows and let in fresh air. Don’t forget to deep clean to remove hidden allergens and pollutants.
Summer Sun: Long, relaxing days at home are more enjoyable in a clean space that promotes calm and relaxation.
Autumnal Bounty: A clean home enhances gatherings with loved ones and sets the stage for joyful memories.
Winter Warmth: Cozy up in a clean and clutter-free space, free from the grime and dust of colder months.
BA House Cleaning ensures your home is a sanctuary of cleanliness and comfort through every season.
Making “Home is Clean” a Reality
Ready to transform your home and well-being? Partner with BA House Cleaning to experience the transformative power of a clean home. We offer flexible scheduling, customized cleaning plans, and competitive pricing to fit your needs.