Search their name on Google + city they live in. Are they professional? (Note: Any criminal record found, pictures smoking or any other unprofessional type of information found online disqualifies them)
Rugs are a great piece of decoration. They can give an elegant and colorful appearance to every room. And, as any other implement in your house, it needs care, cleaning and (sometimes) emergency actions to save their beauty.
Rugs are an essential part of any home décor, adding warmth, texture, and style to your living spaces. However, over time, rugs can accumulate dirt, dust, and stains, making them look dull and lifeless. Regular vacuuming can only do so much; deep cleaning is often necessary to restore your rugs to their former glory.
Rug care is determined by size, construction, and material. However, the first step to have is to limit how much dirt gets into the rug and then to procure a frequent cleaning process.
As with any carpet, if the rug covers a larger area, vacuum it regularly. If a rug is reversible, vacuum both sides. This removes grit and grime that can wear out your rug prematurely. Take care to not vacuum the fringe of your rug.
Remember that sometimes, vacuums leave pet hair behind. You can use a stiff brush to remove the hair, brushing in the direction of the nap of the rug.
Take it out
If the rug is small enough, you can take it outside and shake it or beat it vigorously to remove dirt and grit. This is recommended for large rugs as well, because the dust that collects in them may contribute to health problems—particularly asthma.
Cleaning according to your rug’s type
Woven or braided rugs
Check rugs for stitching breaks before and after cleaning.
Check labels to determine whether small braided rugs are washable.
If they are, place them in a zippered pillowcase or mesh laundry bag. Wash in cool water on a gentle cycle, rinsing thoroughly. Tumble dry on a low setting.
Place large braided rugs on a vinyl or concrete floor or place an old blanket beneath them.
Sponge commercial carpet-cleaning foam over the surface and rub it in according to the product directions. Finish by rinsing or vacuuming. Dry thoroughly before replacing the rug on the floor.
Oriental rugs, handmade, hand-knotted or antique
Vacuum a new Oriental rug as you would carpet and wool area rugs.
Use special care with delicate vintage or antique rugs.
Protect them from the vacuum by placing a piece of nylon screen over the rug and weighting it down with books or bricks.
Vacuum over the screen.
Have these rugs professionally cleaned once a year?
Coir, sisal, rush, and grass rugs
Vacuum frequently, removing the rug occasionally to vacuum the floor, as well.
Many of these rugs are reversible; if so, flip them every time you vacuum for even wear.
To clean stains or discolorations on a room-size natural-fiber rug, leave it in place.
Protect the floor beneath it with a plastic drop cloth and towel.
Scrub the stains with a soft brush dipped in soapy water. Rinse with clear water.
Place a towel over the wet area.
Blot the cleaned spot as dry as possible.
Use a portable fan or hair dryer to speed drying.
Move small rugs to a protected table or counter to clean. Water weakens the fibers, so work quickly and dry thoroughly to extend the life of these rugs.
Fur, sheepskin, and hair-on hides
Shake unscented talcum powder on fur, sheepskin, and hair on hide rugs and leave for several hours.
Brush the talcum powder through the hair, then shake it out. Repeat this process several times, depending on the length of the fur.
To clean the back of such a rug, use a clean cotton cloth dipped in lukewarm soapy water. Wipe off any dirt or spills.
Rinse with a cloth dipped in clean water and allow it to dry completely before putting it back in place.
Emergency actions: stains removal
There are a lot of causes for stains, and we can provide some emergency actions to remove them:
Alcohol and soft drinks: Use a solution of 1 teaspoon liquid dish detergent, 1 quart of warm water, and 1/4 teaspoon of white vinegar. Apply to the stain, rinse, then blot dry.
Coffee or tea: Using the detergent mix above, apply to stain, rinse, and blot. If a stain remains, use a commercial spot carpet cleaner.
Fat-based stains: For foods such as butter, margarine, or gravy, use a dry-solvent spot carpet cleaner.
Gum: Peel off what you can, then put ice cubes in a plastic bag and harden the gum, scraping the gum off with a spoon or dull knife. Vacuum and use a dry-solvent spot cleaner if needed.
Melted wax: Use the same treatment as gum, hardening it with ice cubes in a plastic bag and scraping. Dampen a clean white cloth or cotton ball with rubbing alcohol and blot to remove any remaining wax.
Paint: For acrylic and latex paint, while the stain is still wet, spot-clean with the detergent solution. If color remains, dab it with rubbing alcohol. For oil-based paint, sponge with odorless mineral spirits, being careful not to soak through to the backing.
Tomato sauce: Sponge with cool water, dab with detergent solution, or a citrus-oxygen cleaner. Rinse with a solution of 1 cup white vinegar and 2 cups of water and blot until dry.
Urine, feces, and vomit: Apply detergent solution or a citrus-oxygen cleaner, rinse, and blot until dry.
Extra tips
Foot traffic, sun, and other factors used to wear the fabric of your rugs. Turn them once or twice a year to even out the wear.
Some natural fiber rugs are constructed in squares that are sewn together. Buy a few extra squares or a smaller size of the same rug. If a rug square becomes irrevocably stained, clip the threads that hold it in place and replace it with a new square. Hand-stitch it in place with heavy-duty carpet threads.
Why Professional Rug Cleaning Matters
Rug cleaning is not just about aesthetics; it’s also about maintaining a healthy home environment. Dust mites, allergens, and other contaminants can get trapped in rug fibers, posing a risk to those with allergies or respiratory sensitivities. Professional rug cleaning effectively removes these harmful particles, creating a cleaner and healthier indoor environment.
BA House Cleaning: Your Rug Cleaning Experts
At BA House Cleaning, we understand the value of your rugs and are committed to providing the highest quality rug cleaning services in Oakland and the East Bay Area. Our team of experienced professionals is trained to handle a wide variety of rugs, from delicate silk rugs to durable wool rugs. We use specialized cleaning techniques and eco-friendly solutions to ensure that your rugs are thoroughly cleaned without damaging their fibers or colors.
Our Rug Cleaning Process
Inspection and Assessment: We begin by carefully inspecting your rug to determine its material, construction, and any potential issues.
Dust and Dirt Removal: We use high-powered vacuuming equipment to remove loose dirt, dust, and debris from the rug’s surface.
Pre-treatment: We apply specialized pre-treatment solutions to target specific stains and areas of heavy soiling.
Deep Cleaning: We deep clean your rug using our gentle yet effective cleaning methods, ensuring that all dirt, dust, and stains are thoroughly removed.
Rinsing and Drying: We thoroughly rinse your rug to remove any cleaning residue, and then carefully dry it to prevent mold or mildew growth.
Finishing Touches: We perform a final inspection to ensure your rug is spotless and looking its best.
Experience the Difference with BA House Cleaning
When you choose BA House Cleaning for your rug cleaning needs, you can expect:
Expert rug care: Our team is trained to handle a wide range of rugs, from delicate to durable.
Eco-friendly cleaning: We use eco-friendly solutions to protect your rugs and the environment.
Convenience: We offer pick-up and delivery services for your convenience.
Satisfaction Guarantee: We stand behind our work and offer a satisfaction guarantee.
Do you know any other way of cleaning rugs that we haven’t covered? Please let us know!
At BA House Cleaning, we realize that cleaning can be a stressful process especially when you have your hands full with what feels like a million other things. An investment in a professional cleaning service is truly worth it. Freeing up yourself from cleaning so that you can focus on your life and/or business is money well spent, every time.
In today’s fast-paced world, it can be difficult to find the time and energy to keep your home clean. That’s where professional cleaning services like BA House Cleaning come in. We offer a variety of cleaning services to meet your needs, from general cleaning and deep cleaning to move-in/move-out cleaning and window cleaning.
Benefits of Using a Professional Cleaning Service There are many benefits to using a professional cleaning service. Here are just a few:
Frees up your time: You can spend your free time doing the things you enjoy instead of cleaning your home.
Improves your health: A clean home can help to reduce the spread of germs and allergens.
Increases your property value: A clean home can make your property more appealing to potential buyers.
Reduces stress: A clean home can help you to feel more relaxed and at ease.
Why Choose BA House Cleaning?
When you choose BA House Cleaning, you can be confident that you are getting the best possible service. We are a team of experienced and professional cleaners who are dedicated to providing our customers with the highest quality of service. We are also fully insured and bonded.
Here are just a few of the reasons why you should choose BA House Cleaning:
We are experienced: We have been in business for over 10 years and have a proven track record of success.
We are reliable: We will show up on time and complete our work to your satisfaction.
We are affordable: We offer competitive rates and flexible scheduling.
We are eco-friendly: We use green cleaning products whenever possible.
We are customer-focused: We are committed to providing our customers with the best possible service.
Dealing with Real Estate?
Then it’s the Perfect Time to opt for a Professional Cleaning Service
Increasingly, everyone from realtors to home sellers and buyers is seeing the benefits of having their homes professionally cleaned, and it is easy to understand why. A professional cleaning service like BA House Cleaning knows what it takes to not just clean a home, but to make it look very presentable as well.
Stress Can Impair the Decision-Making Process
Any step that you can take to reduce your stress levels is a savvy move. Why? High-stress levels will impact your life and your job performance in ways both large and small. Stress can sneak up on you and impact your life and your health without you even realizing it.
Stress can impair decision making which is, of course, the last thing you need when you are dealing with real estate. The bottom line is that for most people buying or selling a home marks one of the largest financial transactions that they will ever make, period.
If you are buying or selling, you need to focus on the real estate process and not get distracted by stressful factors outside of your area of expertise. Our experienced team has the right tools and an established system for handling all kinds of homes.
What you see around your house that you find stressful or problematic will likely just be quite normal to us! After all, cleaning is what we do for a living! But it isn’t what you do for a living. As a result, our team won’t experience the kind of stress that you are likely to feel about issues like dust, dirt, and mold. For us, it’s just “another day at the office.”
Stress Can Lead to Medical Problems
It is difficult to overstate how important it is to avoid stress. Medical science has firmly established that stress can literally shorten our lives and even damage our brains, increasing the risk of Alzheimer’s disease and other neurodegenerative conditions. Stress triggers stress hormones which, in turn, produce inflammation in the body. Inflammation is at the heart and core of a range of diseases including cancer. In short, any steps you can take to reduce your stress levels are well worth it. If you are like most people, you probably don’t like cleaning. Why not let us do the job for you?
* Always assume the sale * Use urgency words * Assume they are going to schedule (Be confident) * Don’t ask closed ended questions * Words that end with a yes or no * Ask open ended questions that makes them answer you Don’t word vomit – Less words less mistakes * Be simple and to the point * Giving too much info or asking too many questions confuses people and you will lose the sale as they become confused.
SALES SCRIPT OPENING: “Thank you for choosing BA House Cleaning this is Anita” “Great; I can definitely help you with that, may I ask whom I am speaking with? (Always ask for their name) Hi __ it’s nice to meet you, how’s your day doing so far? Absolutely. that’s what we’re here for right? __ , May I have the zip code of your property? (This will help to qualify the call) “Awesome; we service the area. Are you looking for just a one time service? or you’re looking for something that is ongoing? We do our pricing based on the square footage of your home, so How many square feet is your home?” Thank you! Let’s take a look here: For a 1 Time cleaning it will just be $280 however, if you are looking for recurring services, we do apply a $50 discount to that. And it’s a lot less for ongoing maintenance. So if you’re scheduling an ongoing service it will be only $230 and let’s say for instance you wanna do every 2 weeks following it will then be $122.5 every 2 weeks after Absolutely, let me see if when we have some availability here, let me check my schedule. So it looks like I had a cancelation for tomorrow. I don’t know if that’s too soon for you. But I can get you scheduled in there. I know we’re gonna fill that in within the next couple of hours. Oh! That’s Great! I’ll just need to get a little bit of information from you and we’ll get you all situated. Phone Number: First/Last name: Address: Email Address: Number of Bedrooms: Number of Bathrooms: Pets: Entry Access? Get the Card for billing: (If this is ONE time or Move Out Cleaning its CASH only and card is only used as a backup. If its first cleaning and then ongoing service then we can use the card. Note: For 1x cleans: Save the card as a payment method, then go back into the booking to EDIT, and change to Cash so we don’t charge the card and they pay cash as well. Note: If its ongoing cleaning and they will be paying with credit card for both first cleaning and all future, please add * next to customer last name int heir profile. Just to confirm if I have everything right.. I have your address as ____ Your email as ________ I have you down for a Top to bottom on ___ Then every four weeks after on Tuesdays. We do require all our customers to reply to our quote accepting it and I’ll email that over as soon as I get off the phone with you. We also require all our customers to read and sign our customer guidelines and I will send that over once we get off the phone as well. If you need to change or cancel any cleanings we ask that you please give us 48 hours notice so we can schedule someone else in there.
Keeping your home clean and free of grime can feel like a constant battle. No matter how often you clean, dirt and grime always seem to find a way to creep back in and take over your space. But fear not, with a few simple tips and the help of a professional cleaning service like BA House Cleaning, you can fight the grime and keep your home looking and feeling fresh.
Furniture, watch straps, any place, or utensils can become a victim of dirt and grime. Grime masks the true beauty of everything you own, and, even when frequent cleaning can avoid the “Fight the Grime” battle, sometimes you need fiercer actions to eliminate it.
General Process
A simple process works on almost every surface: apply a small quantity of regular white toothpaste to the area you want to clean, and take a soft brush a rub. Keep in mind the surface you want to clean, will it scratch? If so, rub only with your fingers.
Wipe the toothpaste with a dampened cloth.
If the grime remains, mix baking soda with a small amount of water to create a paste. Apply it as before: rubbing it on the surface you want to clean. Rinse thoroughly and allow it to dry completely.
Specific Surfaces
Even when the mentioned process works very well, sometimes we have special places we need to clean with special care.
Let’s start in the kitchen. Everything in it, especially the walls, gets a layer of cooking grease plus steam plus dust. That’s an awful combination and trying to get rid of it with regular water and soap can be unnecessarily difficult. Instead, wash the surface with white vinegar. Use a sponge to apply the vinegar and another wet sponge to rinse. Let it dry.
Say goodbye to the days of endless cleaning and hello to a sparkling, fresh-smelling home with BA House Cleaning.
We’re a team of experienced and dedicated cleaners who are passionate about transforming homes into havens of comfort and joy. Whether you’re dealing with stubborn stains, dust bunnies that have taken up residence, or a kitchen that looks like it’s been ravaged by a culinary tornado, we’re here to save the day.
With BA House Cleaning, you can expect:
Thorough and meticulous cleaning: We’ll tackle every nook and cranny of your home, leaving no surface untouched.
Eco-friendly practices: We care about the environment, so we use green cleaning products that are tough on dirt but gentle on the planet.
Flexible scheduling: We’ll fit our cleaning services into your busy life, whether you need weekly, bi-weekly, or monthly cleaning.
A team you can trust: Our cleaners are background-checked, insured, and bonded, so you can feel confident knowing your home is in good hands.
Here’s what you can expect when you choose BA House Cleaning:
Sparkling countertops and appliances: We’ll banish those stubborn grease stains and grime buildup, leaving your kitchen looking and smelling its best.
Dust-free surfaces: Say goodbye to those pesky dust bunnies that seem to multiply overnight. We’ll leave your home sparkling clean from top to bottom.
Gleaming floors: Whether it’s hardwood, tile, or carpet, we’ll get your floors sparkling and banish those dirt tracks.
Freshly scented bathrooms: We’ll eliminate those unpleasant odors and leave your bathroom smelling fresh and inviting.
Still in the kitchen, we’ve already covered how to do a deep clean in your microwave, however, here’s a fast tip: take a glass bowl, fill it up to half with equal parts vinegar and water, and put it inside the microwave. Set the time for the water to boil. Then, remove the hot bowl. All the grime inside will be softened; all you’ve to do is to clean it with a paper towel.
The kitchen garbage bin is one of the most overlooked utensils, and, because of its purpose, one of the filthiest occupants of your kitchen. Use some gloves and wash it in your bathtub. Scrub the surface with dish detergent and a nylon bristle brush. Rinse and dry with paper towels.
Now that we are in the bathroom, you might want to know how to eliminate soap residue and hard water spots in showers and on shower doors. White vinegar is your battle partner: apply it onto your shower walls and door with a sponge, rinse with clear water, and let it dry or dry it with paper towels.
Vinegar is also your ally against a dirty toilet, it will also deodorize it. Pour one cup of vinegar into the bowl and let sit overnight. Then, scrub the surface with a brush, and there you have it! All cleanliness.
Don’t let the grime and clutter control your life. Contact BA House Cleaning today and let us take care of the cleaning, so you can focus on enjoying your life.
Welcome to BA House Cleaning, your trusted service provider for all your cleaning needs. In this comprehensive guide, we will walk you through the step-by-step process to clean a bathtub. A clean and sparkling bathtub is not only visually appealing but also promotes good hygiene. With our expert tips and tricks, you’ll be able to maintain a clean bathtub effortlessly.
Before you begin the cleaning process, it’s essential to gather all the necessary supplies. Here’s a list of items you’ll need:
Rubber gloves
Baking soda
Vinegar
Dish soap
Microfiber cloth
Soft-bristle brush
Old toothbrush
Spray bottle
Step 2: Remove Debris and Pre-Treat Stains
Start by removing any debris, such as hair or soap scum, from the bathtub. Use a soft-bristle brush or your hands to collect the debris and dispose of it properly. Next, pre-treat any stubborn stains using a mixture of baking soda and water. Apply the paste to the stained areas and let it sit for a few minutes before proceeding to the next step.
Step 3: Clean the Bathtub Surface
Fill a spray bottle with equal parts of vinegar and water. Spray the solution onto the bathtub surface, focusing on the stained areas. Vinegar is a natural cleaner that effectively removes soap scum and mineral deposits. Let the solution sit for about 10 minutes to allow it to break down the grime.
Step 4: Scrub and Rinse
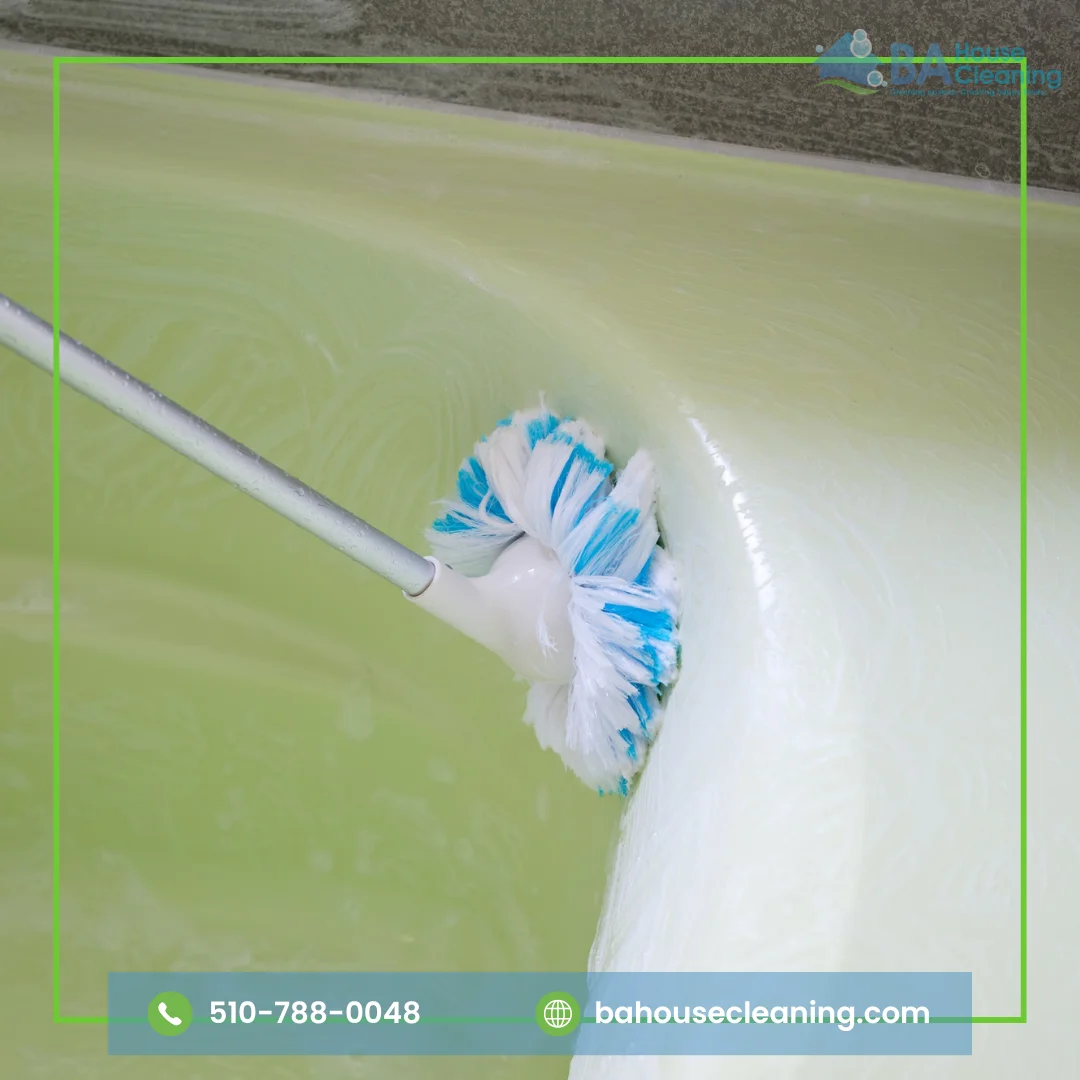
After the solution has had time to work its magic, use a soft-bristle brush or sponge to scrub the bathtub surface. Apply gentle pressure and work in circular motions to loosen the dirt and stains. For hard-to-reach corners and crevices, an old toothbrush can come in handy.
Once you’ve scrubbed the entire bathtub, rinse it thoroughly with warm water. Make sure to remove all traces of cleaning solution and residue.
Step 5: Address Tough Stains
If you encounter any tough stains that are resistant to regular cleaning methods, try using a mixture of vinegar and baking soda. Sprinkle baking soda directly onto the stain and spray vinegar over it. The mixture will create a foaming reaction that helps lift stubborn stains. Let it sit for a few minutes before scrubbing and rinsing as usual.
Step 6: Dry and Shine
After rinsing, use a clean microfiber cloth to dry the bathtub. This will help prevent water spots and keep the surface looking shiny. Wipe down all the surfaces, including the fixtures and handles.
Maintaining a Clean Bathtub
To keep your bathtub looking clean and fresh, it’s important to establish a regular cleaning routine. Here are some additional tips to help you maintain a sparkling bathtub:
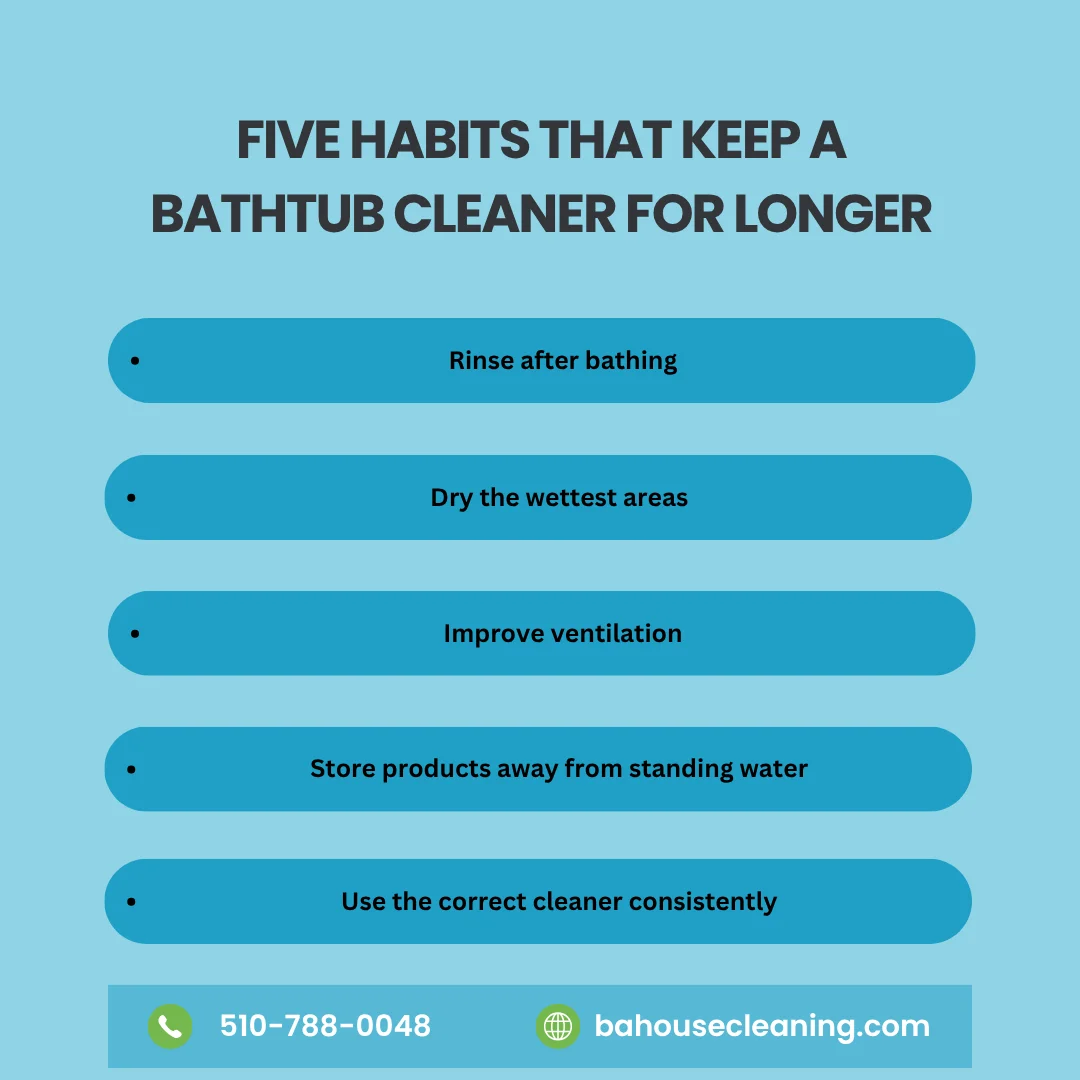
Wipe down the bathtub after each use to remove soap residue and prevent the build-up of grime.
Avoid using harsh abrasive cleaners that can damage the bathtub surface. Stick to gentle and non-toxic cleaning products.
Regularly inspect and clean the drains to prevent clogs and unpleasant odors.
Consider using a bathtub mat or non-slip strips to prevent accidents and protect the surface from scratches.
There are at least 7 key ingredients you can use to clean your bathtub
(and yes, we’re including a popular beverage):
Baking Soda: The amazing baking soda helping us again. For dirt and grease removal, apply a paste of 2 parts baking soda and 1 part hydrogen peroxide (this can be bought in pharmacies). Let the paste set for 30 minutes. Scrub with enthusiasm and rinse well.
Coke: Yes, use Coke Cola as a bathtub cleaner. This is perfect for water stains. Pour the cola directly on the area and wipe it with a rag. You can also unclog hair and debris in your pipes when you pour it down them.
Cream of Tartar: Mix cream of tartar and hydrogen peroxide in a small, shallow cup or dish. Remember that you’re creating a paste, so drip slowly the hydrogen peroxide on the cream. Apply to any stain your bathtub has and let it dry. Remove the paste with a cloth and rinse it.
Oven Cleaner: This is for hardcore stains and only for white bathtubs. Spray the stains with oven cleaner and let it sit for two hours. Rinse thoroughly.
Salt: This is a dedicated solution for the yellow spots. Mix up a solution of salt and turpentine in equal parts. Remember to use rubber gloves. Use the mix over the discoloration and then rinse.
Shampoo: Well, yes, the closest cleaning ingredient for your bathtub. This is especially useful over soap scum, just apply it over the scum and scrub it with a cloth. Rinse it clean!
Vinegar: The best friend of baking soda. This is the best way to shine back your porcelain bathtub. Use with vinegar in a cloth and scrub your bathtub then rinse with cold water. If there are stains that are really hard to remove, pour in 3 cups of white vinegar under running hot tap water. Fill the tub up over the stains and allow it to soak. Four hours should be enough. Drain the water and scrub off the stains.
These ingredients are easy to find and very effective. Do you know any other ingredient useful for maintaining a clean bathtub? Let us know!
Frequently Asked Questions
FAQ 1: How often should I clean my bathtub?
It is recommended to clean your bathtub at least once a week to prevent the build-up of grime and soap scum. However, the frequency may vary depending on usage and personal preference.
FAQ 2: Can I use bleach to clean my bathtub?
While bleach can be effective in removing stains, it is not recommended for regular bathtub cleaning. Bleach is a harsh chemical that can damage the bathtub surface and may pose health risks if not used properly.
FAQ 3: How do I remove mold and mildew from my bathtub?
To remove mold and mildew, mix equal parts of vinegar and water in a spray bottle. Spray the solution onto the affected areas and let it sit for about 15 minutes. Then, scrub the mold or mildew with a brush and rinse thoroughly.
FAQ 4: Can I use a magic eraser to clean my bathtub?
Magic erasers can be effective in removing stains and scuff marks from bathtubs. However, be cautious when using them on delicate surfaces, as they can cause abrasions or remove the finish.
FAQ 5: What should I do if my bathtub has hard water stains?
If your bathtub has hard water stains, you can use a mixture of vinegar and baking soda to remove them. Apply the paste to the stained areas, let it sit for a few minutes, and then scrub and rinse.
FAQ 6: How can I prevent my bathtub from becoming slippery?
To prevent slips and falls in the bathtub, consider using a non-slip mat or adhesive strips. These provide traction and reduce the risk of accidents.
Conclusion
A clean bathtub not only enhances the overall appearance of your bathroom but also ensures a hygienic environment. By following the step-by-step guide provided by BA House Cleaning, you can easily maintain a sparkling bathtub. Remember to establish a regular cleaning routine and use gentle cleaning products to preserve the bathtub’s surface. For any stubborn stains or professional cleaning needs, don’t hesitate to reach out to BA House Cleaning for expert assistance.
Clean your coffee maker for a fresher, delicious taste!
Sometimes we forget to clean the most useful kitchen utensils. This is (usually) the coffee maker’s destiny. If your morning coffee starts to taste bitter, or if you find strange bits of an unknown origin inside of it (coffee sediments), it’s time to clean it!
Doing this attains multiple benefits: your coffee will taste fresher, hard water spots from the carafe will be removed and stains will be a forgotten story. It will also remove mineral buildup and clean out the coffee oils that get left behind and turn rancid.
White vinegar (enough to fill up half your carafe)
Hot soapy water
Sponge
Damp dish towel
Dry dish towel
How to clean your coffee maker?
Empty and rinse the carafe and dump out any coffee grounds left in the filter—actually, you must do this regularly for better maintenance.
Fill the water chamber to its full capacity with equal parts white vinegar and water. You can use the carafe to measure equal parts of each.
Start a brew cycle. Midway through the brew cycle, turn off the coffee maker and let it sit for an hour.
After an hour, turn on the coffee maker and let the brew cycle finish.
After the brew cycle has been completed, pour out the vinegar-water solution and fill the water chamber with fresh water (no vinegar). Run a whole new brew cycle just with the water. Repeat two more times, allowing your coffee maker to cool slightly between brews.
Wipe down the exterior of your coffee maker, and wash the carafe and filter basket in hot, soapy water.
Reassemble and brew a great cup of coffee!
Extra Tips!
Dhow’s writer, Donna Porter, offers some tips for better maintenance of your coffee maker:
Put a glass marble in the water chamber to attract mineral deposits from hard water. Wash it once a week.
Instead of a pitcher, you can use the sprayer from your sink to fill the coffee maker without spilling!
Does your pot have hard-to-reach areas? Use a wooden chopstick with a paper towel to get in there.
Use a baby bottle brush inside for stubborn stains.
You can put ice cubes and a little water in a pot and swirl them around, for harder stains put some table salt in a pot and swirl it around for a few minutes, and then rinse.
Heat a toothbrush by the bristles enough that you can bend it to a 90° angle. This makes a perfect brush for cleaning the filter basket.
Never use the coffee pot to pour water into the reservoir. This will transfer oils and impurities from the pot, and eventually give the coffee a nasty taste. Instead, use a pitcher that is reserved for water only.
For tough stains, scrub the pot using a paper towel or a clean (not soapy) dish towel. Rinse thoroughly.
Never wash the coffee pot with soap. This will bind with the oils deposited by the coffee and will leave a taste behind. Do not wash in the dishwasher for the same reason.
Mildew often begins as a small patch near a shower, window, sink, or another damp surface. At first, it may look like a minor cleaning problem. However, wiping away the visible mark does not always solve the underlying cause. If moisture remains, the same patch can return within days or weeks.
Learning how to get rid of mildew requires two important steps. First, you need to clean the affected surface safely. Second, you must reduce the moisture that allowed the growth to develop. Skipping either step can lead to recurring odors, stubborn stains, and new surface growth.
Oakland homes can develop mildew for several reasons. Bathrooms may stay damp after showers, condensation can collect around windows, and slow plumbing leaks may keep cabinets or walls moist. Wet towels, laundry, poor airflow, and high indoor humidity can also create suitable conditions for mildew.
BA House Cleaning helps Oakland and East Bay homeowners maintain cleaner, fresher, and more comfortable living spaces. While routine cleaning can help manage small surface-level buildup, the source of moisture must also be addressed to prevent mildew from returning.
This guide explains how to identify common mildew, clean small affected areas, protect different materials, and reduce the chance of regrowth. It also explains when professional cleaning services may help and when the situation requires a qualified mold remediation specialist instead.
What Is Mildew?
Mildew is a common name for certain types of surface-level fungal growth. People often use the word to describe flat, powdery, or patchy growth found in damp household areas. It may appear white, gray, brown, green, or dark in color.
In everyday home care, the difference between mildew and mold is less important than the moisture source. Both depend on damp conditions. Both can spread when the surface stays wet. In addition, appearance alone cannot confirm the exact species.
The National Institute of Environmental Health Sciences explains that mold is a type of fungus that thrives in wet places. Leaks, flooding, humidity, and poor ventilation can all support indoor growth. Therefore, the most effective response begins with moisture control rather than surface cleaning alone.
Mildew may grow on shower grout, window frames, painted walls, fabrics, wood, rubber seals, and other materials. Some surfaces can be cleaned successfully. However, porous materials may hold growth below the visible surface and may need replacement when the contamination is extensive.
Mildew vs. Mold: Is There a Real Difference?
Homeowners often describe a flat patch as mildew and a thicker or fuzzy patch as mold. This can be a useful visual description, but it is not a reliable diagnostic test.
Mildew usually appears to sit on the surface. It may look powdery and spread in a relatively flat pattern. Mold may appear raised, fuzzy, slimy, or irregular. Still, color and texture vary widely. Dark growth is not automatically a specific type of “toxic mold,” and light-colored growth is not automatically harmless.
For practical cleaning decisions, focus on three questions:
How large is the affected area?
What material is affected?
Is there an ongoing leak, flooding issue, or hidden moisture source?
A small patch on a hard bathroom surface may be suitable for careful household cleaning. Growth across drywall, insulation, ceiling materials, carpet padding, or HVAC components requires a different level of caution. If the moisture source is hidden, cleaning the visible area may only delay the problem.
Why Mildew Keeps Returning
The main reason mildew returns is simple: the surface remains damp. Professional cleaning services can remove visible residue and surface buildup, but the growth may return when humidity, condensation, leaks, or poor ventilation continues.
The EPA identifies moisture control as the key to managing mold. Its guidance recommends fixing leaks, cleaning hard surfaces with detergent and water, and drying everything completely. It also notes that moldy porous materials may be difficult or impossible to clean fully.
Common causes include:
Bathrooms that stay humid after showers
Kitchen steam without effective ventilation
Leaking faucets, pipes, toilets, or roofs
Condensation around windows and exterior walls
Damp laundry left in baskets or washing machines
Furniture placed tightly against a cold wall
Wet carpet, padding, or fabric that dries slowly
Indoor humidity that remains too high
The CDC recommends keeping indoor humidity no higher than 50% when possible. Air conditioning, dehumidifiers, exhaust fans, and better airflow can help maintain a drier indoor environment.
Therefore, learning how to get rid of mildew is not only about cleaning. It also requires better ventilation, property maintenance, and complete drying.
Signs You May Have a Mildew Problem
Visible spotting is the most obvious sign. However, mildew may also appear as a recurring stain or dull film that returns after normal wiping.
A persistent musty odor can also indicate damp materials or hidden growth. The smell may be stronger after the room has remained closed. In bathrooms, it may come from grout, caulk, shower curtains, bath mats, or areas behind stored products.
Other warning signs include:
Discoloration near windows or ceiling corners
Peeling paint or bubbling wall finishes
Soft or swollen drywall
Repeated condensation
Damp cabinet interiors
Staining beneath a sink
Musty towels or clothing after washing
Dark residue on appliance seals
Do not ignore water stains, even when no growth is visible. They may indicate a plumbing, roof, or condensation problem. Fixing the source early can prevent a much larger cleanup later.
Safety Steps Before You Start Cleaning
Before deciding how to get rid of mildew, assess the area honestly. Small surface patches are different from widespread growth following a leak or flood.
Protect your skin and eyes from both the growth and the cleaning product. Wear gloves and use eye protection when splashing is possible. Increase ventilation by opening a window or running an exhaust fan that vents outdoors.
Read the product label before use. Never mix bleach with ammonia or any other cleaner. The CDC specifically warns that mixing bleach with ammonia or other cleaning products can create dangerous fumes.
Keep children and pets away from the work area until the surface is clean, rinsed when required, and completely dry. Also, avoid aggressive dry brushing. It can disturb particles and spread them into the surrounding area.
People with asthma, severe allergies, chronic lung conditions, weakened immune systems, or other health concerns should avoid direct exposure and seek appropriate medical or professional guidance.
How to Get Rid of Mildew on Hard, Washable Surfaces
For a small patch on tile, glass, sealed counters, or another hard washable surface, begin with detergent and water. The goal is to remove the growth physically, clean the residue, and dry the surface thoroughly.
Follow these steps:
Improve ventilation in the room.
Put on gloves and eye protection.
Remove nearby personal items.
Apply a suitable detergent solution according to its label.
Gently scrub the affected hard surface.
Rinse if the product instructions require it.
Dry the area completely.
Correct the moisture source.
The EPA recommends scrubbing mold from hard surfaces with detergent and water, then drying the surface completely.
Avoid soaking seams, unsealed wood, drywall edges, or cracked grout. Excess liquid can move deeper into the material and create another moisture problem.
After cleaning, check the area again over the next several days. If the spotting or odor quickly returns, the visible patch may not be the full problem.
How to Get Rid of Mildew in a Bathroom
Bathrooms provide moisture, warmth, and repeated condensation. As a result, showers, grout lines, caulk, ceilings, and window frames are common problem areas.
Start by running the exhaust fan during the shower and for a reasonable period afterward. Leave the shower door or curtain open so wet surfaces can dry. Remove bottles and bath products that trap moisture against tile or tub edges.
For small patches on tile or sealed surfaces, use a product approved for that material. Scrub gently and dry the area afterward. Do not combine different cleaning agents in an attempt to create a stronger solution.
Caulk deserves special attention. Surface staining may clean up, but growth can penetrate old or damaged caulk. When discoloration remains below the surface, replacing the caulk may provide a better result than repeated scrubbing.
Check the ceiling, especially above the shower. Recurring spots can indicate poor ventilation, roof issues, or condensation on a cold surface. Cleaning alone will not correct those causes.
How to Get Rid of Mildew on Grout and Caulk
Grout is more porous than smooth tile. Therefore, it can hold moisture and discolor more easily. Start with the gentlest method suitable for the grout type and sealer.
Use a soft brush rather than a metal tool that may damage the joint. Apply the cleaner for the label’s recommended contact time, then scrub and rinse as directed. Dry the surface carefully.
When grout remains dark after cleaning, the issue may be deep staining, deteriorated sealer, or growth below the surface. Regrouting or resealing may be necessary.
Caulk can be even harder to restore. If it has separated, cracked, softened, or developed staining beneath its surface, remove and replace it after the area is fully cleaned and dried. Fresh caulk should not be applied over damp or contaminated material.
Preventive care matters. Squeegee shower walls, spread towels to dry, and avoid leaving wet bath mats against the floor.
How to Get Rid of Mildew on Painted Walls and Ceilings
Painted surfaces require caution because aggressive scrubbing can remove the finish. Before cleaning, determine whether the wall is simply spotted or whether the material feels soft, swollen, or damaged.
A small surface patch on sound, washable paint may respond to gentle detergent cleaning. Test the method in an inconspicuous area first. Use as little moisture as possible, and dry the wall promptly.
Do not paint over active mildew. New paint may temporarily hide the mark, but the problem can return through the coating. First, identify the moisture source. Then clean and dry the surface according to the material’s requirements.
If drywall has softened, crumbled, or developed widespread staining, replacement may be safer than repeated surface treatment. Porous materials can hold growth inside spaces that a cloth cannot reach.
Ceiling spots require extra investigation. Check for roof leaks, plumbing above the room, poor bathroom ventilation, or condensation. When the cause is unclear, contact an appropriate property professional.
Cleaning Mildew Around Windows
Windows often develop condensation when warm indoor air meets cold glass or frames. Water can collect along tracks, sills, seals, and nearby walls.
Begin by wiping away condensation when you notice it. Clean tracks and frames with a product suitable for their material. Then dry each groove carefully. Avoid allowing dirty water to drain into wall cavities.
Check the condition of window seals and exterior caulking. Damaged seals may allow moisture to enter. Curtains, blinds, and furniture can also limit airflow around the glass.
To reduce recurrence, improve room ventilation and monitor humidity. A small hygrometer can help you track conditions. If condensation occurs every day, the issue may require more than cleaning.
When staining extends into drywall or wood framing, ask a qualified professional to assess the moisture source.
How to Handle Mildew on Fabric, Towels, and Clothing
Fabric can develop a musty smell or spotting when it remains damp. Act quickly because growth can spread through fibers.
Take washable items outdoors or to a well-ventilated area when practical. Follow the care label and use the warmest water allowed for the fabric. Add an appropriate laundry product according to its instructions. Dry the item completely before storing it.
Do not place a still-damp item back into a closet or hamper. Clean the storage area as well, especially if it smells musty.
Some staining may remain even after the growth is removed. Delicate, valuable, or dry-clean-only items may need professional textile care. Heavily affected porous materials may not be worth saving.
Prevent future problems by moving laundry promptly from the washer to the dryer or drying rack. Allow towels to spread out instead of remaining folded while wet.
How to Clean Mildew From Wood
Wood varies greatly. Sealed wood may tolerate gentle surface cleaning, while unfinished wood can absorb moisture and growth.
First, identify the finish. Use a cleaner approved for that surface and test a small hidden area. Avoid soaking the wood. Wipe with minimal moisture and dry it immediately.
If the wood is warped, soft, deeply stained, or affected across a large area, stop treating it as a routine cleaning job. A carpenter, restoration professional, or mold specialist may need to inspect it.
Furniture placed against exterior walls may trap humid air. Leave a small gap to improve circulation. Also, avoid storing damp items in wooden cabinets or closets.
Should You Use Bleach for Mildew?
Bleach is not the automatic answer for every mildew problem. It may damage finishes, discolor materials, create irritating fumes, or fail to reach growth inside porous surfaces.
The CDC states that bleach or dish detergent may be used in some home cleanup situations. It also advises using no more than one cup of household bleach in one gallon of water and never mixing bleach with ammonia or other cleaners.
However, the product label and surface manufacturer’s guidance still matter. Never use bleach on a surface that the manufacturer warns against. Increase ventilation and wear appropriate protection.
For many small patches on hard surfaces, detergent and water, followed by complete drying, may be sufficient. The moisture source remains the most important part of the solution.
When DIY Cleaning Is Not Enough
Knowing how to get rid of mildew also means knowing when to stop. A routine house cleaning company is not the same as a licensed mold remediation or water-damage restoration specialist.
Seek specialist help when:
Growth covers a large area
The problem followed flooding or sewage
Drywall, insulation, carpet padding, or ceilings are affected
The odor persists without a visible source
HVAC systems may be involved
The material is structurally damaged
The growth returns quickly after cleaning
A resident has significant health concerns
The moisture source cannot be identified
The CDC’s disaster cleanup guidance recommends protective equipment and stresses that drying the home and removing water-damaged materials are essential after major water events.
BA House Cleaning can support routine household cleaning and maintenance. However, extensive mold, contaminated building materials, flooding, and hidden moisture require the appropriate remediation, plumbing, roofing, or restoration professional.
How Deep Cleaning Services Support Mildew Prevention
Deep Cleaning Services can help address the dirt, soap residue, dust, and buildup that collect in moisture-prone areas. A detailed visit may include closer attention to bathroom surfaces, kitchen areas, baseboards, reachable fixtures, and other locations included in the selected checklist.
However, deep cleaning does not replace leak repair, moisture testing, structural drying, or mold remediation. The service works best after the underlying moisture problem has been corrected and when the affected area is within the safe scope of routine residential cleaning.
For example, a detailed cleaning can help refresh shower surfaces, window sills, sink areas, and other reachable hard surfaces. It can also help homeowners establish a cleaner baseline for ongoing maintenance.
Discuss visible staining, odors, leaks, and damaged materials before booking. Accurate information allows the cleaning company to determine whether the request fits its service or requires a specialist.
Where Sanitizing Cleaning Services Fit Into the Process
Sanitizing Cleaning Services focuses on selected surfaces and high-touch areas according to the booked service. They should not be confused with mold remediation.
Cleaning removes dirt and organic residue. Sanitizing reduces certain microorganisms on suitable surfaces when the correct product and contact time are used. Mildew control still requires physical removal, complete drying, and correction of the moisture source.
If you request Sanitizing Cleaning Services, tell the company about delicate finishes, pets, allergies, ventilation concerns, and product preferences. The team can then explain what the service includes.
For a recurring mildew problem, start with the moisture source. Sanitizing a damp surface without correcting humidity or leaks will not prevent future growth.
Choosing Cleaning Services in Oakland for Moisture-Prone Homes
When comparing cleaning services in Oakland, choose a provider that sets realistic boundaries. A trustworthy company should not promise to solve extensive mold problems through ordinary house cleaning.
Ask what the service includes and whether the team can work safely on the affected material. Also, explain the size of the area, the location, the surface, and whether a leak has been repaired.
Professional cleaning services can help maintain kitchens, bathrooms, bedrooms, common areas, and other parts of the home. Regular care can reduce the buildup that makes damp spaces feel dirty or musty. Still, maintenance works best when ventilation and repairs keep the property dry.
Oakland homes include older properties, apartments, modern buildings, and spaces with different airflow challenges. A local provider should record access instructions, cleaning priorities, pets, and material concerns before the visit.
How to Prevent Mildew From Returning
After learning how to get rid of mildew, prevention becomes the next priority. A clean surface will not stay clean if moisture continues.
Keep Humidity Under Control
Use a dehumidifier or air conditioner when indoor humidity remains high. The CDC recommends keeping humidity no higher than 50% when possible.
Improve Ventilation
Run bathroom and kitchen exhaust fans that vent outdoors. Open windows when weather and security allow. Keep interior doors open when better airflow is needed.
Fix Leaks Promptly
Repair dripping faucets, pipe leaks, roof problems, and damaged seals. After repairs, dry the affected material completely.
Dry Wet Items Quickly
Spread towels, bath mats, and cleaning cloths so they can dry. Move laundry out of the washer promptly. Do not store damp items inside closets or cabinets.
Reduce Condensation
Wipe window condensation and improve airflow around exterior walls. Avoid placing large furniture tightly against cold surfaces.
Maintain a Regular Cleaning Routine
Routine cleaning removes soap film, dust, and organic residue from moisture-prone surfaces. It also makes new discoloration easier to notice.
Inspect Hidden Areas
Check under sinks, behind appliances, inside cabinets, and around toilets. Early detection can prevent a small leak from becoming a larger problem.
Why Oakland Homeowners Choose BA House Cleaning
BA House Cleaning helps local homeowners maintain cleaner, more comfortable living spaces through organized residential cleaning options.
Cleaning Plans Based on Your Home
Customers can share priorities, surface concerns, pets, entry instructions, and rooms that need extra attention before the visit.
Detailed Service Options
Homeowners can choose ongoing cleaning, Deep Cleaning Services, Sanitizing Cleaning Services, move-related care, and other available solutions based on their needs.
Local Oakland Experience
A local team understands the scheduling, parking, access, and layout differences found across Oakland and the East Bay.
Clear Service Boundaries
Responsible cleaning services should explain what routine cleaning can handle and when water damage, structural issues, or extensive mold require a specialist.
Support Beyond the Cleaning Visit
Customers can contact the company about scheduling, service questions, updates, or concerns rather than depending only on one cleaner.
BA House Cleaning is a practical choice when you want help maintaining moisture-prone rooms after leaks and ventilation problems have been addressed. The team can provide regular cleaning within the agreed scope while you focus on keeping the home dry.
Create a Cleaner, Drier Home With BA House Cleaning
Mildew is easier to manage when you respond early. Clean small surface areas safely, dry them completely, and correct the source of moisture. If the affected material is porous, damaged, widespread, or connected to flooding, contact a qualified specialist rather than relying on household cleaning alone.
Once the property is dry and the problem falls within routine cleaning, BA House Cleaning can help you maintain kitchens, bathrooms, bedrooms, and shared areas. Choose the service level that matches the condition of your home and share any problem areas before the appointment.
Send BA House Cleaning a message on Facebook to describe your cleaning priorities and explore a suitable service for your Oakland home. Build a routine that keeps moisture-prone spaces cleaner, easier to inspect, and more comfortable throughout the year.
Frequently Asked Questions
What Is the Fastest Way to Remove Mildew?
For a small patch on a hard, washable surface, use a suitable detergent, scrub gently, and dry the area completely. Also, fix the moisture source. Fast surface cleaning will not prevent regrowth when the area stays damp.
Can I Permanently Remove Mildew?
You can remove many small surface patches, but lasting control depends on moisture. Repair leaks, improve ventilation, reduce humidity, and dry wet materials quickly.
Is Mildew the Same as Mold?
Mildew is a common term for certain surface-level fungal growth and is generally treated as a type of mold. Appearance alone cannot reliably identify the exact species.
Can Vinegar Remove Mildew?
Some homeowners use vinegar, but official guidance commonly emphasizes detergent and water for hard surfaces. Always follow surface and product instructions, and never mix cleaning chemicals.
Does Bleach Kill Mildew?
Bleach may be suitable in some situations, but it is not appropriate for every material. Never mix it with ammonia or other cleaners. Follow the label and use proper ventilation.
Why Does Mildew Keep Returning in My Bathroom?
The bathroom may remain humid after showers, have weak ventilation, or contain damp grout and caulk. Run the exhaust fan, dry surfaces, and check for leaks or condensation.
Can I Paint Over Mildew?
No. Painting may hide the spot temporarily, but it does not solve active growth or moisture. Clean and dry the area first, then correct the cause before repainting.
When Should I Throw Away a Moldy Item?
Porous materials may be difficult to clean when growth penetrates deeply. Heavily affected carpet padding, ceiling tiles, insulation, or damaged drywall may require removal. Seek specialist advice for extensive contamination.
Can Professional Cleaning Services Remove All Mildew?
Routine cleaning services may clean small reachable surface areas within their scope. They do not replace mold remediation, structural drying, plumbing repair, or water-damage restoration.
How Can I Stop Mildew in Closets?
Keep clothing dry, improve airflow, avoid overpacking, and monitor humidity. Do not place damp shoes, towels, or laundry inside. Check nearby walls and floors for hidden leaks or condensation.