A bathtub can collect more than visible dirt. Soap residue, body oils, hard-water minerals, loose hair, bath products, and moisture may settle across the basin, ledges, drain, fixtures, and areas around the caulk. When these materials remain on the surface, they can create a dull film that becomes harder to remove with every use.
Learning how to clean a bathtub starts with identifying what the tub is made from. Acrylic, fiberglass, porcelain enamel, cast iron, and stone-based materials do not always tolerate the same products or scrubbing tools. A method that removes buildup from one finish may scratch, discolor, or dull another.
At BA House Cleaning, we understand that a clean bathroom depends on more than quickly wiping the center of the tub. The faucet base, overflow plate, drain cover, corners, wall joints, and surrounding floor also contribute to how fresh and comfortable the room feels. This guide explains how to clean common bathtub materials, address soap scum and mineral marks, deal with bathroom moisture, and avoid methods that may damage the finish.
Identify the Bathtub Material Before Cleaning
Before selecting a cleaner, determine whether the bathtub is acrylic, fiberglass, porcelain enamel, enameled cast iron, or another specialty material. Check the manufacturer’s label, purchase information, or care manual when the surface is difficult to identify.
Acrylic and fiberglass tubs often feel warmer and lighter than cast iron. Porcelain-enamel and enameled cast-iron surfaces usually feel harder and colder, but appearance alone does not always provide a reliable answer.
The safest approach is to begin with warm water, mild dish soap, and a soft cloth. Do not apply acidic, abrasive, or heavily alkaline products until you confirm that the manufacturer allows them.
Bathtub manufacturers commonly advise homeowners to use non-abrasive cleaners and soft sponges on acrylic surfaces because rough pads, scrapers, and abrasive powders may scratch or dull the finish.
What to Use to Clean a Bathtub
A basic bathtub-cleaning kit may include:
Rubber or household cleaning gloves
Mild liquid dish soap
Warm water
A soft microfiber cloth
A non-abrasive sponge
A soft nylon brush
A small brush for corners and grout
A bucket or removable shower sprayer
Clean towels for drying
A cleaner approved for the bathtub material
Open a window or operate the bathroom exhaust fan while cleaning. Apply commercial products according to their labels, and never combine cleaners unless their manufacturers specifically state that the combination is safe.
Avoid steel wool, metal scrapers, rough scouring pads, and unidentified cleaning mixtures. Even a durable bathtub may contain a slip-resistant coating, glossy finish, repair layer, or decorative surface that requires special care.
The Safest Basic Method for Bathtub Cleaning
For routine bathtub cleaning, remove bottles, toys, mats, and personal items from the tub. Clear loose hair and debris from the drain area before adding water or cleaner.
Rinse the surface with warm water to loosen fresh residue. Add a small amount of mild dish soap to a damp sponge or dilute it in a bucket of warm water. Begin at the upper ledges and work toward the drain so dirty water moves away from completed areas.
Wipe the basin, walls, corners, faucet base, overflow cover, and drain area using gentle pressure. Allow the soap solution to remain on light buildup for a few minutes, but do not let it dry.
Rinse the bathtub thoroughly and inspect it under good lighting. Repeat the process on any remaining marks rather than immediately switching to an abrasive product. Finish by drying the surface and metal fixtures with a clean microfiber cloth.
How to Clean an Acrylic Bathtub
Acrylic bathtubs require gentle products and non-abrasive tools. Use warm water, mild liquid dish soap, or a cleaner labeled as safe for acrylic.
Apply the cleaner with a soft cloth or sponge and wipe without aggressive scrubbing. Rinse promptly and dry the tub so cleaning residue and water spots do not remain on the glossy finish.
Do not use steel wool, hard brushes, abrasive powders, paint removers, or harsh solvents unless the manufacturer gives specific instructions for a particular problem. Kohler and American Standard both warn against abrasive products on acrylic bath surfaces, while MAAX recommends non-abrasive cleaning products and tools that will not scratch or dull the finish.
For model-specific instructions, use the manufacturer’s official acrylic bathtub cleaning guidance rather than relying on a universal household recipe.
How to Clean a Fiberglass Bathtub
Fiberglass bathtubs may develop a dull appearance when soap film and minerals remain on the surface. Because fiberglass can scratch, begin with mild dish soap, warm water, and a soft sponge.
Work in small areas and rinse frequently. Avoid pressing harder when a stain remains. Give the cleaner additional time to soften the buildup or switch to a product approved for fiberglass.
Do not use stiff wire brushes, powdered abrasives, or cleaning erasers unless the tub manufacturer confirms that they are safe. Sterling’s care instructions for its Vikrell bath material similarly recommend a soft cloth or sponge and advise against abrasive brushes and scouring pads.
Dry the surface after rinsing to reveal any film that still remains. A cloudy appearance may come from leftover cleaner rather than a permanent stain.
How to Clean a Porcelain or Enameled Bathtub
Porcelain-enamel and enameled cast-iron tubs have a hard outer finish, but that coating can chip, scratch, or lose its shine when cleaned incorrectly.
For general cleaning, use warm water, liquid dish detergent, and a soft cloth or non-abrasive sponge. Rinse the cleaner completely and dry the surface afterward.
Avoid metal scrapers, wire brushes, steel wool, highly acidic cleaners, and heavily alkaline products. Kohler’s enameled cast-iron guidance recommends non-abrasive products and cautions that improper cleaners may permanently affect slip-resistant areas.
If the enamel has chipped and exposed the underlying metal, cleaning alone will not repair the damage. Rust may continue to form around the damaged section, so consider an appropriate repair or refinishing assessment.
How to Remove Soap Scum from a Bathtub
Soap scum forms when soap residue combines with minerals, body oils, and other materials on the surface. It often appears as a cloudy or slightly sticky film around the waterline, corners, ledges, and lower walls.
Start with warm water and mild dish soap. Apply the solution generously and allow it to soften the residue for several minutes. Use a soft sponge to move across the surface with light, overlapping strokes.
Rinse and repeat when necessary. Several gentle applications are safer than one aggressive scrubbing session.
A diluted vinegar solution may help with soap scum on some tubs, but only use it when the manufacturer permits acidic cleaners. Do not assume that vinegar is suitable for natural stone, repaired finishes, specialty coatings, or every acrylic product.
How to Remove Hard-Water Stains
Hard-water stains often appear as white, gray, or chalky marks around faucets, drains, and areas where water repeatedly dries.
Begin with the mildest method suitable for the tub. Warm water and dish soap may remove surface film, while a manufacturer-approved mineral-deposit cleaner may be necessary for more established marks.
When the care instructions permit vinegar, apply a diluted solution to a cloth rather than soaking the entire tub. Place the damp cloth over the affected area briefly, then wipe, rinse, and dry.
Do not leave acidic products on metal fixtures, grout, natural stone, or unknown finishes. The best way to clean a bathtub is not to use the strongest available product but to match the cleaner to the material and type of buildup.
How to Address Yellow Bathtub Stains
Yellow discoloration can develop from minerals, product residue, age, rust, or wear within the finish. Different causes require different responses.
Clean the area first with mild soap to determine whether the mark is removable surface residue. If it remains, check the manufacturer’s recommendations for stain removal.
Avoid using salt, turpentine, oven cleaner, chlorine bleach, or other strong chemicals as general-purpose stain treatments. These products may create fumes, affect the finish, or react with residue from another cleaner.
A yellow mark that returns quickly may relate to water quality, corrosion, damaged enamel, or an aging finish rather than incomplete cleaning.
Cleaning Bathtub Fixtures and the Overflow Plate
Bathtub faucets, handles, spouts, drains, and overflow plates often collect water spots and product residue even when the basin looks clean.
Use mild soap and a soft damp cloth. Wipe around fixture bases and narrow joints where moisture remains, then rinse and dry the metal immediately.
Do not leave vinegar or acidic cleaners on chrome, brushed finishes, plated fixtures, or decorative coatings without checking the manufacturer’s instructions. Some finishes require only water and mild soap.
Avoid spraying cleaner directly into openings or behind the overflow plate. Apply the product to the cloth so you can control where the moisture travels.
How to Clean the Bathtub Drain Area
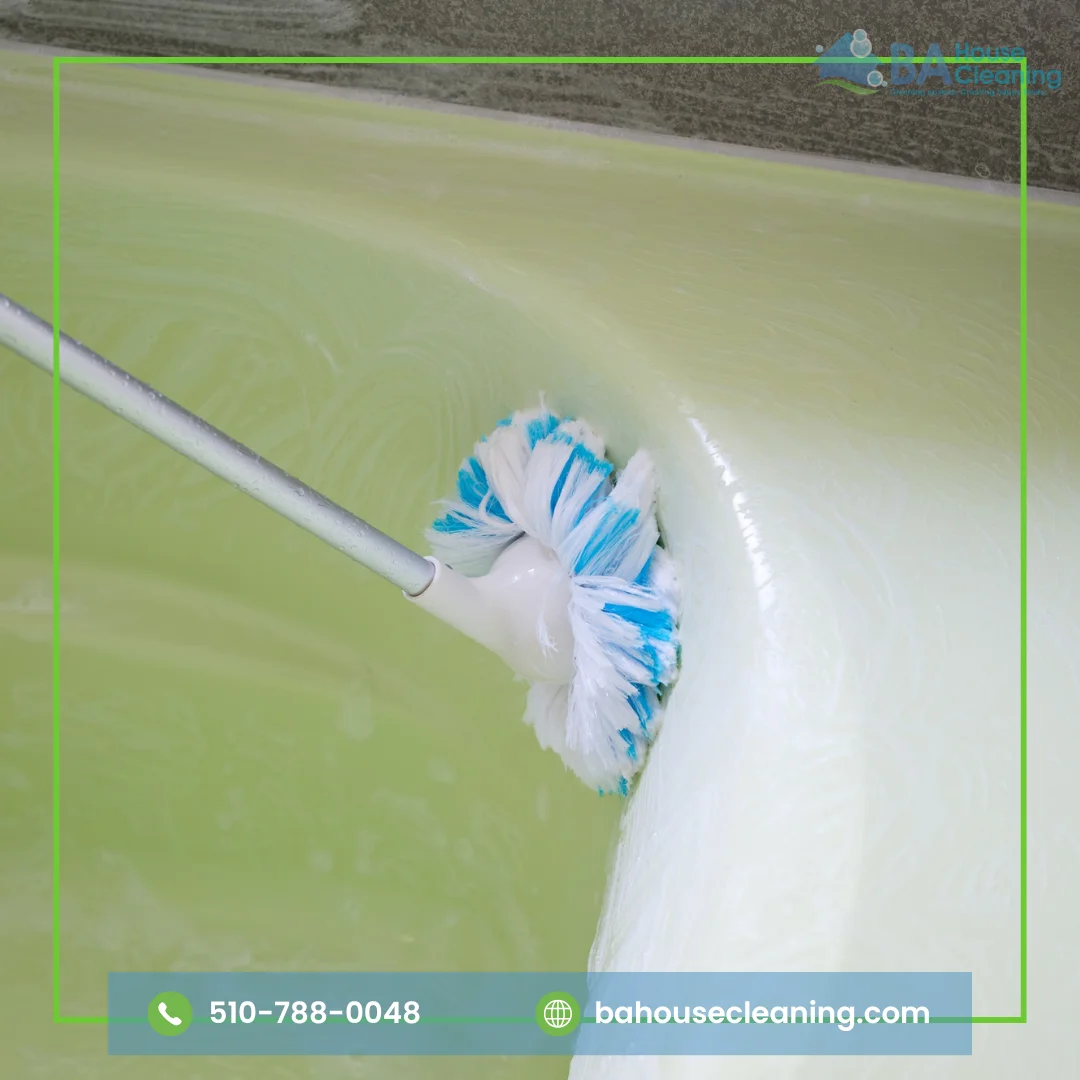
Remove visible hair and loose debris from the drain cover while wearing gloves. Clean the surrounding surface with mild soap and a small soft brush.
Do not push hair or solid material further into the drain. If the water flows slowly, use the drain-cleaning method recommended for the plumbing and bathtub manufacturer.
Avoid pouring random combinations of baking soda, vinegar, bleach, commercial drain opener, or other chemicals into the drain. Products left from a previous treatment may react with the next one.
A recurring blockage, sewage odor, or standing water may require plumbing service rather than additional surface cleaning.
Cleaning Caulk and Grout Around the Bathtub
Caulk seals the joint between the bathtub and surrounding wall. Grout fills gaps between tiles. Both areas may collect soap residue and discoloration, but damaged material cannot always be restored through cleaning.
Use mild detergent, water, and a soft brush for routine care. Avoid scraping caulk with metal tools or scrubbing grout so aggressively that the material begins to erode.
Cracked, separated, or missing caulk allows moisture to travel behind the surface. Replace failed caulk rather than covering the opening with cleaner.
Dark staining that remains inside the caulk may indicate that discoloration has penetrated the material. In that case, removal and replacement may provide a better result than repeated chemical treatment.
How to Deal with Mold and Mildew Around a Bathtub
Bathroom mold often develops where moisture lingers around caulk, grout, ceilings, walls, or fixtures. Cleaning the visible mark without addressing humidity, leaks, or poor ventilation allows the problem to return.
For a small area on a hard surface, the EPA recommends scrubbing with detergent and water and drying the surface completely. Homeowners should also repair leaks and correct the source of moisture. Porous materials may require replacement when mold has grown inside them.
Follow the EPA’s mold cleanup guidance when deciding whether the affected area is appropriate for household cleaning.
Never mix bleach with ammonia, vinegar, or another cleaner. Open windows or doors when using cleaning products, follow label instructions, and consider professional evaluation when mold covers a large area or repeatedly returns.
Can You Use Baking Soda and Vinegar on a Bathtub?
Baking soda and vinegar appear in many household cleaning guides, but they are not suitable for every bathtub.
Baking soda provides mild abrasive action, which may dull glossy acrylic, fiberglass, repaired coatings, or other delicate finishes when applied too aggressively. Vinegar is acidic and may affect stone, grout, metal fixtures, and surfaces whose manufacturers do not approve acidic products.
When the bathtub’s care instructions permit either ingredient, use a small amount, test a hidden section, and rinse thoroughly. Do not assume that combining the two creates a stronger cleaner. Their visible fizzing comes from an acid-base reaction, but the ingredients begin neutralizing each other.
For routine maintenance, mild soap and a soft sponge remain the safer starting point.
Cleaning a Whirlpool or Jetted Bathtub
A jetted bathtub requires care beyond wiping the visible basin. Water remains inside internal lines, jets, and air channels that ordinary surface cleaning cannot reach.
Follow the exact cleaning or flushing procedure in the owner’s manual. Manufacturers may specify water level, cleaner type, cycle duration, and rinsing steps for each model.
Do not pour bleach, dishwashing detergent, oils, or homemade mixtures into the jet system unless the manufacturer permits them. The wrong product may create excessive foam, damage components, or leave residue inside the plumbing.
Stop using the system and seek appropriate service if the jets release dark material repeatedly, leak, fail to operate, or produce an electrical smell.
Common Bathtub Cleaning Mistakes
Avoid these mistakes when deciding what to use to clean a bathtub:
Treating all bathtub materials as though they have the same finish
Using oven cleaner as a general stain remover
Scrubbing acrylic or fiberglass with steel wool
Leaving acidic cleaner on faucets or grout
Mixing bleach with vinegar, ammonia, or other products
Allowing cleaner to dry on the surface
Ignoring the underside of bath mats
Applying excessive force to slip-resistant textures
Pouring chemicals into a slow drain without checking previous treatments
Continuing to clean damaged enamel instead of repairing it
Covering mold without correcting the moisture source
Returning bottles and mats before the tub dries
The right process should remove buildup without creating scratches, chemical residue, damaged caulk, or discoloration.
How Often Should You Clean a Bathtub?
The appropriate schedule depends on how often the tub is used, the number of people in the home, water hardness, ventilation, and the types of bath products used.
Rinse fresh residue after bathing and remove loose hair before it reaches the drain. Wipe the tub lightly during the week when several people use it, and complete a more detailed cleaning when soap film, mineral marks, or discoloration begin to appear.
Drying wet ledges and improving bathroom ventilation can reduce the moisture that supports recurring buildup. Manufacturer guidance for acrylic and other bath materials also commonly recommends wiping the surface with a soft cloth after use and avoiding abrasive tools.
When the Bathroom Needs More Detailed Cleaning
Cleaning the bathtub may improve one major bathroom surface, but dust, product residue, hair, soap film, and moisture often collect in several areas at once.
BA House Cleaning’s Deep Cleaning Services provide additional attention for Oakland and East Bay homes that need a more detailed reset. The service is designed for homes that require more extensive scrubbing and care than routine maintenance.
After a detailed clean, Recurring Cleaning Services can help maintain bathrooms and other frequently used areas through weekly, biweekly, or monthly visits. BA House Cleaning lists tubs, bathroom tiles, shower doors, sinks, and countertops among the areas addressed during its standard recurring service.
Professional house cleaning does not replace repairs, plumbing work, mold remediation, or the manufacturer’s maintenance instructions. It can, however, help prevent routine household buildup from spreading across several bathroom surfaces.
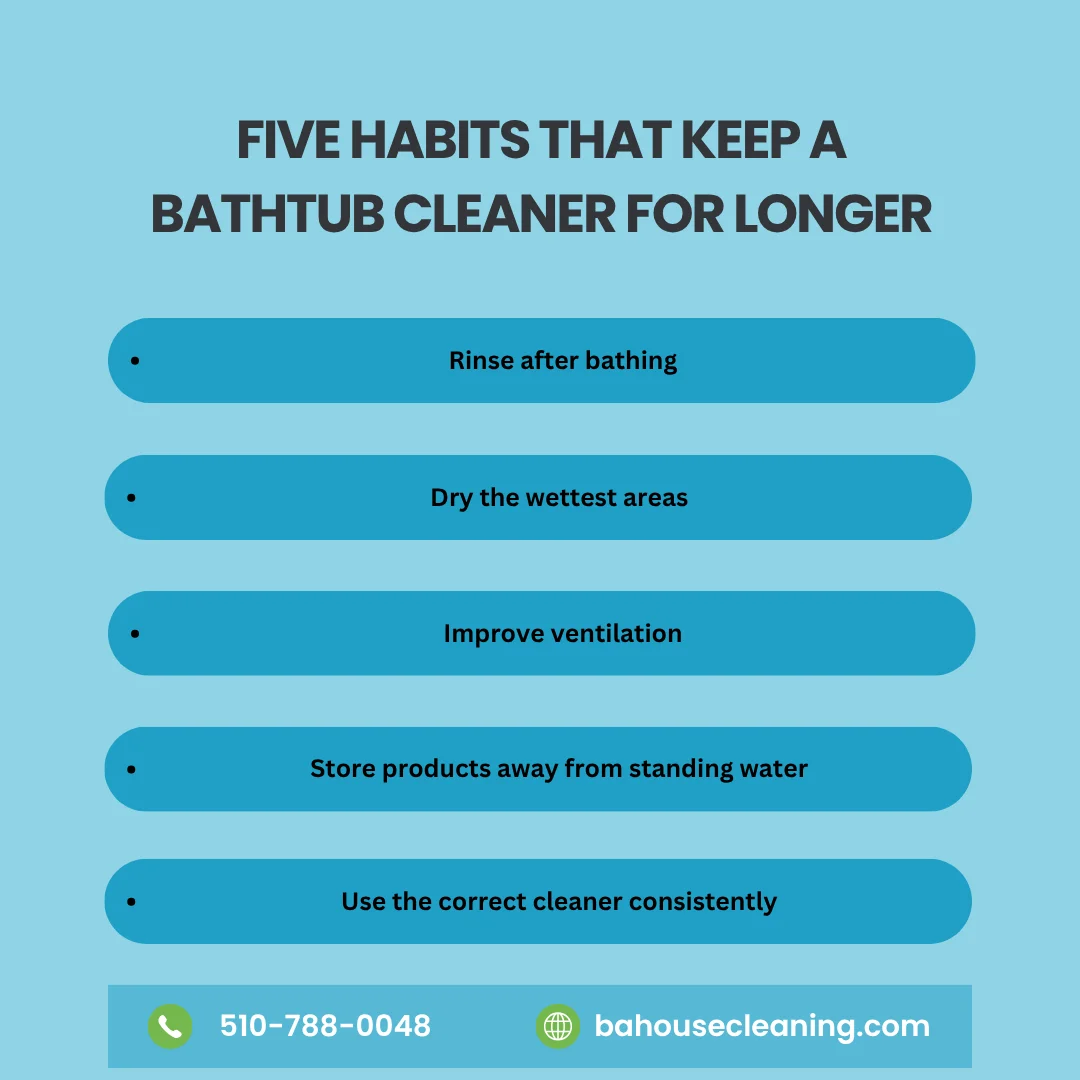
Five Habits That Keep a Bathtub Cleaner for Longer
A practical maintenance routine can reduce soap film, water spots, and difficult stains:
Rinse after bathing: Remove shampoo, soap, bath oil, and loose residue before they dry on the surface.
Dry the wettest areas: Wipe ledges, corners, fixtures, and the area around the drain with a soft cloth.
Improve ventilation: Run the exhaust fan or open an appropriate window to help bathroom moisture escape.
Store products away from standing water: Bottles and containers can trap residue beneath them and leave rings on the tub ledge.
Use the correct cleaner consistently: Keep a manufacturer-approved product available instead of switching between strong household mixtures.
These habits make routine cleaning easier and reduce the need for heavy scrubbing that could affect the bathtub finish.
Give Your Bathroom the Detailed Care It Needs
A clean bathtub can improve the appearance of the entire bathroom, but maintaining the room also requires attention to floors, sinks, fixtures, mirrors, toilets, and surrounding surfaces.
Connect with BA House Cleaning on Facebook to discuss professional home cleaning in Oakland and the East Bay. Choose dependable support for routine bathroom maintenance or a more detailed cleaning when soap residue, dust, and household buildup have become difficult to manage.
Frequently Asked Questions
What is the best way to clean a bathtub?
Identify the bathtub material first. Begin with warm water, mild dish soap, and a soft, non-abrasive sponge. Rinse thoroughly, and use stronger products only when the manufacturer confirms they are safe for the finish.
How do I remove soap scum from a bathtub?
Apply warm water and mild dish soap, allow the solution to soften the film, then wipe gently with a soft sponge. Repeat the process rather than using a harsh scrubber. A manufacturer-approved soap-scum remover may help with heavier buildup.
Can I use vinegar to clean a bathtub?
Some manufacturers permit diluted vinegar on selected bathtub materials, while others recommend different products. Avoid using vinegar on natural stone, unknown coatings, sensitive fixtures, or any surface whose care instructions prohibit acidic cleaners.
Can I use baking soda on an acrylic bathtub?
Baking soda may create fine scratches or dull a glossy surface when used aggressively. Check the acrylic tub manufacturer’s instructions before applying it, use minimal pressure, and test a hidden area first.
How do I clean a fiberglass bathtub without scratching it?
Use warm water, mild liquid soap, and a soft cloth or non-abrasive sponge. Avoid steel wool, stiff brushes, abrasive powders, and cleaning tools that may dull the fiberglass finish.
How can I remove hard-water marks from a bathtub?
Start with mild soap and water. When the manufacturer permits an acidic cleaner, use diluted vinegar or an approved mineral-deposit remover on the affected section. Rinse and dry the surface immediately afterward.
Can bleach damage a bathtub?
Bleach may discolor or damage some acrylic, fiberglass, coated, or decorative surfaces. Do not use it unless the manufacturer approves it for that exact material, and never combine it with vinegar, ammonia, or another cleaner.
How often should I clean my bathtub?
Remove hair and rinse fresh residue after use. Complete a more thorough cleaning weekly or whenever soap film, stains, or mineral deposits begin to appear. Usage, water hardness, and ventilation affect the ideal schedule.
Why do bathtub stains return after cleaning?
Recurring marks may come from hard water, damaged enamel, leaking fixtures, standing moisture, soap residue, mold growth, or products stored on wet ledges. Identify and correct the source instead of repeatedly treating the visible stain.
When should I replace bathtub caulk?
Replace caulk when it cracks, separates from the wall or tub, develops gaps, remains deeply discolored, or no longer forms a watertight seal. Cleaning cannot restore caulk that has physically failed.
Baking soda is a familiar kitchen ingredient, but many households also keep it nearby for small cleaning and deodorizing tasks. It can help lift light residue, absorb certain odors, and add gentle scrubbing action when mixed with water. However, it is not suitable for every surface, and using more of it does not automatically produce better results.
Successful cleaning with baking soda depends on understanding what the product can do, how much to use, and when another cleaning method would be safer. Baking soda is mildly alkaline and slightly abrasive, which makes it useful for selected washable surfaces. Those same properties also mean it may dull, scratch, or leave residue on delicate finishes when used carelessly.
At BA House Cleaning, we understand that homeowners often want practical ways to manage small messes between professional appointments. This guide explains how to use baking soda in kitchens, bathrooms, refrigerators, trash cans, cookware, and other household areas while avoiding misleading cleaning hacks and potentially damaging combinations.
What Is Baking Soda and How Does It Help with Cleaning?
Baking soda is sodium bicarbonate, a mild alkaline substance commonly used in cooking and household care. When mixed with a small amount of water, it forms a soft paste that can help loosen light grime and provide gentle scrubbing action.
Its alkaline nature may also help address some acidic-smelling residues, while the dry powder can absorb certain odors rather than simply covering them with fragrance. This makes baking soda useful for refrigerators, washable trash cans, food containers, and some other odor-prone areas.
However, baking soda is not a universal cleaning product. It does not dissolve every type of grease, remove every stain, or safely clean every finish. It also should not replace manufacturer-approved products when cleaning appliances, specialty flooring, natural stone, electronics, or coated surfaces.
Cleaning Is Different from Disinfecting
Baking soda can help remove visible dirt, residue, and odors, but it should not be presented as a disinfectant.
The CDC’s guidance on cleaning and disinfecting explains that cleaning removes dirt and many germs from surfaces, while disinfecting uses appropriate products to kill remaining germs. In most ordinary household situations, cleaning with soap and water may be sufficient, but disinfecting can become necessary when someone is ill or when a particular contamination risk exists.
When a surface requires disinfection, first remove visible dirt and then use a product that is registered and labeled for the intended surface and purpose. Follow the product’s required contact time and safety instructions.
Do not rely on baking soda, vinegar, or a homemade mixture as a substitute for an approved disinfectant.
What You Need Before Cleaning with Baking Soda
Most small household tasks require only a few basic supplies:
Baking soda
Warm water
Mild dish soap
A soft microfiber cloth
A non-abrasive sponge
A small bowl
A soft-bristled brush
Clean water for rinsing
A dry towel
Keep a separate sponge or brush for bathrooms and food-contact areas. Do not use the same cleaning tool across toilets, counters, sinks, and appliances without washing or replacing it.
Before applying baking soda, read the surface or appliance care instructions. Test the method in a small hidden area when you are uncertain about the finish.
How to Make a Baking Soda Cleaning Paste
A basic paste works well for small, accessible areas with light residue.
Place a small amount of baking soda in a bowl and add water gradually. Stir until the mixture develops a spreadable consistency. The paste should remain moist enough to move across the surface without scattering dry powder.
Apply a thin layer to the affected area and allow it to sit briefly. Use a soft cloth or non-abrasive sponge to work gently over the residue, then rinse the surface thoroughly and dry it.
Avoid allowing the paste to harden completely on porous, textured, or difficult-to-rinse surfaces. Dried baking soda can leave a white film that becomes more noticeable after the surface dries.
Cleaning Kitchen Sinks with Baking Soda
Baking soda can help remove light residue and odors from many stainless steel, porcelain, and ceramic sinks. The correct method still depends on the manufacturer and finish.
Rinse away loose food first. Sprinkle a small amount of baking soda onto a damp sponge or create a soft paste with water. Wipe gently around the basin, drain area, and faucet base without applying excessive pressure.
Rinse thoroughly so no powder remains, then dry the sink with a clean cloth. Drying helps reduce water spots and reveals any residue that still needs removal.
Be cautious with composite, coated, colored, polished, or specialty sinks. Use the product recommended by the sink manufacturer when baking soda is not listed as an approved option.
Using Baking Soda on Stainless Steel
Some appliance manufacturers recommend a baking soda-and-water paste for selected stainless steel stains. When the method is approved, use a soft cloth and wipe in the direction of the grain rather than scrubbing in circles.
After cleaning, remove all residue with clean water and dry the stainless steel completely. Water and cleaning residue may leave marks when allowed to air-dry.
Not every stainless steel appearance is a traditional uncoated finish. Fingerprint-resistant, black stainless, painted, and coated appliances may require different care. Check the model instructions before applying baking soda or vinegar.
Never use steel wool, hard brushes, or excessive pressure on stainless steel.
Cleaning the Inside of a Refrigerator
Baking soda and water can provide a low-odor option for cleaning many refrigerator interiors. Remove food and detachable shelves according to the appliance instructions, then wipe away crumbs and spills before applying any solution.
Mix baking soda with warm water and apply it with a soft cloth. Clean accessible walls, shelves, drawers, and food residue, then wipe everything again with clean water and dry it before returning food.
GE and Whirlpool both publish refrigerator-care instructions that include diluted baking soda and water for selected interior surfaces and odor control. Always follow the instructions for the specific refrigerator model.
Do not pour baking soda into vents, drain openings, electrical components, ice-making systems, or control panels.
Deodorizing the Refrigerator with Baking Soda
A container of baking soda may help absorb some food odors inside a refrigerator, but it cannot compensate for spoiled food, hidden spills, dirty drip trays, or blocked drainage.
Begin by locating and removing the source of the smell. Check drawers, shelves, containers, door seals, and areas beneath removable parts.
After cleaning and drying the refrigerator, place an open box or designated refrigerator deodorizer inside according to the package instructions. Replace it regularly rather than leaving the same open box indefinitely.
Do not use refrigerator deodorizing baking soda for cooking after it has absorbed household odors.
Cleaning Cookware and Burned Food Residue
A baking soda paste may help loosen light burned residue from certain pans, baking dishes, and cookware. Allow the item to cool first, then add warm water and mild dish soap to soften the food.
Apply a paste only after checking that the material can tolerate mild abrasives. Work gently with a non-scratch sponge, rinse thoroughly, and repeat rather than increasing pressure.
Exercise caution with:
Nonstick coatings
Aluminum
Copper
Seasoned cast iron
Painted cookware
Decorative finishes
Specialty ceramic coatings
These materials may require specific care. Follow the cookware manufacturer’s instructions instead of applying a universal cleaning hack.
Cleaning Ovens and Microwaves
Baking soda may work on selected oven and microwave interiors when the appliance manufacturer permits it. A paste can help loosen light residue on accessible surfaces, while baking soda dissolved in water may assist with odors.
Do not apply paste to:
Heating elements
Fans
Electrical openings
Oven door gaskets
Microwave vents
Control panels
Self-cleaning oven components unless approved
Whirlpool includes baking soda among possible household materials for selected oven and microwave cleaning methods, but its guidance still depends on the appliance type and specific instructions.
Remove every trace of paste before operating the appliance again. Dried powder can produce residue, odors, or smoke when heated.
Cleaning Bathroom Sinks, Tubs, and Tiles
A damp sponge with a small amount of baking soda may help lift light soap residue from certain porcelain, ceramic, and tile surfaces.
Rinse the area first, then apply the product gently. Pay attention to corners, faucet bases, drain covers, and areas where soap residue commonly develops. Rinse thoroughly and dry metal fixtures to prevent spotting.
Do not assume that all tubs and shower walls can tolerate abrasion. Acrylic, fiberglass, refinished, painted, and coated surfaces may scratch or lose their shine.
Always test a hidden section or use the cleaner recommended by the surface manufacturer.
Can Baking Soda Clean Grout?
A paste of baking soda and water may help remove light surface residue from some unsealed grout. Apply it with a soft brush, scrub gently, rinse, and dry the area.
Baking soda cannot repair cracked grout, reverse permanent discoloration, or remove contamination that has penetrated deeply into porous material.
Colored grout, sealed grout, epoxy grout, and stone installations may require specialized products. Test the method first and avoid aggressive brushing that could erode the grout lines.
Persistent dark marks may indicate mildew, embedded staining, water intrusion, or another issue that requires more than surface cleaning.
Surfaces That Require Extra Caution
Baking soda is often described as gentle, but it still creates friction. That can affect glossy or delicate finishes.
Avoid using it without manufacturer approval on:
Natural stone countertops and floors
Polished marble
Lacquered or waxed wood
Acrylic and glossy plastic
Painted surfaces
Glass and mirrors
Electronic screens
Gold- or silver-plated finishes
Aluminum
Antique or delicate items
Coated appliance exteriors
The Natural Stone Institute recommends using neutral cleaners, stone soap, or mild dishwashing detergent for routine care of natural stone. A specialized poultice may contain baking soda for particular stone stains, but that is different from routinely scrubbing the whole surface with dry powder.
Using Baking Soda on Carpets and Rugs
People often sprinkle baking soda on carpets to manage light odors, but the method has limitations.
Fine powder may settle deep into carpet fibers or backing, especially when too much product is applied. Repeated use may also make complete vacuum removal difficult. Baking soda does not remove the source of pet urine, moisture, mold, food contamination, or deeply embedded stains.
Before using it:
Check the carpet or rug care instructions.
Test a hidden area.
Keep the powder dry.
Apply only a light amount.
Keep children and pets away.
Vacuum thoroughly.
Avoid using it on wet contamination.
For persistent smells, widespread staining, or heavily soiled fibers, professional Carpet Cleaning Services may provide a more appropriate solution than repeatedly adding dry powder.
Deodorizing Trash Cans
Baking soda can help manage light odors in washable trash cans after the actual waste and residue have been removed.
Empty the container, wash it with appropriate soap and water, rinse it, and let it dry. Sprinkle a small amount of baking soda into the dry base or use a diluted cleaning solution if the material allows it.
Do not use baking soda to cover leaking food, liquid, mold, or spoiled waste. Odor control works best after physical cleaning.
ARM & HAMMER includes trash cans, refrigerators, drains, and selected appliances among its published baking soda cleaning and deodorizing applications.
Can You Mix Baking Soda and Vinegar?
Baking soda is alkaline, while vinegar is acidic. Combining them causes fizzing and produces carbon dioxide gas. The visible reaction may help move loose debris in some situations, but the two ingredients also neutralize each other as the reaction proceeds.
That means the mixture is not automatically stronger than using either product appropriately on its own.
Never mix or store baking soda and vinegar in a sealed bottle or container because pressure can build as gas forms. Use them only in an open, ventilated area and only when the surface instructions allow both ingredients.
More importantly, do not combine homemade ingredients with bleach, ammonia, drain cleaners, disinfectants, or unidentified commercial products.
Never Mix Household Cleaning Products Randomly
A safe rule is to use one cleaning product at a time and follow its label.
Poison Control’s cleaning safety guidance advises against mixing household cleaning products because unexpected chemical reactions may produce irritating or dangerous gases. Bleach should never be combined with vinegar, ammonia, or other acidic or ammonia-containing cleaners.
Baking soda itself is generally mild, but that does not make every mixture containing baking soda safe.
Rinse the surface and allow it to dry before changing to another cleaning product. Keep products in their original labeled containers and store them away from children and pets.
Is Baking Soda Safe Around Children and Pets?
Baking soda should still be stored and used carefully.
Small amounts used correctly for cleaning are different from swallowing a large quantity. Poison Control notes that excessive ingestion of baking soda can cause serious toxicity because it contains sodium and bicarbonate.
Keep open containers, pastes, and freshly treated areas away from children and animals. Do not sprinkle baking soda directly onto a pet’s fur or bedding without veterinary guidance.
After using it on a household surface, rinse or vacuum thoroughly as appropriate. Store the package securely after use.
Common Baking Soda Cleaning Mistakes
Baking soda becomes less useful when it is applied without considering the surface or the type of mess.
Avoid these common mistakes:
Treating baking soda as a disinfectant
Scrubbing delicate surfaces with dry powder
Applying it to natural stone without guidance
Combining it with unidentified cleaning chemicals
Mixing it with bleach
Storing baking soda and vinegar in a sealed container
Using excessive amounts on carpets
Leaving dried paste inside appliances
Pouring powder into vents or drains without checking instructions
Using the same sponge in kitchens and bathrooms
Skipping the rinse step
Assuming every “natural” method is automatically safe
A successful method should remove residue without creating scratches, chemical exposure, white film, or damage to the surrounding material.
When a Home Needs More Than a Baking Soda Paste
Baking soda can help with an isolated sink mark, refrigerator odor, or small area of surface residue. It cannot replace detailed cleaning when grease, soap buildup, dust, debris, and grime extend across several rooms or hard-to-reach areas.
BA House Cleaning’s Deep Cleaning Services provide a more thorough option for Oakland and East Bay homes that need additional attention beyond routine maintenance. Deep cleaning can help reset kitchens, bathrooms, floors, baseboards, and other frequently overlooked areas.
For ongoing maintenance, Recurring Cleaning Services can help homeowners follow a weekly, biweekly, or monthly cleaning schedule rather than waiting for buildup to become difficult to manage. BA House Cleaning lists deep cleaning, recurring cleaning, and carpet cleaning among its residential services.
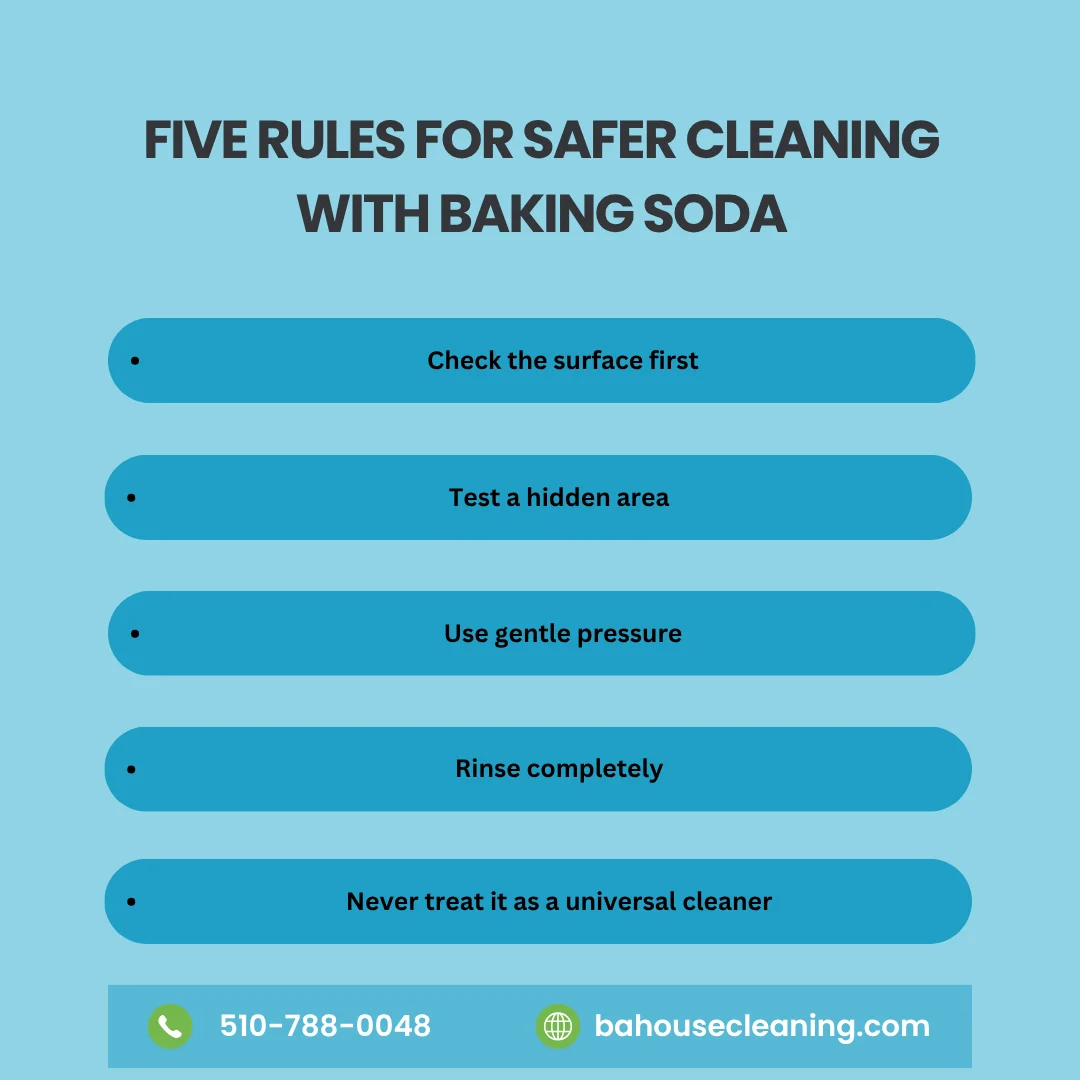
Five Rules for Safer Cleaning with Baking Soda
Using a simple routine can reduce the risk of scratches, residue, and unsuitable product combinations:
Check the surface first: Read manufacturer instructions and identify whether the material is coated, polished, porous, painted, or otherwise delicate.
Test a hidden area: Apply a small amount in an inconspicuous location and allow it to dry before treating a larger section.
Use gentle pressure: Let moisture and time loosen residue instead of relying on aggressive scrubbing.
Rinse completely: Remove every trace of baking soda to prevent white film, gritty residue, or powder entering appliance openings.
Never treat it as a universal cleaner: Choose another method when the surface requires a neutral cleaner, specialty product, disinfectant, or professional treatment.
Following these five rules makes cleaning with baking soda more practical while protecting the materials and finishes throughout the home.
Create a Cleaner Routine for Your Entire Home
Small cleaning methods can make everyday maintenance easier, but they work best as part of a consistent routine. When kitchens, bathrooms, floors, and frequently used surfaces receive regular attention, isolated spills and odors are less likely to develop into widespread buildup.
Connect with BA House Cleaning on Facebook to discuss professional house cleaning in Oakland and the East Bay. Choose dependable support for routine upkeep, detailed cleaning, and the areas of your home that need more attention than a simple household cleaning paste can provide.
Frequently Asked Questions
What can you clean with baking soda?
Baking soda may help clean selected stainless steel, porcelain, ceramic, refrigerator interiors, washable trash cans, cookware, sinks, tubs, and tile surfaces. Always check the manufacturer’s instructions and test a hidden area before treating the complete surface.
Can baking soda disinfect surfaces?
No. Baking soda can help remove dirt, residue, and some odors, but it is not an EPA-registered disinfectant. Use an appropriate labeled product when a surface requires disinfection.
How do you make a baking soda cleaning paste?
Place a small amount of baking soda in a bowl and add water gradually until the mixture becomes spreadable. Apply a thin layer, clean gently with a soft cloth or sponge, rinse thoroughly, and dry the surface.
Can you mix baking soda and vinegar for cleaning?
The combination produces fizzing as the acid and alkaline ingredients react. The reaction may move loose debris, but it also neutralizes both ingredients over time. Never store the mixture in a closed container or combine it with commercial cleaners.
Can you mix baking soda with bleach?
Do not create homemade mixtures involving bleach. Use bleach only according to its product label, and never combine it with vinegar, ammonia, acids, or unidentified cleaning products.
Is baking soda safe for natural stone?
Routine scrubbing with baking soda is not the preferred care method for natural stone. Use a neutral cleaner or stone-specific product unless a stone professional recommends a controlled poultice for a particular stain.
Can baking soda scratch stainless steel?
Some manufacturers allow a baking soda paste for traditional stainless steel when applied gently in the direction of the grain. Coated, fingerprint-resistant, black stainless, and other specialty finishes may require different care.
Can I leave baking soda on a carpet overnight?
Check the carpet manufacturer’s instructions first. Fine powder may settle deeply into fibers and become difficult to remove. Avoid applying it to wet stains, delicate rugs, or pet accidents, and keep children and animals away from the treated area.
Does baking soda remove every household odor?
No. It may absorb some light odors, but it cannot correct spoiled food, pet urine, mold, moisture, plumbing problems, smoke damage, or residue hidden beneath a surface. Remove the source of the smell before attempting to deodorize the area.
How often can I clean with baking soda?
Use it only when appropriate for the surface and type of residue. Frequent abrasive cleaning may gradually affect some finishes, so gentle routine cleaning with the manufacturer-recommended product is often more suitable.
A coffee maker may look clean from the outside while coffee oils, water spots, loose grounds, and mineral deposits gradually collect inside its removable parts and internal water system. Over time, this buildup can affect the way the machine operates and may leave coffee tasting bitter, stale, or different from the flavor you normally expect.
Learning how to clean a coffee maker involves more than rinsing the carafe after breakfast. The filter basket, lid, water reservoir, warming plate, reusable filter, exterior controls, and internal brewing system all require different types of care. Some parts need washing after every use, while the internal system may require a separate descaling cycle based on the manufacturer’s instructions.
At BA House Cleaning, we understand that small kitchen routines can make a noticeable difference in how clean and comfortable the complete room feels. Regularly cleaning the coffee station, removing spills, and wiping surrounding countertops can prevent sticky residue and scattered grounds from becoming part of a larger kitchen mess.
This guide explains how to clean a drip coffee maker, wash the carafe and removable components, remove mineral buildup, use vinegar safely, clean without vinegar, care for a single-serve brewer, and avoid common mistakes that may damage the machine.
Why Coffee Makers Need Regular Cleaning
Every brewing cycle brings coffee grounds, natural oils, heat, and water into contact with different parts of the machine. Grounds may collect around the basket, while brewed coffee can drip onto the warming plate or exterior. Water also leaves minerals behind as it moves through the reservoir, tubes, and heating system.
These types of buildup require different cleaning methods. Warm water and dish soap can remove coffee residue from washable components, but they cannot always reach mineral deposits inside the internal water pathway. That is why a complete coffee maker cleaning routine includes both surface cleaning and periodic descaling.
Cuisinart explains that coffee oils, residue, and hard-water deposits can affect flavor, brewing speed, and the machine’s operation. Its guidance separates washing the carafe and filter basket from descaling the internal system.
Cleaning Versus Descaling a Coffee Maker
Cleaning and descaling are related, but they do not solve the same problem.
Routine Cleaning
Routine cleaning removes visible coffee grounds, spills, oils, stains, and residue from accessible components. It normally covers the carafe, lid, brew basket, reusable filter, removable water reservoir, warming plate, and exterior surfaces.
The parts that come into direct contact with coffee should receive the most frequent attention because oils and damp grounds can remain behind after brewing.
Descaling
Descaling targets mineral deposits left by the water used in the machine. These deposits may develop inside the reservoir, tubing, heating system, or other areas that a cloth cannot reach.
A descaling cycle usually involves running a manufacturer-approved solution through the machine without coffee grounds. Depending on the model, the recommended product may be diluted vinegar or a branded descaling solution.
Because coffee makers vary, always check the manual before selecting a solution or starting a cleaning cycle.
What You Need Before Cleaning
Gathering the right supplies helps you clean the machine without using harsh or unsuitable products.
You may need:
Warm water.
Mild, unscented dish soap.
A soft sponge or microfiber cloth.
A small soft-bristled brush.
White distilled vinegar, when approved for the model.
A manufacturer-approved descaling solution.
A clean, dry towel.
A paper coffee filter, when required for the cleaning cycle.
Avoid steel wool, abrasive scouring pads, sharp tools, bleach, and commercial oven cleaners. These products may scratch removable components, damage finishes, or leave unwanted residue.
Unplug the machine and allow it to cool before cleaning the exterior, warming plate, or removable parts. Never immerse the electrical base, power cord, or plug in water.
How to Clean a Coffee Maker After Every Use
A quick cleaning after brewing prevents grounds and coffee oils from remaining inside the machine until the next day.
Once the coffee maker cools, remove the used paper filter and grounds. Empty and rinse the carafe, then wash the brew basket, reusable filter, and lid if the manufacturer identifies them as washable.
Use warm water, mild dish soap, and a soft sponge. Rinse each component thoroughly so no soap remains, then allow the parts to dry before returning them to the machine.
Wipe coffee drips from the warming plate and surrounding exterior with a damp cloth. Apply the water to the cloth rather than pouring or spraying it directly onto electrical components.
How to Clean the Coffee Carafe
The carafe often develops a brown film when coffee remains inside for several hours or when the pot receives only a quick rinse after use.
Start by washing the carafe with warm water, mild dish soap, and a non-abrasive sponge. Pay attention to the pouring lip, underside of the lid, handle connection, and corners where coffee may collect.
For a stubborn stain, add warm water and a small amount of baking soda to the carafe. Allow it to sit briefly, then clean the surface gently with a soft sponge or bottle brush. Rinse several times before using the carafe again.
Avoid sudden temperature changes with a glass pot. Do not pour cold water into a hot carafe because thermal shock may crack the glass.
Cuisinart recommends washing the carafe and filter basket with warm soapy water and identifies a baking soda paste as an option for deeper carafe stains.
How to Clean the Brew Basket and Reusable Filter
The brew basket and reusable filter come into direct contact with wet coffee grounds and oils. When residue remains in the small openings, it may interfere with drainage or carry an old flavor into the next pot.
Remove both parts according to the manual. Empty all loose grounds, rinse the pieces, and wash them with warm water and mild dish soap.
Use a soft brush to reach mesh, corners, or narrow openings without bending or puncturing the filter. Rinse carefully and allow the components to dry completely.
Check whether the manufacturer allows dishwasher cleaning. A removable part may look dishwasher-safe but still require hand washing, so rely on the model instructions rather than appearance.
How to Clean the Water Reservoir
Empty standing water when the coffee maker will not be used for an extended period. A removable reservoir can usually be washed more thoroughly than a fixed one, but the correct method depends on the machine.
When the reservoir is removable and washable, use mild soap, warm water, and a soft cloth. Rinse it well so no detergent remains.
For a fixed reservoir, wipe only the accessible areas with a clean damp cloth. Do not pour dish soap directly into the internal water system unless the manufacturer specifically instructs you to do so.
Avoid using baking soda in a non-removable reservoir because undissolved particles may remain inside the machine. Baking soda is better suited to accessible surfaces such as the carafe.
How to Clean a Drip Coffee Maker with Vinegar
White vinegar can help remove mineral deposits from many traditional drip coffee makers, but the correct water-to-vinegar ratio varies by brand and model.
Before starting:
Empty the carafe.
Remove the coffee grounds.
Wash the basket.
Remove a charcoal water filter when the manual requires it.
Check that the manufacturer permits vinegar.
Fill the reservoir with the recommended vinegar-and-water solution. Place the empty carafe beneath the basket and run the machine without coffee grounds.
Some models complete the process in one cleaning cycle. Others instruct the user to pause halfway, allow the solution to sit, and then finish the cycle.
Afterward, empty and rinse the carafe. Fill the reservoir with clean water and run one or more full brewing cycles until the vinegar smell disappears.
Cuisinart’s official coffee maker cleaning guide recommends checking the individual manual because its models may use different vinegar ratios and cleaning functions. The company also recommends running a fresh-water cycle after descaling.
Can You Use Undiluted Vinegar?
Do not assume that stronger vinegar will provide better results. Undiluted vinegar may leave a powerful odor and may not match the manufacturer’s instructions for the machine.
Some coffee makers use a three-parts-water-to-one-part-vinegar mixture, while others use different amounts. Certain manufacturers prefer a dedicated descaling solution instead.
Follow the instructions for the exact machine rather than applying a universal ratio from a general cleaning article. This is particularly important for machines with filters, sensors, pumps, specialized tubing, or built-in cleaning programs.
How to Clean a Coffee Maker Without Vinegar
Some people dislike the smell of vinegar, while some manufacturers recommend a branded descaling product instead.
To clean a coffee maker without vinegar, use the descaling solution listed in the appliance manual. Measure and dilute the product exactly as directed, run the required cleaning cycle, and complete all recommended rinsing cycles.
Do not replace a commercial descaler with lemon juice, citric acid, bleach, dishwashing liquid, or baking soda unless the manufacturer approves that substitute.
Baking soda can help clean an accessible carafe, but running it through internal tubing may leave particles behind when it does not dissolve completely.
The safest vinegar-free option is the product and method approved for the specific coffee maker.
How to Clean a Single-Serve Coffee Maker
Single-serve brewers include components that differ from a traditional drip machine. These may include a pod holder, entrance needle, exit needle, removable drip tray, water reservoir, and replaceable water filter.
Unplug the brewer and allow it to cool. Remove and wash the drip tray, reservoir, lid, and pod holder when the manufacturer permits it.
Coffee grounds may collect around the pod holder and needles. Follow the manual’s procedure carefully because these needles are sharp and may require a special maintenance tool.
Descale the internal water system according to the brewer’s instructions. Keurig states that descaling removes calcium deposits from parts that come into contact with water and provides model-specific procedures for activating the correct descaling cycle.
Avoid copying the button sequence from a different brewer. Even machines from the same company may use different controls and descaling modes.
How to Clean a Coffee Maker with a Grinder
A grind-and-brew coffee maker requires additional care because coffee oils and fine grounds may remain inside the grinder, chute, and basket.
Unplug the machine before cleaning the grinder area. Remove loose grounds using the brush supplied with the appliance or another manufacturer-approved tool.
Do not introduce water into a grinder unless the manual identifies the component as removable and washable. Moisture inside the grinding mechanism may cause grounds to clump or affect electrical parts.
Wash the removable brew basket and carafe separately, then clean and descale the brewing system according to the model instructions.
How to Remove Coffee Odors
Old coffee smells often come from damp grounds, residue inside the basket, coffee left in the carafe, or spills on the warming plate.
Empty the grounds immediately after brewing and wash all removable coffee-contact components. Clean beneath the filter basket and around the carafe lid, where residue may remain less visible.
A small amount of baking soda can help deodorize a washable carafe, but rinse it thoroughly afterward.
Avoid masking the smell with perfume, essential oils, or heavily scented cleaners. Any product used on coffee-contact surfaces should rinse away completely.
Signs Your Coffee Maker Needs Descaling
A calendar provides a useful reminder, but the way the machine operates may also indicate mineral buildup.
Common signs include:
Brewing takes longer than usual.
The machine produces less coffee than expected.
Water flow appears uneven.
The brewer makes unfamiliar sounds.
A clean or descale indicator appears.
Coffee develops an unusual flavor despite fresh grounds.
White mineral residue appears around accessible water-contact areas.
These signs may have causes other than scale. Stop using the machine and contact the manufacturer when you notice leaking, electrical odors, sparks, damaged wiring, or repeated error messages.
How Often Should You Clean a Coffee Maker?
Clean the carafe, filter basket, lid, and reusable filter after each use or according to the appliance manual. Wipe the warming plate and exterior whenever you notice drips or loose grounds.
Descaling frequency depends on water hardness, brewing frequency, the machine’s design, and whether it uses a water filter. Cuisinart recommends descaling some machines every one to three months depending on water hardness, while Mr. Coffee advises cleaning selected models every 40 to 80 brewing cycles. Keurig commonly recommends descaling supported brewers every three to six months or when the descale indicator appears.
These schedules are general brand guidance, not universal rules. Follow the manual and indicator lights for the specific model.
Common Coffee Maker Cleaning Mistakes
Avoid these mistakes when cleaning or descaling the machine:
Starting before the coffee maker cools.
Immersing the electrical base or power cord in water.
Running dish soap through the internal brewing system.
Using vinegar without checking the manual.
Forgetting to remove the water filter before descaling.
Brewing coffee before completing the rinse cycles.
Scrubbing the carafe with steel wool.
Cleaning grinder components with water when they are not washable.
Returning wet parts to the machine.
Ignoring a persistent leak or electrical smell.
A cleaning method should match both the type of machine and the manufacturer’s recommendations.
Keep the Complete Coffee Station Cleaner
Cleaning the brewer is easier when the surrounding coffee station also receives regular attention. Grounds may spread across countertops and floors, while coffee, milk, sweeteners, and water may leave sticky marks on cabinet fronts, handles, and nearby appliances.
BA House Cleaning’s Recurring Cleaning Services help Oakland and East Bay homeowners maintain kitchens and other frequently used areas through weekly, biweekly, or monthly appointments. The service page states that standard cleaning can include kitchen counters, sinks, appliance exteriors, stovetops, floors, and other routine household surfaces.
Professional house cleaning does not replace the internal maintenance required by the coffee maker’s manufacturer. It can, however, help keep the surrounding kitchen cleaner and reduce the everyday buildup that develops around a busy coffee station.
Five Habits That Make Coffee Maker Cleaning Easier
A consistent routine prevents small spills and loose grounds from turning into stubborn buildup:
Empty grounds after brewing: Remove the used filter and wet coffee grounds instead of leaving them inside the basket for several hours.
Wash coffee-contact parts regularly: Clean the carafe, lid, filter basket, and reusable filter according to the manufacturer’s instructions.
Wipe spills while they are fresh: Allow the warming plate to cool, then remove coffee drips before heat causes them to dry onto the surface.
Follow a descaling schedule: Use the appliance manual, water hardness, brewing frequency, and descale indicator to decide when the internal system needs attention.
Complete every rinse cycle: After using vinegar or descaling solution, run the required fresh-water cycles before brewing coffee again.
These habits create a simpler coffee maker cleaning routine and help keep the brewer, carafe, and surrounding coffee station easier to manage.
Start Every Morning with a Cleaner Kitchen
A clean coffee maker supports a fresher morning routine, but it represents only one small part of the kitchen. Counters, floors, cabinet fronts, sinks, and frequently touched surfaces also require consistent attention throughout the week.
Connect with BA House Cleaning on Facebook to learn more about dependable home cleaning in Oakland and the East Bay. Build a recurring schedule that keeps your kitchen and living spaces cleaner, more comfortable, and ready for everyday use.
Frequently Asked Questions
What is the best way to clean a coffee maker?
Wash the removable coffee-contact parts with warm water and mild dish soap, wipe the exterior, and descale the internal water system according to the manufacturer’s instructions. The correct descaling solution and frequency depend on the model.
Can I clean a coffee maker with vinegar?
Many drip coffee makers allow diluted white vinegar, but not every machine follows the same ratio or procedure. Check the manual before adding vinegar to the reservoir, then complete all required fresh-water rinses.
How do I descale a coffee maker?
Empty the machine, remove filters when instructed, add the approved descaling solution, and run the designated cleaning or brewing cycle. Rinse the reservoir and complete the recommended water-only cycles afterward.
How often should I descale my coffee maker?
The schedule depends on the model, water hardness, and brewing frequency. Some manufacturers recommend every one to three months, while others recommend every three to six months or when a descale light appears. Follow the manual for the specific brewer.
Can I use baking soda to clean a coffee maker?
Baking soda can help clean stains and odors from an accessible carafe. Avoid running it through internal tubing unless the manufacturer specifically approves the method, because undissolved material may remain inside the machine.
How can I clean a coffee maker without vinegar?
Use the branded or manufacturer-approved descaling solution listed in the manual. Follow the dilution, cycle, and rinsing instructions exactly.
Why does my coffee taste bitter after cleaning the machine?
Cleaning solution may remain inside the water system when the machine has not completed enough rinse cycles. Run the manufacturer-recommended fresh-water cycles and wash the carafe and filter basket again before brewing.
Should I wash the coffee carafe after every use?
Regular washing helps remove coffee oils and prevents stains from building up. Use warm water, mild dish soap, and a soft sponge unless the manufacturer provides different instructions.
Can coffee maker parts go in the dishwasher?
Some carafes, lids, reservoirs, and filter baskets are dishwasher-safe, while others require hand washing. Check the manual before placing any removable component in the dishwasher.
Why is my coffee maker brewing slowly?
Mineral buildup may restrict water flow, but slow brewing can also have other causes. Descale the machine according to its instructions. Contact the manufacturer if the problem continues after cleaning.