Bay Area Cleaning Services in Oakland maintaining a clean home is essential for both health and comfort, but with busy schedules and daily responsibilities, keeping up with cleaning tasks can be overwhelming. Whether you are managing a household, running a business, or simply struggling to find time in your hectic day, cleaning can often take a back seat. This is where professional cleaning services come in to help.
Bay Area Cleaning Services in Oakland offers comprehensive cleaning solutions that can make your life easier, cleaner, and more enjoyable. In this article, we will explore what Bay Area Cleaning Services entails, why you should choose them, and how they can help maintain a spotless and healthy environment.
What Are Bay Area Cleaning Services in Oakland?
Bay Area Cleaning Services in Oakland covers a wide range of professional cleaning solutions designed to meet the unique needs of homes and businesses in the Bay Area. These services are provided by cleaning professionals who are equipped with the tools, knowledge, and experience to offer high-quality cleaning, whether for regular housekeeping, deep cleaning, or specialized services such as move-in/move-out cleaning or post-construction cleaning.
Some of the key services included in Bay Area Cleaning Services in Oakland are:
Residential Cleaning: This includes regular cleaning services for homes, such as dusting, vacuuming, mopping, and cleaning surfaces. It ensures that your home is always ready for guests or simply provides you with a clean, healthy space to relax in after a long day.
Deep Cleaning: For homes that need more than just routine cleaning, deep cleaning services are available. This service targets hidden dirt and grime in areas that are typically ignored, such as baseboards, under furniture, and behind appliances. Deep cleaning is recommended for homes that haven’t been cleaned thoroughly in a while or after special events.
Move-in/Move-out Cleaning: If you are moving into or out of a home, Bay Area Cleaning Services in Oakland can assist with comprehensive cleaning, ensuring that your new home is fresh and ready for occupancy or that you leave your old home spotless to secure your security deposit.
Commercial Cleaning: Businesses in the Bay Area can benefit from professional cleaning services that help maintain clean and inviting spaces for employees, clients, and visitors. Services may include office cleaning, restroom sanitation, and floor care.
By opting for Bay Area Cleaning Services in Oakland, you can rely on experts to maintain a high standard of cleanliness, making your space healthier, more organized, and more pleasant.
What Makes Bay Area Cleaning Services in Oakland the Best Choice?
There are several compelling reasons why Bay Area Cleaning Services in Oakland is an excellent choice for maintaining cleanliness in your home or business. Whether you’re looking for regular cleaning or one-time deep cleaning, professional cleaning services provide unique advantages that can’t be matched by DIY efforts.
Time-Saving Convenience: With busy schedules, cleaning often becomes a lower priority and can take up precious hours of your day. By hiring Bay Area Cleaning Services in Oakland, you can free up your time to focus on other important tasks, such as work, family, or hobbies. The professionals handle all the cleaning, ensuring your home or business stays pristine without you lifting a finger.
Expertise and High-Quality Results: Professional cleaners are trained in the most efficient cleaning methods and use the right products and equipment to get the job done effectively. They can handle tough stains, difficult-to-reach areas, and delicate surfaces with precision, ensuring high-quality results every time.
Healthier Environment: Regular cleaning, especially deep cleaning, helps eliminate dust, dirt, allergens, and bacteria from your living or working space. This is particularly beneficial for people with allergies, asthma, or other respiratory issues. Bay Area Cleaning Services in Oakland ensures that your home is not only clean but also healthier for everyone living or working there.
And here are the other reasons that will help you choose a company Bay Area Cleaning Services in Oakland.
Customizable Services: Bay Area Cleaning Services in Oakland are customizable, meaning you can select the exact services you need. Whether you require a one-time cleaning for a special event or regular weekly cleaning, the flexibility allows you to choose a plan that fits your lifestyle and preferences.
Increased Property Value: Regular cleaning and maintenance can enhance the appearance and longevity of your property. Whether it’s the cleanliness of your floors, windows, or walls, keeping your property well-maintained can preserve its value, especially when it comes time to sell or rent out your home or office space.
Professional Equipment and Supplies: Cleaning services use industrial-grade equipment and high-quality cleaning solutions that aren’t available in typical household cleaning kits. These professional tools ensure a more thorough clean and can handle even the toughest jobs.
Peace of Mind: When you hire Bay Area Cleaning Services in Oakland, you can have peace of mind knowing that experts are taking care of your cleaning needs. You don’t need to worry about managing cleaning tasks yourself or dealing with unsatisfactory results from subpar cleaners.
How Do Bay Area Cleaning Services Work?
Hiring Bay Area Cleaning Services is a simple process. Here’s an overview of how it typically works:
Contact the Service Provider: The first step is to contact a professional cleaning service provider. You’ll provide details about your cleaning needs, including the type of service (e.g., regular cleaning, deep cleaning, move-out cleaning, etc.) and the size of the property.
Request a Quote: Based on your specific cleaning requirements, you will receive a personalized quote. This quote will take into account the type of service, the size of the area, and any additional cleaning needs.
Schedule a Cleaning Appointment: Once you agree to the quote, you can schedule a time for the cleaning. Bay Area Cleaning Services in Oakland often offers flexible scheduling to suit your availability, whether it’s during the week, weekends, or evenings.
Cleaning Day: On the scheduled day, the professional cleaning team will arrive at your property with all the necessary cleaning supplies and equipment. They will perform the services as agreed, ensuring that every area is cleaned to your satisfaction.
Inspection and Feedback: After the cleaning is complete, the team may conduct a final inspection to ensure the quality of the service. You’ll also have the opportunity to provide feedback or request any additional cleaning if necessary.
Ongoing Service (Optional): If you’re satisfied with the service, you can schedule ongoing cleaning services, whether that’s weekly, bi-weekly, or monthly. Many cleaning services offer subscription-based packages for regular cleaning.
Enjoy a Cleaner Space: Once the cleaning is completed, you can enjoy your freshly cleaned home or office with the knowledge that you’ve left the work to professionals.
Conclusion
Hiring Bay Area Cleaning Services in Oakland is the key to maintaining a clean, healthy, and organized living or working space. Whether you need regular cleaning, deep cleaning, or specialized services, professional cleaning ensures that your home or business always looks its best.
For the highest-quality cleaning services in the Bay Area, considerBA House Cleaning. With their expertise, flexible scheduling, and commitment to customer satisfaction, they are the ideal choice for all your cleaning needs.
FAQs
How often should I schedule cleaning services?
It depends on your needs. You can schedule cleaning services weekly, bi-weekly, or monthly, or as a one-time service for deep cleaning or move-out cleaning.
Are the cleaning products used safe for my family and pets?
Yes,BA House Cleaning uses Eco-friendly cleaning products that are safe for both children and pets.
How do I book a cleaning service with BA House Cleaning?
You can easily book a cleaning service by visiting their website atba housecleaningor by calling their customer service to schedule your appointment.
You understand the demands of a busy lifestyle, often leaving little time for essential tasks like cleaning. Imagine the peace of mind that comes with knowing your home, office, or commercial space in Oakland CA is consistently clean and organized without you having to lift a finger. That’s the convenience and benefit that a Recurring Cleaning Service Oakland CA offers. Instead of constantly playing catch-up with cleaning, you can invest your valuable time in work, family, or enjoying the beautiful Canadian outdoors.
This article will guide you through the advantages of establishing a Recurring Cleaning Service Oakland CA for your various spaces. We’ll explore how this consistent approach not only saves you time and effort but also contributes to a healthier and more productive environment. Discover how a tailored recurring cleaning plan can seamlessly integrate into your life, providing reliable and stress-free cleanliness for your home, office, or commercial property in Oakland CA, allowing you to focus on what truly matters.
What is Recurring Cleaning Service Oakland CA?
Recurring Cleaning Service Oakland CA refers to professional cleaning services scheduled regularly to maintain cleanliness in your home or office. Unlike one-time deep cleanings, recurring services involve routine visits by cleaning professionals who come at set intervals, whether weekly, bi-weekly, or monthly, depending on your needs. These services typically include general cleaning tasks such as dusting, vacuuming, mopping, bathroom sanitization, and kitchen cleaning, among others.
Hiring a Recurring Cleaning Service Oakland CA, ensures that your space remains consistently clean, organized, and well-maintained without the need to constantly schedule a new cleaning every time things get messy. This service is particularly beneficial for people who want to keep their home or office tidy with minimal effort, as well as those who have a busy lifestyle and need the peace of mind that comes with a regularly cleaned space.
Why Choose Recurring Cleaning Service Oakland?
Opting for Recurring Cleaning Service Oakland CA, offers a range of benefits that go beyond just cleanliness. Below are some reasons why you should consider this service for your home or office:
1. Consistency and Convenience
One of the key benefits of Recurring Cleaning Service Oakland CA is the consistency it provides. With regular cleaning visits, your home or office remains spotless at all times. You won’t have to worry about unexpected messes or the buildup of dirt and dust. Scheduling regular cleaning intervals ensures that your space is always ready for guests, meetings, or family gatherings.
2. Time-Saving
Cleaning your home or office can take hours, and it’s a task that many of us would rather avoid. By opting for Recurring Cleaning Service Oakland CA, you can save valuable time and energy that can be better spent on other important tasks. With professional cleaners handling the cleaning, you’ll no longer need to carve out time from your already packed schedule to scrub floors, sanitize bathrooms, or dust surfaces.
3. Improved Health and Hygiene
A clean environment is crucial for your health. Dust, allergens, bacteria, and mold can accumulate over time, potentially leading to respiratory issues, allergies, and other health problems. Regular cleaning ensures that these harmful substances are kept at bay. Recurring Cleaning Service Oakland CA helps reduce the presence of germs and allergens, creating a healthier living and working environment for you, your family, or your employees.
4. Long-Term Savings
While some may view professional cleaning services as an unnecessary expense, the reality is that Recurring Cleaning Service Oakland CA can save you money in the long run. Routine cleaning helps preserve the condition of your furniture, carpets, and surfaces, preventing costly repairs or replacements down the line. Additionally, maintaining cleanliness in your home or office can extend the lifespan of appliances and furniture, reducing the need for frequent purchases.
5. Customizable Cleaning Plans
With Recurring Cleaning Service Oakland CA, you have the flexibility to choose a plan that fits your needs. Whether you need weekly, bi-weekly, or monthly cleaning, the service can be tailored to meet your specific requirements. You can also specify the tasks you want to be prioritized or any areas that need extra attention. The ability to customize the service makes Recurring Cleaning Service Oakland CA an ideal option for both homes and offices with unique cleaning needs.
How Does Recurring Cleaning Service Oakland CA Work?
The process of hiring and benefiting from Recurring Cleaning Service Oakland CA is simple. Here’s a breakdown of how it typically works:
1. Initial Consultation
The first step is to contact a cleaning service provider and schedule an initial consultation. During this consultation, you’ll discuss your cleaning needs, preferences, and expectations. This is also the time to determine how often you’d like the cleaning service to occur—whether it’s weekly, bi-weekly, or monthly.
2. Customized Cleaning Plan
After the initial consultation, a customized cleaning plan will be created to suit your needs. Whether you’re looking for a basic cleaning or a more detailed deep clean, the plan will outline the tasks to be performed during each visit. Special requests, such as prioritizing certain areas or using eco-friendly cleaning products, can also be included.
3. Scheduled Cleaning Visits
Once the plan is in place, your recurring cleaning schedule will be set. Cleaning professionals will arrive at your home or office on the agreed-upon dates and times. They will bring all necessary cleaning supplies and equipment to complete the tasks as specified in your plan.
4. Routine Cleaning
During each visit, the cleaning team will perform regular cleaning tasks, such as dusting, vacuuming, mopping, and sanitizing surfaces. The cleaning team may also handle more specialized tasks, like cleaning appliances, washing windows, or deep-cleaning carpets, depending on the scope of the plan.
5. Post-Cleaning Inspection
After each cleaning session, a post-cleaning inspection may be done to ensure that all tasks have been completed to your satisfaction. If any areas need additional attention, the team will address them promptly. Regular feedback can help improve the quality of the service over time.
Why Choose BA House Cleaning for Your Recurring Cleaning Service Oakland CA Needs?
At BA House Cleaning, we offer high-quality Recurring Cleaning Service Oakland tailored to your specific needs. Here’s why our service stands out:
Experienced Cleaning Professionals: Our team consists of trained, insured, and reliable cleaning experts who take pride in delivering top-notch service.
Eco-Friendly Cleaning Solutions: We use environmentally friendly cleaning products to ensure that your home or office is cleaned without harming the environment or compromising your health.
Customizable Plans: Whether you need weekly cleaning, bi-weekly cleaning, or a more extensive monthly clean, we offer flexible options to suit your requirements.
Affordable Pricing: At BA House Cleaning, we provide competitive pricing without compromising on quality. Our transparent pricing ensures there are no hidden fees.
100% Satisfaction Guarantee: We are committed to delivering outstanding service and ensuring your satisfaction. If you’re not happy with the cleaning results, we’ll make it right at no extra cost.
VisitBA House Cleaning to book your Recurring Cleaning Service Oakland today and experience the difference our professional team can make.
Conclusion
Maintaining a clean home or office is essential for a positive, productive, and healthy environment. Recurring Cleaning Service Oakland offers an effective solution for those who want to keep their space clean without the hassle of cleaning it themselves. By opting for professional cleaning services, you ensure that your space is consistently spotless, your health is safeguarded, and your time is freed up for more important tasks. Choose BA House Cleaning for your Recurring Cleaning Service Oakland needs, and let us help you enjoy a cleaner, more organized space.
FAQs
What is included in a recurring cleaning service?
A recurring cleaning service typically includes regular tasks such as dusting, vacuuming, mopping floors, cleaning bathrooms, sanitizing kitchen surfaces, and emptying trash. The frequency and scope of services can be customized based on your needs.
Why should I choose recurring cleaning services instead of one-time cleanings?
Recurring cleaning services ensure that your home or office remains consistently clean without the need to schedule new cleanings frequently. Regular cleaning helps maintain cleanliness, prevents dirt buildup, and saves you time.
How often should I schedule recurring cleaning?
The frequency of recurring cleaning depends on your preferences and the level of traffic in your space. Most clients opt for weekly or bi-weekly cleaning for homes and businesses, but monthly cleanings are also available.
Are your cleaning products safe for the environment?
Yes, BA House Cleaning uses Eco-friendly cleaning products that are safe for the environment, your family, and your employees. We prioritize using non-toxic, sustainable products that are both effective and safe.
Can I customize my recurring cleaning plan?
Yes, our Recurring Cleaning Service Oakland CA is fully customizable. You can tailor the cleaning schedule and tasks to fit your needs, ensuring that we meet your specific requirements. Whether you need deep cleaning or standard cleaning, we’re here to accommodate your requests.
In today’s fast-paced business environment, maintaining a clean and organized office is essential for fostering a productive and positive work atmosphere. A tidy office not only reflects well on your company but also contributes to employee well-being and overall business efficiency. That’s where Office Cleaning Service Oakland CA comes into play. Whether you’re operating in a small office or managing a large corporate space, professional cleaning services can help you maintain a pristine environment without the hassle of handling it yourself. In this article, we will dive into what Office Cleaning Service Oakland CA involves, why it’s essential for your business, and how it can contribute to a cleaner and healthier workspace.
What is Office Cleaning Service Oakland CA?
Office Cleaning Service Oakland CA refers to professional cleaning services that cater to businesses, offices, and commercial spaces in the Oakland area. These services are designed to ensure that office environments are maintained at the highest standards of cleanliness. Typical tasks include cleaning office floors, desks, windows, common areas, bathrooms, and kitchens, as well as emptying trash bins, disinfecting high-touch surfaces, and dusting furniture.
A professional Office Cleaning Service Oakland CA provides comprehensive solutions tailored to the specific needs of your office. Whether it’s a one-time deep clean or regular maintenance cleaning, these services ensure your office is spotless and organized. Hiring professionals to handle your office cleaning allows you to focus on running your business, while ensuring that the space remains inviting, hygienic, and conducive to productivity.
Why Choose Office Cleaning Service Oakland CA?
Opting for Office Cleaning Service Oakland CA brings several key benefits to your workplace. Below are some compelling reasons to choose professional cleaning services for your office:
1. Boost Employee Productivity
A clean office can have a direct impact on employee morale and productivity. Studies have shown that employees tend to be more focused and efficient in a clean and organized environment. Office Cleaning Service Oakland CA ensures that your workspace is free from distractions like clutter, dirt, and germs, allowing employees to focus on their tasks and work more effectively.
2. Maintain a Professional Image
First impressions matter, and your office space plays a significant role in how clients, visitors, and potential employees perceive your business. A clean and well-maintained office presents a professional image and helps build trust with clients and customers. Regular Office Cleaning Service Oakland CA ensures that your space is always ready for meetings and presentations, projecting an image of professionalism and reliability.
3. Improve Employee Health and Hygiene
Offices are breeding grounds for germs and bacteria, especially in shared spaces like kitchens and bathrooms. A professional Office Cleaning Service Oakland CA will thoroughly disinfect and sanitize these areas, reducing the spread of illness and promoting a healthier work environment. Regular cleaning helps minimize allergens, dust, and bacteria, ensuring your employees stay healthy and can avoid sick days.
4. Customizable Cleaning Plans
One of the greatest benefits of hiring an Office Cleaning Service Oakland CA is the flexibility they offer. You can customize the cleaning schedule to meet your office’s needs. Whether you need daily cleaning, weekly cleaning, or a monthly deep clean, professional cleaning companies can tailor their services to fit your business’s specific requirements.
5. Cost-Effective Solution
Although it may seem more cost-effective to have your employees clean the office, this can be a drain on time and resources. Hiring a professional Office Cleaning Service Oakland CA is a cost-effective way to ensure that your office remains clean without taking time away from your employees’ actual work. Cleaning professionals have the experience and equipment necessary to do the job efficiently, saving you both time and money in the long run.
How Does Office Cleaning Service Oakland CA Work?
The process of hiring an Office Cleaning Service Oakland CA is simple and convenient. Here’s a step-by-step guide on how it works:
1. Initial Consultation
The first step in hiring an Office Cleaning Service Oakland is to schedule an initial consultation. During this consultation, the cleaning company will assess the size and scope of your office space and discuss your specific cleaning needs. You can ask questions, provide any special requests, and agree on the frequency of cleaning, whether it’s daily, weekly, or as needed.
2. Create a Custom Cleaning Plan
Once the consultation is complete, the cleaning company will create a customized cleaning plan tailored to your office’s requirements. This plan will outline the tasks to be performed, such as desk cleaning, window washing, floor care, trash removal, and more. You can also request additional services, such as carpet cleaning or deep cleaning of common areas.
3. Schedule the Cleaning
After the plan is in place, you’ll schedule the cleaning at a time that works best for your office. Many businesses choose to have cleaning services scheduled after hours or during weekends to avoid disrupting daily operations. The flexibility of professional Office Cleaning Service Oakland CA means you can choose a time that fits your business’s schedule.
4. Cleaning Day
On the scheduled day, the cleaning team will arrive with all the necessary cleaning supplies and equipment. They will begin cleaning according to the plan, ensuring that every area of your office is attended to. Depending on the services requested, this may include dusting surfaces, vacuuming, mopping floors, disinfecting high-touch areas, cleaning windows, and more.
5. Post-Cleaning Inspection
Once the cleaning is complete, a final inspection is usually conducted to ensure that all tasks have been completed to satisfaction. If any areas require additional attention, the cleaning team will address them immediately.
6. Ongoing Cleaning Services
After the first cleaning, you can continue with a recurring cleaning schedule to ensure that your office stays clean and well-maintained. Many businesses find that having regular cleaning services ensures that their office always looks professional and clean, without the need for constant supervision.
Why Choose BA House Cleaning for Your Office Cleaning Service Oakland CA?
At BA House Cleaning, we pride ourselves on offering top-tier Office Cleaning Service Oakland that provides exceptional value and results. Here’s why we are the preferred choice for businesses in Oakland:
Experienced and Trusted Team: Our cleaning professionals are highly trained, insured, and bonded, ensuring that your office is in good hands.
Eco-Friendly Products: We use safe, environmentally friendly cleaning products that are effective in maintaining a spotless office while protecting the environment.
Customizable Cleaning Solutions: We understand that each office has unique cleaning needs. Our services are fully customizable, allowing you to choose the frequency and scope of cleaning that best suits your business.
Affordable Pricing: At BA House Cleaning, we offer competitive pricing for our Office Cleaning Service Oakland CA, ensuring you get high-quality service at a price that fits your budget.
100% Satisfaction Guarantee: We stand by the quality of our work and offer a satisfaction guarantee. If you’re not completely satisfied with our service, we will make it right at no additional cost.
For reliable, efficient, and thorough Office Cleaning Service Oakland visitBA House Cleaning today to schedule your first cleaning session.
Conclusion
A clean office is more than just an aesthetic luxury—it’s a necessity for fostering productivity, promoting health, and creating a positive impression with clients and visitors. Office Cleaning Service Oakland ensures that your workspace remains spotless, healthy, and inviting without taking valuable time away from your business operations. From routine maintenance to deep cleaning, professional cleaning services provide a flexible, cost-effective solution for every business. Choose BA House Cleaning for your Office Cleaning Service Oakland CA and enjoy a cleaner, healthier, and more productive office environment. VisitBA House Cleaning today to get started!
FAQs
What does an office cleaning service include?
An office cleaning service typically includes tasks such as vacuuming, dusting, trash removal, cleaning restrooms, sanitizing high-touch areas, and deep cleaning of floors and surfaces.
Why should I hire a professional office cleaning service?
Hiring a professional office cleaning service ensures that your office is cleaned thoroughly and consistently by trained staff using the best tools and cleaning products, saving you time and enhancing productivity.
How often should my office be cleaned?
The frequency of cleaning depends on the size of your office and the level of traffic. Most businesses opt for weekly or bi-weekly cleaning, but for high-traffic areas, daily cleaning may be necessary.
What should I do before the office cleaning team arrives?
Before the cleaning team arrives, it’s helpful to organize personal items or paperwork, especially in shared spaces. The cleaning team will handle all the standard tasks, but removing clutter helps them work more efficiently.
Are the cleaning products safe for my employees?
Yes, BA House Cleaning uses eco-friendly, non-toxic cleaning products that are safe for both your employees and the environment. Our products are effective at cleaning without compromising health or safety.
Moving out can be an exciting yet stressful experience. From packing up your belongings to saying goodbye to a place you’ve called home, there’s a lot to think about. One of the most overlooked aspects of moving out, however, is cleaning the space you’re leaving behind. Whether you’re a tenant trying to get your deposit back or a homeowner preparing for new occupants, a thorough Move Out Cleaning Oakland CA can make all the difference. In this article, we’ll explore what Move Out Cleaning Oakland CA entails, why it’s essential, and how our professional cleaning service can help make your move easier and more efficient.
What is Move Out Cleaning Oakland?
Move Out Cleaning Oakland CA refers to the cleaning services provided to individuals who are moving out of a residential or commercial space. This service ensures that the property is thoroughly cleaned and restored to its original condition (or better) before the new occupants move in. A Move Out Cleaning Oakland CA typically includes tasks like deep cleaning floors, carpets, windows, walls, and appliances, as well as removing any remaining trash or personal items.
When you hire Move Out Cleaning Oakland CA services, you can rest assured that your space will be left spotless. Whether you’re moving into a new apartment, house, or office space, this cleaning ensures that you leave behind a clean and fresh environment for the next occupants.
Why Choose Move Out Cleaning Oakland CA?
There are numerous reasons why Move Out Cleaning Oakland CA is a great option when you’re preparing to leave a property. Below, we’ll highlight some of the key benefits of opting for professional cleaning services during your move:
1. Get Your Deposit Back
For tenants, a Move Out Cleaning Oakland CA is essential for securing your security deposit. Landlords typically require tenants to leave their apartments or homes in pristine condition, and a professional cleaning can help meet those expectations. From wiping down surfaces to cleaning carpets and windows, a detailed cleaning will ensure that the property is left in excellent condition, improving the chances of getting your full deposit refunded.
2. Save Time and Effort
Moving is already a time-consuming process, and cleaning an entire home or office can add a significant amount of stress to the situation. Hiring a Move Out Cleaning Oakland CA service allows you to focus on packing, organizing, and other important aspects of your move while the cleaning professionals take care of the hard work. They have the experience and tools to do the job efficiently, saving you time and energy.
3. Leave a Good Impression
If you’re a homeowner or landlord preparing a property for new tenants, a Move Out Cleaning Oakland CA service helps leave a positive impression. A clean and well-maintained property is more likely to attract quality tenants and buyers. First impressions matter, and a clean, fresh space can make all the difference when showing the property to potential renters or buyers.
4. Comprehensive and Thorough Cleaning
A professional Move Out Cleaning Oakland CA service goes beyond simple tidying up. Cleaners will perform deep cleaning tasks that include detailed attention to areas that are often neglected, such as baseboards, windowsills, air vents, and bathroom grout. They will also sanitize high-touch surfaces like doorknobs and light switches to ensure your space is hygienic and free of germs.
5. Stress-Free Transition
The process of moving out can be emotionally and physically draining, especially when you’re dealing with the logistics of transporting your belongings. A Move Out Cleaning Oakland service can ease the stress by handling one of the most important tasks during your transition. With a clean home, you can focus on the next steps in your move, knowing that the space is ready for the next occupants.
How Does Move Out Cleaning Oakland CA Work?
Hiring a professional Move Out Cleaning Oakland service is straightforward and convenient. Here’s how the process typically works:
1. Initial Consultation
The first step in the Move Out Cleaning Oakland CA process is scheduling an initial consultation. During this consultation, the cleaning company will assess the size of the property and discuss your specific cleaning needs. Whether you need a basic cleaning or a more extensive deep cleaning, they will tailor the service to meet your requirements.
2. Scheduling the Cleaning
Once the consultation is complete, you’ll set a date and time for the cleaning. Most cleaning services offer flexible scheduling, so you can choose a time that works best for your moving schedule. This might be on the same day as your move-out or a day or two before the new tenants are set to move in.
3. Cleaning the Property
On the scheduled day, the professional cleaning team will arrive at the property with all the necessary equipment, tools, and eco-friendly cleaning products. They will get to work on cleaning every area of the property, including:
Kitchens: Cleaning appliances, countertops, sinks, and cabinets
Bathrooms: Scrubbing sinks, tubs, toilets, and floors
Living Areas: Vacuuming carpets, dusting furniture, and cleaning windows
Floors and Walls: Sweeping, mopping, and wiping down walls and baseboards
Windows and Mirrors: Ensuring they are streak-free and clear
4. Final Inspection
After the cleaning is completed, a final inspection will be done to ensure that all tasks have been completed to the highest standards. If any areas need additional attention, the cleaning team will address them to ensure your satisfaction.
5. Move In or Final Touches
Once the cleaning is done, you can rest easy knowing the property is ready for the next tenants or your next phase of life. If you’re moving into a new home, you can schedule a Move Out Cleaning Oakland for your new property as well, ensuring it’s clean and ready for you.
Why Choose BA House Cleaning for Your Move Out Cleaning Oakland CA?
At BA House Cleaning, we are dedicated to providing top-notch Move Out Cleaning Oakland services. Here’s why we stand out from the competition:
Professional and Experienced Team: Our cleaning professionals are highly trained, insured, and experienced in move-out cleaning services. We ensure that every detail is handled with precision and care.
Customizable Cleaning Plans: We understand that every move is different, so we offer flexible and customizable cleaning plans that meet your needs. Whether it’s a standard move-out clean or a deep clean, we’ve got you covered.
Eco-Friendly Products: We use eco-friendly cleaning products that are safe for both your family and the environment. You can feel good about the cleaning solutions we use, knowing they’re effective and environmentally responsible.
Affordable Pricing: We offer competitive pricing for Move Out Cleaning Oakland without compromising on quality. Our transparent pricing ensures that you get great value for the service you receive.
100% Satisfaction Guarantee: Your satisfaction is our top priority. If you’re not completely satisfied with the cleaning service, we’ll make it right at no additional cost.
VisitBA House Cleaning today to book your Move Out Cleaning Oakland and experience the difference that our professional cleaning services can make.
Conclusion
Move Out Cleaning Oakland is the perfect solution for anyone preparing to move out of their home or office in Oakland. From getting your deposit back to leaving a great impression on future tenants, professional cleaning services offer numerous benefits. Whether you need a quick touch-up or a thorough deep clean, BA House Cleaning is here to provide you with the best move-out cleaning experience. Our dedicated team ensures that your property is left in pristine condition, giving you peace of mind during the transition.
VisitBA House Cleaning today and take the first step toward a hassle-free move with our expert Move Out Cleaning Oakland services.
FAQs
What is included in a move-out cleaning?
A move-out cleaning typically includes tasks such as deep cleaning of floors, walls, windows, and appliances. It also includes dusting, vacuuming, and sanitizing bathrooms, kitchens, and other areas.
Why should I hire a professional move-out cleaning service?
A professional move-out cleaning service ensures that your home is cleaned to the highest standard, saving you time and effort. It can also increase your chances of getting your security deposit back if you’re a tenant.
How long does a move-out cleaning take?
The time required for a move-out cleaning depends on the size of the property. On average, a cleaning session may take anywhere from 2 to 6 hours, depending on the scope of work.
Can I request specific cleaning tasks during a move-out cleaning?
Yes, most cleaning services offer customizable cleaning plans. You can request specific tasks such as carpet cleaning, window washing, or detailed appliance cleaning to be included in your move-out cleaning.
Is move-out cleaning the same as regular cleaning?
Move-out cleaning is more thorough and detailed than regular cleaning. It includes deep cleaning tasks and is designed to prepare the space for new occupants, while regular cleaning typically involves basic upkeep.
A professional House Cleaning Service Oakland CA, is the perfect solution if you’re looking for an efficient way to keep your home clean and organized without adding extra stress to your busy schedule. House Cleaning Service offers comprehensive cleaning services that combine quality and professionalism to help you maintain a healthy and comfortable living environment. We understand the challenges of balancing work and other responsibilities, which is why our home cleaning service allows you to enjoy a spotless home without worrying about the daily details. Let us help make your home a more peaceful and organized place, with guaranteed quality and reliability every time.
What is House Cleaning Service Oakland CA?
House Cleaning Service Oakland refers to professional cleaning services that take care of residential cleaning tasks in homes across Oakland. These services include a wide range of tasks such as dusting, vacuuming, mopping floors, cleaning bathrooms, washing windows, and more. Cleaning services can be tailored to your specific needs, whether you require a one-time deep cleaning or regular maintenance cleaning.
Our House Cleaning Service Oakland CA, is designed to help homeowners maintain a spotless environment without the stress and time-consuming effort of doing it themselves. Professional cleaning companies in Oakland provide experienced cleaners who have the tools, skills, and expertise to deliver high-quality cleaning results.
Why Choose House Cleaning Service Oakland CA?
There are several reasons why opting for a House Cleaning Service Oakland CA is a great idea. Here are some compelling reasons to consider this service:
1. Time-Saving Convenience
With today’s fast-paced lifestyle, finding time to clean your home can be a challenge. Hiring a professional House Cleaning Service Oakland CA allows you to reclaim your time and focus on what truly matters. Whether you have a busy work schedule, family commitments, or simply want to relax, professional cleaners can handle the cleaning so you don’t have to.
2. Expertise and Experience
When you hire a House Cleaning Service Oakland CA, you benefit from the knowledge and experience of trained professionals. These cleaning experts know the best techniques and use the right cleaning products to ensure your home gets cleaned thoroughly and efficiently. With professional cleaners on the job, you can trust that every corner of your home will be spotless.
3. Customization Cleaning Plans
A key advantage of House Cleaning Service Oakland CA is the flexibility to choose a cleaning plan that fits your needs. Whether you require a quick tidy-up or a detailed deep cleaning, you can customize the services to suit your preferences. Most cleaning services offer options such as regular cleaning, one-time deep cleaning, post-construction cleaning, and move-in/move-out cleaning.
4. Improved Health and Hygiene
Regular cleaning is essential for maintaining a healthy home. Dust, allergens, and bacteria can accumulate over time, leading to potential health risks. By hiring a House Cleaning Service Oakland CA, you ensure that your home is cleaned regularly and thoroughly, which helps to create a healthier living environment for you and your family.
5. Professional-Grade Equipment and Products
Another reason to choose House Cleaning Service Oakland CA is access to professional-grade cleaning equipment and products. Professional cleaners use high-quality tools and eco-friendly cleaning solutions to achieve better results than typical store-bought products. This ensures a more effective clean and can also protect your furniture and surfaces from damage.
How Does House Cleaning Service Oakland Work?
The process of hiring a House Cleaning Service Oakland CA is straightforward and can be customized to meet your specific needs. Here’s a breakdown of how it works:
1. Initial Consultation
The first step is to reach out to a House Cleaning Service Oakland CA provider for an initial consultation. This may involve a phone call or an in-home visit where the cleaning company assesses your needs and discusses the details of your cleaning preferences.
2. Customized Cleaning Plan
Based on the consultation, a tailored cleaning plan is created. You can choose the frequency of cleaning (e.g., weekly, bi-weekly, monthly) and specify the areas of your home that require special attention. The cleaning company will also determine the best cleaning products and methods for your home.
3. Professional Cleaning Team Arrives
Once the plan is in place, the professional cleaning team will arrive at your home at the scheduled time. The team is equipped with all the necessary tools, products, and equipment to perform the cleaning service.
4. Efficient and Thorough Cleaning
The cleaners will follow the agreed-upon cleaning plan and work efficiently to get your home looking spotless. They will clean every surface, dust and sanitize high-touch areas, and take care of all your cleaning needs. Depending on the type of service you selected, the cleaning may include deep cleaning tasks like carpet shampooing or window washing.
5. Quality Check and Final Touches
After the cleaning is completed, a final inspection is often conducted to ensure that every detail is perfect. Any additional tasks or touch-ups are taken care of to guarantee your satisfaction. After the quality check, your home is left looking pristine, fresh, and ready to enjoy.
Why Choose Our House Cleaning Service Oakland?
AtBA House Cleaning, we take pride in offering top-notch House Cleaning Service Oakland that goes beyond basic cleaning. Here’s why we stand out:
Experienced and Trustworthy Staff: Our cleaning professionals are highly trained, insured, and bonded, ensuring that your home is in good hands.
Eco-Friendly Cleaning Products: We use environmentally friendly cleaning products that are safe for your family and pets while still providing a deep clean.
Personalized Service: We understand that every home is different, so we offer personalized cleaning plans that meet your specific needs and preferences.
Reliable and Consistent: We offer reliable cleaning schedules and consistently high-quality results. We ensure that our cleaners arrive on time and deliver exceptional cleaning every time.
Affordable Pricing: Our House Cleaning Service Oakland is priced competitively, providing you with excellent value for your investment in a cleaner, healthier home.
If you’re looking for a professional, reliable, and trustworthy House Cleaning Service Oakland CA, look no further than bahousecleaning .
Conclusion
A clean home is essential for a healthy and comfortable living environment, and hiring a House Cleaning Service Oakland CA is a great way to ensure your home remains spotless without the hassle of cleaning it yourself. Whether you need regular maintenance cleaning, deep cleaning, or post-construction cleanup, professional cleaning services can handle it all. By choosing a reputable service, you can save time, improve the cleanliness of your home, and enjoy a healthier living space.
VisitBA House Cleaning today and experience the difference our House Cleaning Service Oakland CA can make for you. Trust our experienced team to provide you with the best cleaning services in Oakland, so you can spend more time doing the things you love.
FAQs
What does a house cleaning service include?
A house cleaning service typically includes tasks such as dusting, vacuuming, mopping floors, cleaning bathrooms, wiping down surfaces, and removing trash. Some services also offer additional services like window washing or carpet cleaning.
Why should I hire a house cleaning service?
Hiring a house cleaning service saves you time, ensures professional cleaning results, and helps maintain a healthier home by reducing allergens and bacteria. It also allows you to focus on other important tasks or enjoy more leisure time.
How often should I have a house cleaning service?
The frequency of house cleaning depends on your needs. Some homeowners opt for weekly or bi-weekly cleaning, while others prefer monthly deep cleaning sessions. You can tailor the cleaning schedule to suit your lifestyle.
What should I do before the cleaning team arrives?
Before the cleaning team arrives, it’s helpful to tidy up personal items and valuables. While the cleaners will handle the cleaning tasks, organizing your home beforehand can help streamline the process.
Is it safe to have a cleaning service in my home?
Yes, professional house cleaning services, like House Cleaning Service Oakland, employ trained, insured, and trustworthy staff. They are committed to respecting your home and ensuring a thorough, safe cleaning experience.
Living in Oakland, you understand the demands of a busy modern life, where finding time for thorough home cleaning can feel like an impossible task. Between your career, family responsibilities, and enjoying the Canadian lifestyle, maintaining a spotless living environment often gets pushed aside. Fortunately, there’s a convenient and effective solution readily available – Maid Service in Oakland CA.
Welcome to BA House Cleaning, your dependable partner for top-tier Maid Service in Oakland CA. We specialize in providing professional and comprehensive cleaning solutions specifically tailored to the needs of busy individuals and families in the Oakland area. Imagine reclaiming your precious weekends and evenings, knowing that your home will be consistently clean and welcoming without you having to lift a finger. Discover how our Maid Service in Oakland CA can simplify your life, providing you with more time to enjoy what truly matters and transforming your house into a genuine sanctuary where you can relax and recharge. Contact BA House Cleaning today for a personalized cleaning plan and experience the ease and convenience of a professionally maintained home.
What is Our Maid Service Oakland CA?
Our Maid Service Oakland is a dedicated residential cleaning solution created to offer exceptional cleanliness without you having to lift a finger. At BA House Cleaning, we understand that each home is unique, and we provide tailored cleaning services ranging from routine maintenance cleaning and deep cleans to specialized Eco-friendly cleaning. Our skilled cleaning professionals meticulously address every part of your home, ensuring an impeccable finish every time.
Types of Cleaning Offered by Our Maid Service Oakland CA
Routine Cleaning: Regular cleaning services to maintain your home’s cleanliness consistently.
Deep Cleaning: Thorough cleaning covering areas that typically go unnoticed, ideal for seasonal cleans or before special occasions.
Move-In/Move-Out Cleaning: Comprehensive cleaning ensuring your home is sparkling clean, ready for new occupants or welcoming you comfortably into your new space.
Eco-Friendly Cleaning: Cleaning using environmentally safe products that are gentle yet highly effective, suitable for households with children and pets.
Why Choose Our Maid Service Oakland CA?
Selecting BA House Cleaning’s Maid Service Oakland CA means choosing quality, consistency, and unmatched reliability. Here’s what sets our Maid Service Oakland apart from the rest:
Highly Trained and Experienced Staff
Our professional cleaners undergo rigorous training and are carefully vetted to ensure your home is always in trustworthy hands. They excel in detailed cleaning, ensuring no spot is overlooked.
Customized Cleaning Solutions
Every home has different cleaning needs. That’s why we offer personalized cleaning plans, ensuring that your Maid Service Oakland CA experience perfectly matches your specific requirements, schedule, and budget.
Commitment to Quality
At BA House Cleaning, quality is our top priority. We set high standards, using the best cleaning techniques and products to guarantee consistently outstanding results with every visit.
Eco-Friendly Approach
We deeply care about the environment and your health. Our Maid Service Oakland CA exclusively utilizes environmentally friendly cleaning products, minimizing chemical exposure while delivering superior cleaning performance.
Competitive Pricing
Quality doesn’t have to break the bank. We offer competitive pricing for all our cleaning services, ensuring you receive premium service at a reasonable cost.
How Does Our Maid Service Oakland CA Work?
Booking your Maid Service Oakland CA experience with BA House Cleaning is straightforward, convenient, and stress-free. Here’s a simple breakdown of the process:
Step 1: Select Your Service
Visit our user-friendly website atba house cleaning to explore the various cleaning packages we offer. Choose the type of cleaning that suits your needs—routine, deep, move-in/move-out, or Eco-friendly cleaning.
Step 2: Customize Your Plan
Specify your cleaning preferences and any additional services needed. Whether it’s special instructions or particular areas requiring extra attention, we accommodate all your requests.
Step 3: Schedule Your Appointment
Choose a convenient date and time that fits seamlessly into your busy schedule. Our Maid Service Oakland offers flexible scheduling options, including weekly, bi-weekly, monthly, or one-time appointments.
Step 4: Enjoy Your Clean Home
Sit back and relax while our professional cleaning team meticulously cleans your home. Experience the difference of our Maid Service Oakland CA as we deliver a fresh, spotless, and inviting living environment.
Why BA House Cleaning?
Choosing BA House Cleaning is choosing peace of mind. Our reputation in Oakland speaks for itself—our dedicated clients continually praise our consistent, high-quality cleaning services. Here’s why BA House Cleaning should be your first choice for Maid Service Oakland:
Exceptional Customer Service
Our customer service team is always available to address your concerns, answer your questions, and ensure your complete satisfaction with every service provided.
Reliable and Trustworthy
Dependability is crucial. Our Maid Service Oakland CA consistently arrives on time and is fully equipped to handle your cleaning needs efficiently and effectively.
Satisfaction Guarantee
We stand behind our services with a satisfaction guarantee. If you’re ever dissatisfied, we’re committed to promptly addressing and resolving the issue, ensuring your complete satisfaction.
Fully Insured and Bonded
Rest assured, your property and belongings are safe with us. BA House Cleaning is fully insured and bonded, providing peace of mind throughout every cleaning service.
Conclusion
BA House Cleaning is your ultimate partner for a cleaner, healthier, and more inviting home environment. With our expert Maid Service Oakland CA, enjoy the luxury of a perfectly cleaned home without the stress or hassle. Visit us today at BA house cleaning to schedule your first appointment and discover why our Maid Service Oakland CA is the trusted choice for Oakland residents.
FAQs
1. What does your Maid Service Oakland include?
Our Maid Service Oakland includes comprehensive cleaning tailored to your needs, such as dusting, vacuuming, mopping, bathroom sanitation, kitchen cleaning, and more.
2. How do I book Maid Service Oakland?
Booking is easy! Simply visit BA house cleaning , select your preferred service, customize your plan, and schedule your appointment.
3. Are your cleaning products safe for pets and children?
Absolutely! Our Maid Service Oakland uses Eco-friendly products that are safe and non-toxic for both pets and children.
4. Can I request the same cleaning crew for each appointment?
Yes, we strive to provide consistency, so you can typically expect the same trusted cleaning crew for each visit.
5. What happens if I need to cancel or reschedule my Maid Service Oakland appointment?
We understand schedules change. You can easily reschedule or cancel your appointment by contacting us at least 24 hours in advance.
Life in Oakland can be wonderfully vibrant yet incredibly busy. Between professional responsibilities, family activities, social events, and personal downtime, finding enough hours in the day for thorough home cleaning can seem impossible. Thankfully, a professional solution is within reach—Cleaning Service Oakland provided by BA House Cleaning. Our specialized cleaning services are designed specifically for the diverse and dynamic lifestyles of Oakland residents. Discover how BA House Cleaning’s exceptional Cleaning Service Oakland CA can restore balance to your life, creating a spotless home environment while freeing up valuable time.
What is Our Cleaning Service Oakland CA?
At BA House Cleaning, our Cleaning Service Oakland CA is not just a basic home cleaning solution; it’s a comprehensive approach to maintaining an immaculate home environment. Our team of skilled professionals provides detailed cleaning tailored to your specific needs, utilizing industry-leading techniques and products. We offer several cleaning packages, including regular maintenance cleaning, deep cleans, and specialized eco-friendly solutions. Each service is designed to meet the varying demands and preferences of Oakland residents, ensuring a sparkling clean and welcoming home every time.
Types of Cleaning Included in Our Cleaning Service Oakland CA
Routine Cleaning: Regularly scheduled services that maintain your home’s cleanliness and comfort.
Deep Cleaning: Intensive cleaning addressing areas often missed during routine cleanings, ideal for seasonal refreshes or special occasions.
Move-In/Move-Out Cleaning: Comprehensive services to ensure your home is spotless, whether you’re moving in or preparing your home for new occupants.
Eco-Friendly Cleaning: Use of environmentally safe and sustainable cleaning products, perfect for households prioritizing health and sustainability.
Why Choose Our Cleaning Service Oakland CA ?
Choosing BA House Cleaning’s Cleaning Service Oakland CA is an investment in quality, convenience, and peace of mind. Here are the key reasons why our Cleaning Service Oakland CA is Oakland’s top choice:
Highly Skilled and Trustworthy Team
Our dedicated cleaners are rigorously trained, background-checked, and experienced, ensuring your home receives superior care every time. We pride ourselves on thoroughness, leaving no detail overlooked.
Customized Cleaning Plans
Recognizing that each home and homeowner’s needs are unique, our Cleaning Service Oakland CA offers fully personalized cleaning plans. Whether it’s specific areas of your home or particular cleaning products, we adjust to meet your precise requirements and schedule.
Unwavering Commitment to Excellence
We maintain an uncompromising commitment to excellence. Every service provided is executed to meet and exceed industry standards, ensuring consistent, outstanding results every visit.
Environmentally Conscious Approach
At BA House Cleaning, we prioritize your health and our planet’s well-being. Our Cleaning Service Oakland CA uses only eco-friendly, non-toxic cleaning products that are effective yet safe for your family and pets.
Competitive Pricing
Our quality cleaning service is accessible without breaking your budget. We offer transparent, competitive pricing designed to deliver exceptional value without compromising on quality.
How Does Our Cleaning Service Oakland CA Work?
Using our Cleaning Service Oakland CA is straightforward, efficient, and user-friendly. Here’s a step-by-step breakdown of how to book and enjoy our exceptional cleaning services:
Step 1: Choose Your Service
Visit our convenient and user-friendly website atbahousecleaningand select the cleaning package that best matches your needs: routine, deep, move-in/move-out, or eco-friendly.
Step 2: Customize Your Preferences
Let us know your specific cleaning preferences and special instructions. Our customizable plans ensure every detail is addressed to your satisfaction.
Step 3: Schedule Conveniently
Pick a convenient time and date. Our flexible scheduling accommodates your busy lifestyle, whether you prefer weekly, bi-weekly, monthly, or one-time cleaning sessions.
Step 4: Experience Professional Cleaning
Sit back and relax as our professional cleaners arrive promptly and fully equipped to transform your living space into a spotless haven.
Why BA House Cleaning?
BA House Cleaning stands out in Oakland because we understand that our Cleaning Service Oakland CA is about much more than cleaning—it’s about enhancing your quality of life. Here’s why Oakland residents continually choose BA House Cleaning:
Outstanding Customer Care
We prioritize customer satisfaction, ensuring every interaction is friendly, informative, and responsive. Our team is always available to answer questions and address your concerns promptly.
Reliability and Consistency
Reliability is at the heart of our Cleaning Service Oakland CA . Our clients trust us to consistently deliver punctual, thorough, and professional services every single time.
Satisfaction Guarantee
We offer a comprehensive satisfaction guarantee. If you ever feel that any part of your cleaning service didn’t meet expectations, we commit to promptly correcting the issue.
Fully Insured and Bonded
We value your trust and ensure your property and belongings are protected at all times. BA House Cleaning is fully insured and bonded for complete peace of mind.
Conclusion
Choosing BA House Cleaning’s Cleaning Service Oakland is more than choosing a cleaning provider—it’s about reclaiming your time and elevating your living space. Our team is dedicated to providing meticulous, personalized, and reliable cleaning services, making us the top choice for Oakland homeowners. Visitbahousecleaningtoday to schedule your first appointment and experience firsthand the remarkable difference of our Cleaning Service Oakland .
FAQs
1. What exactly does your Cleaning Service Oakland include?
Our Cleaning Service Oakland includes detailed cleaning services tailored to your needs, such as thorough dusting, vacuuming, mopping, bathroom sanitation, and comprehensive kitchen cleaning.
2. How do I book a Cleaning Service Oakland appointment?
You can easily book your appointment online through our website atbahousecleaning by selecting your preferred service and scheduling conveniently.
3. Are your cleaning products safe for families and pets?
Absolutely. Our Cleaning Service Oakland CA exclusively utilizes safe, eco-friendly, non-toxic cleaning products suitable for all family members, including pets.
4. Can I request the same cleaning team each time?
Yes, consistency is important to us, and we do our best to provide the same professional team for each Cleaning Service Oakland appointment.
5. What is your cancellation or rescheduling policy for Cleaning Service Oakland appointments?
We understand plans can change. Simply contact us at least 24 hours in advance if you need to reschedule or cancel your Cleaning Service Oakland appointment.
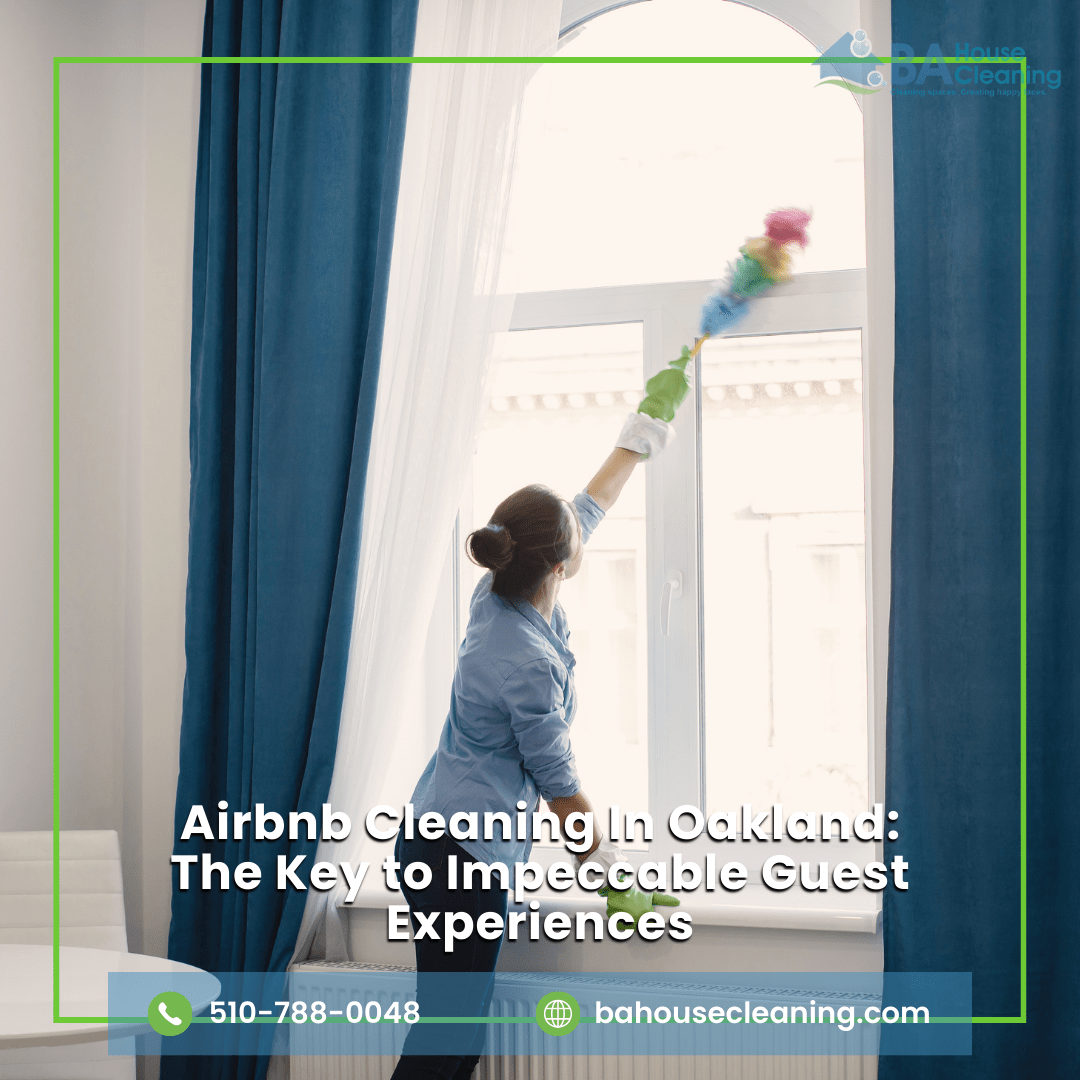
As an Airbnb host in Oakland, you understand that a sparkling clean property is the cornerstone of a thriving business. Positive guest reviews and repeat bookings hinge on providing an exceptional, home-like environment. That’s precisely where professional Airbnb Cleaning In Oakland services become an indispensable tool for your success. At BA House Cleaning, we specialize in providing seamless and efficient cleaning services specifically designed to meet the unique demands of Airbnb hosting, ensuring your property is consistently guest-ready with minimal effort on your part.
In this guide, we’ll delve into why professional Airbnb Cleaning In Oakland is not just a luxury, but a crucial investment for your Oakland property. We’ll also highlight why BA House Cleaning should be your trusted partner in achieving and maintaining the highest standards of cleanliness, ultimately leading to happier guests and a more profitable venture. Whether you’re managing short-term rentals or longer stays, our expert cleaning services are designed to streamline your turnover process, allowing you to focus on other aspects of your hosting duties, secure in the knowledge that your property will always make a fantastic first impression. Let BA House Cleaning handle the cleaning logistics, so you can concentrate on providing outstanding hospitality and maximizing your Airbnb success in Oakland.
What is Airbnb Cleaning In Oakland?
Airbnb Cleaning In Oakland is a specialized cleaning service designed specifically for Airbnb hosts. It goes beyond regular home cleaning, focusing on short-term rental properties. Unlike traditional cleaning services, Airbnb cleaning involves more frequent cleaning, meticulous attention to detail, and a focus on high-traffic areas, ensuring that your property remains spotless between guest check-ins and check-outs.
At BA House Cleaning, we understand the unique needs of Airbnb properties. Our team provides comprehensive cleaning services, ensuring every corner of your rental property is cleaned to perfection. From washing linens and towels to sanitizing high-touch surfaces, we handle all aspects of Airbnb cleaning to guarantee your guests enjoy a comfortable stay.
Why Choose Airbnb Cleaning Oakland from BA House Cleaning?
Choosing the right cleaning service is essential to maintaining a positive guest experience. Here’s why you should trust BA House Cleaning for all your Airbnb cleaning needs:
Tailored to Airbnb Hosts
Unlike regular residential cleaning, Airbnb cleaning requires a more thorough approach. We understand the unique demands of hosting guests, and our services are customized to meet these needs. Whether you need a quick turn-around between guests or preparing your space for new arrivals, we know how to get your property guest-ready in no time.
Fast and Reliable Service
At BA House Cleaning, we prioritize efficiency without compromising on quality. We understand the tight turnaround times between guests, so we work quickly to clean and refresh your property. Our reliable team ensures that your Airbnb is ready for check-in without delays, providing you with peace of mind and satisfied guests.
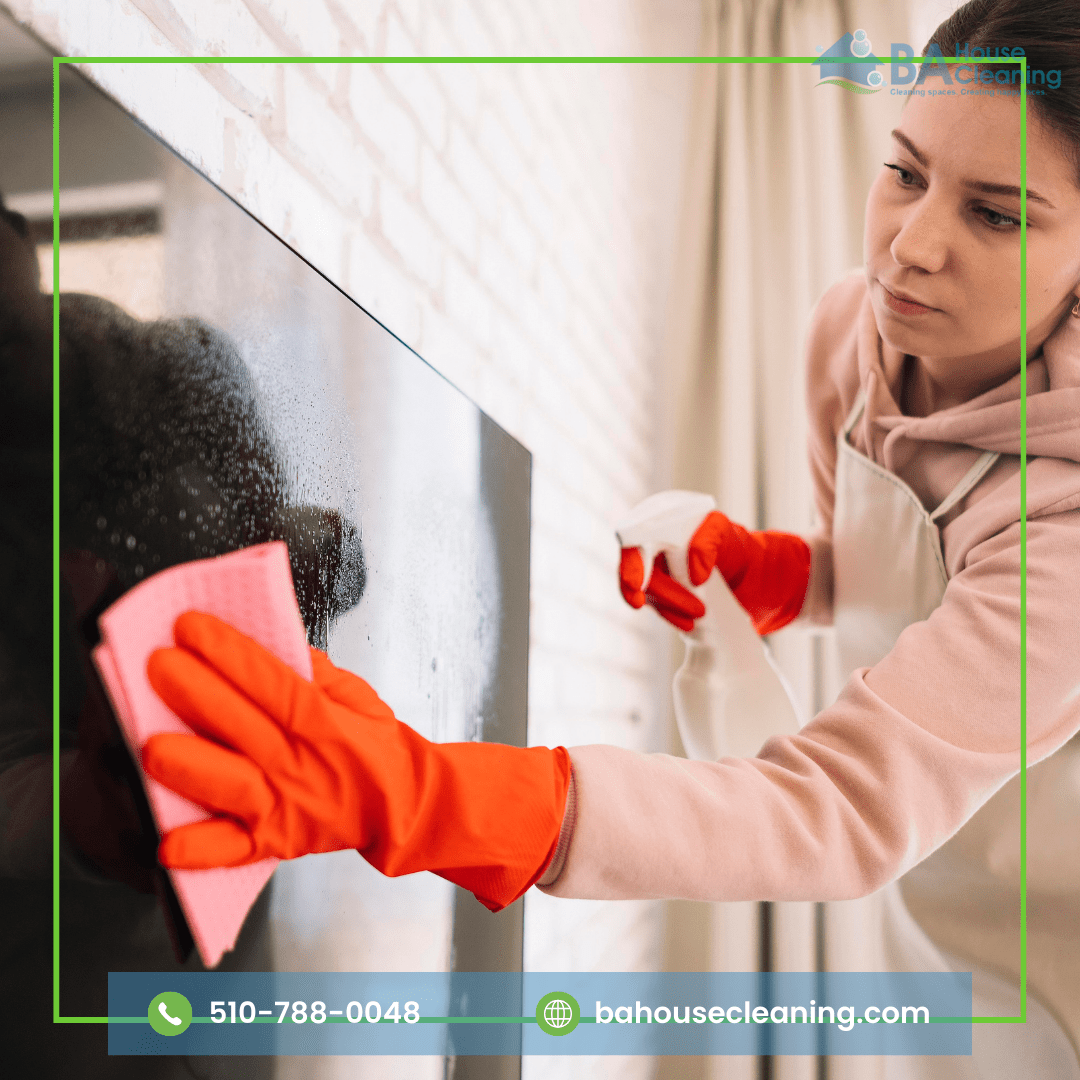
Attention to Detail
Airbnb cleaning isn’t just about making your property look clean—it’s about making it feel inviting and fresh for your guests. We focus on the small details, like folding towels neatly and arranging furniture appealingly. Every inch of your Airbnb will be spotless, giving your guests a five-star experience.
Eco-Friendly Cleaning Products
At BA House Cleaning, we prioritize both cleanliness and sustainability. We use eco-friendly cleaning products that are safe for both your guests and the environment. Our non-toxic cleaning supplies ensure a thorough clean while promoting sustainability.
Affordable Pricing
Maintaining cleanliness in your Airbnb property doesn’t have to be expensive. BA House Cleaning offers competitive rates for our Airbnb Cleaning In Oakland services, providing you with high-quality cleaning at an affordable price. We believe great service should not come with a hefty price tag, which is why we offer cost-effective solutions to Airbnb hosts.
How Does Airbnb Cleaning Oakland Work?
Our process for Airbnb cleaning is simple, efficient, and tailored to your needs. Here’s how we provide top-tier cleaning services for your property:
Initial Consultation and Evaluation
To ensure we meet your specific cleaning needs, we begin with a consultation. We’ll assess the size of your property, the frequency of bookings, and any special cleaning requirements. We’ll also discuss your preferences and any areas of the property that need extra attention.
Customized Cleaning Plan
Once we understand your needs, we create a customized cleaning plan. This plan will outline the tasks that need to be completed before each guest arrives, such as washing linens, cleaning bathrooms, sanitizing surfaces, vacuuming carpets, and tidying up common areas. We’ll work with you to schedule cleanings that fit your booking calendar.
Efficient and Thorough Cleaning
On cleaning day, our team arrives promptly and starts working on your property. We clean every room from top to bottom, ensuring all surfaces are sanitized, every item is organized, and the space is completely guest-ready. We’ll also meet any special requests or preferences you have.
Quality Control and Inspection
After the cleaning is complete, we conduct a thorough inspection to ensure the quality of the work. We check every room and ensure that no detail has been overlooked. Our goal is to ensure that your Airbnb looks and feels pristine for every guest.
Flexible Scheduling
We understand your Airbnb schedule can be tight, so we offer flexible cleaning times that work around your guest check-ins and check-outs. Whether you need cleaning services after each guest, weekly cleaning, or deep cleaning between bookings, we can accommodate your schedule to ensure your property stays spotless.
Why Choose BA House Cleaning for Your Airbnb Cleaning Needs?
Choosing BA House Cleaning for your Airbnb Cleaning In Oakland offers several advantages:
Experience and Expertise:
We have years of experience cleaning Airbnb properties, so we know what it takes to provide exceptional service.
Customized Plans:
Our cleaning services are tailored to meet the unique needs of each Airbnb property.
Eco-Friendly Products:
We use environmentally friendly products to ensure a safe and healthy space for your guests.
Affordable Rates:
We offer competitive pricing without sacrificing quality, making our cleaning services accessible to all Airbnb hosts.
Maintaining a clean and welcoming environment for your Airbnb guests is essential for providing a positive guest experience and earning excellent reviews. Airbnb Cleaning In Oakland services from BA House Cleaning offer the expertise, reliability, and attention to detail needed to keep your property spotless between every guest. Our eco-friendly products, flexible scheduling, and affordable pricing make us the go-to choice for Airbnb hosts in Oakland.
For more information on our Airbnb Cleaning In Oakland services or to book your first cleaning, visit BA House Cleaning today. Let us handle the cleaning so you can focus on what matters most—making your guests feel at home.
FAQs
What is Airbnb cleaning Oakland?
Airbnb Cleaning In Oakland refers to a specialized cleaning service designed for Airbnb hosts. It includes thorough cleaning tasks such as sanitizing bathrooms, washing linens, cleaning kitchens, and ensuring the entire property is guest-ready.
Why should I choose BA House Cleaning for Airbnb cleaning?
BA House Cleaning provides customized cleaning plans tailored to the needs of your Airbnb property, offering eco-friendly products, flexible scheduling, and reliable, affordable service.
How much does Airbnb cleaning Oakland cost?
The cost of Airbnb Cleaning In Oakland depends on the size of your property, the level of cleaning required, and the frequency of cleanings. Contact BA House Cleaning for a personalized quote based on your needs.
How often should I schedule Airbnb cleaning services?
The frequency of cleaning depends on your guest schedule. We recommend cleaning after each guest’s departure to ensure a fresh, clean space for new arrivals.
What is included in Airbnb cleaning services?
Our Airbnb Cleaning In Oakland service includes tasks such as dusting, vacuuming, sanitizing high-touch surfaces, cleaning bathrooms, washing linens, and tidying common areas. We can also customize our services to include additional tasks based on your needs.
Keeping your office space clean and organized is not just about making a good impression; it’s about fostering a healthy and productive environment for employees and clients. An untidy office can create distractions, lower morale, and even contribute to health problems. That’s where professional Office Cleaning Oakland services come in. At BA House Cleaning, we specialize in providing top-tier office cleaning services that help businesses in Oakland thrive.
In this article, we’ll explore everything you need to know about Office Cleaning Oakland, why you should choose our services, and how we ensure your office remains spotless and welcoming. Whether you need a one-time deep cleaning or regular maintenance, we’ve got you covered.
What is Office Cleaning Oakland?
Office Cleaning Oakland is a professional cleaning service designed to keep your office space clean, organized, and hygienic. This service includes a variety of tasks such as dusting, vacuuming, sanitizing, trash removal, and disinfecting high-touch areas. It’s tailored to meet the specific needs of your business environment, ensuring that your office not only looks clean but also remains safe and conducive to productivity.
At BA House Cleaning, we understand that every office is different, so we offer customizable cleaning solutions to suit your specific requirements. Whether you have a small startup or a large corporate building, our team is equipped to handle the cleaning needs of offices of all sizes.
Why Choose Office Cleaning Oakland from BA House Cleaning?
Now that we’ve defined what Office Cleaning Oakland is, let’s discuss why choosing BA House Cleaning for your office cleaning needs is the best decision you can make.
1. Experience and Expertise
At BA House Cleaning, we have years of experience in providing exceptional office cleaning services in Oakland. Our team is fully trained and equipped with the latest tools and techniques to ensure your office receives the highest quality of service. From cleaning common areas to disinfecting high-touch surfaces, we have the knowledge and expertise to get the job done right.
2. Tailored Cleaning Solutions
We understand that every office has different cleaning needs. That’s why we offer flexible and customizable cleaning plans to meet your specific requirements. Whether you need daily, weekly, or monthly office cleaning, we can design a cleaning schedule that works best for your business. Our cleaning solutions are adaptable, ensuring that we can accommodate any special requests you might have.
3. Eco-Friendly Cleaning Products
We care about the environment and the well-being of your employees. That’s why we use eco-friendly cleaning products that are safe for both the environment and your office space. These products are just as effective as traditional cleaning products, but without the harmful chemicals. If you want to maintain a clean office and protect the planet, our eco-friendly options are the way to go.
4. Health and Hygiene Focus
A clean office is not only about aesthetics; it’s also about promoting health and well-being. Regular cleaning reduces the buildup of dust, dirt, and allergens, creating a healthier environment for your employees. With Office Cleaning Oakland services from BA House Cleaning, we focus on sanitizing high-touch surfaces like doorknobs, keyboards, and phones to reduce the spread of germs and viruses.
5. Reliable and Trustworthy Staff
Our cleaning professionals are thoroughly vetted to ensure reliability, trustworthiness, and professionalism. We understand that you’re entrusting us with your workspace, which is why we go the extra mile to ensure that our team provides top-notch service and respects your office’s privacy. With BA House Cleaning, you can rest assured that your office is in good hands.
How We Provide Office Cleaning Oakland Services
At BA House Cleaning, we take a systematic approach to cleaning offices. Here’s how we provide the best Office Cleaning Oakland service:
1. Initial Consultation and Evaluation
We begin by understanding the size, layout, and specific needs of your office space. We’ll schedule an initial consultation to assess your cleaning requirements and determine the best cleaning plan. During this consultation, we’ll discuss your preferences, areas of focus, and any special requests you may have.
2. Customized Cleaning Plan
Once we have a clear understanding of your office, we’ll design a customized cleaning plan. This plan will outline the frequency of cleanings, specific tasks to be performed, and any areas that require special attention. We’ll work with you to ensure that the plan fits your schedule and budget.
3. Professional Cleaning Services
Our team will carry out the cleaning according to the plan, using the best cleaning products and equipment. Whether it’s vacuuming carpets, wiping down desks, or sanitizing restrooms, we ensure that every corner of your office is spotless.
4. Regular Quality Control
To ensure that our services meet the highest standards, we conduct regular quality control checks. Our team will review the work to ensure that it meets your expectations and that any issues are addressed immediately. We want to ensure that you are completely satisfied with our Office Cleaning Oakland services.
5. Flexible Scheduling
We understand that every business has different operating hours. That’s why we offer flexible scheduling options for cleaning your office. Whether you need cleaning services during office hours or after hours, we can accommodate your needs.
Why BA House Cleaning is the Best Choice for Office Cleaning in Oakland, CA
Choosing the right office cleaning service for your business is an important decision, and BA House Cleaning stands out as the top choice for office cleaning in Oakland for several reasons:
Tailored Solutions for Your Office Needs
We don’t provide one-size-fits-all cleaning services. We customize our offerings to suit your specific office needs.
Eco-Friendly Cleaning Options
We care about your health and the planet, which is why we use environmentally safe products.
Consistent and Reliable Service
Our cleaning staff is reliable, professional, and consistent, ensuring that your office is always clean.
Affordable Pricing for Quality Service
Our cleaning services are affordable and provide great value for money.
Customer Satisfaction Guaranteed
At BA House Cleaning, we prioritize customer satisfaction, and our reputation speaks for itself. Our clients trust us because we deliver quality, reliability, and outstanding customer service.
Conclusion
A clean and well-maintained office not only creates a positive first impression for clients but also promotes productivity and overall employee well-being. If you’re looking for Office Cleaning Oakland services, BA House Cleaning is the go-to choice. Our customizable cleaning plans, eco-friendly products, and expert cleaning team ensure that your office remains spotless, hygienic, and ready for business. For more information on our Office Cleaning Oakland services, visit bahousecleaning. Let us handle the cleaning so you can focus on what matters most—growing your business.
FAQs
What is an office cleaning service?
An office cleaning service involves cleaning tasks such as vacuuming, dusting, sanitizing surfaces, emptying trash, and maintaining hygiene in office spaces.
Why should I choose BA House Cleaning for office cleaning in Oakland?
BA House Cleaning provides customized cleaning services, Eco-friendly options, and a professional team dedicated to delivering reliable, high-quality service at an affordable price.
How much does office cleaning in Oakland cost?
The cost of Office Cleaning Oakland services depends on the size of your office and the specific tasks involved. We offer customized pricing based on your cleaning needs.
How often should I schedule office cleaning?
The frequency of office cleaning depends on the size of your office and the level of traffic. We recommend regular cleaning at least once a week, but we can adjust based on your needs.
What should I expect from a professional office cleaning service?
Expect reliable and thorough cleaning, attention to detail, a focus on hygiene, and the use of high-quality, eco-friendly products to maintain a clean and healthy office environment.
A clean carpet not only enhances the aesthetics of your home or office but also contributes to a healthier environment. However, over time, carpets can accumulate dirt, stains, allergens, and bacteria, making them look tired and worn. Regular cleaning is essential to preserve their appearance and functionality. This is where Carpet Cleaning Service in Oakland comes into play. At Bahouse Cleaning, we specialize in offering top-notch carpet cleaning services that can restore the beauty and cleanliness of your carpets. Whether you have a residential or commercial space, our professional team in Oakland is here to ensure your carpets look and feel fresh. In this article, we’ll explain what Carpet Cleaning Service in Oakland entails, why you should choose Bahouse Cleaning for this service, and how we can help you maintain clean and healthy carpets.
What is Carpet Cleaning Service in Oakland?
Carpet Cleaning Service in Oakland involves professionally cleaning carpets to remove dirt, stains, and allergens that regular vacuuming cannot eliminate. Over time, dirt, dust, and other particles can become embedded in carpet fibers, leading to a dull, uninviting appearance. Professional carpet cleaning helps to refresh your carpets, prolong their lifespan, and improve indoor air quality.
At Ba house Cleaning, we use advanced techniques and equipment to provide comprehensive carpet cleaning services. These include:
Deep Cleaning: Using hot water extraction or steam cleaning, we penetrate deep into the carpet fibers to remove embedded dirt and stains.
Stain Removal: Our expert technicians are trained to treat and remove various stains, including food, wine, and pet stains.
Sanitizing and Deodorizing: We clean your carpets and disinfect them, eliminating germs and unpleasant odors to create a healthier environment.
Pet Odor Removal: For pet owners, we specialize in removing pet odors and stains, leaving your carpets smelling fresh and clean.
Carpet Protection: After cleaning, we offer services to apply protective treatments that help prevent future staining and extend the life of your carpets.
Why Choose Carpet Cleaning Service in Oakland from Ba house Cleaning?
Experienced and Trained Technicians
At Bahouse Cleaning, we pride ourselves on our team of skilled professionals. Our carpet cleaning technicians are highly trained and experienced in handling different types of carpets and stains. They know exactly how to treat your carpet with the care it deserves, ensuring the best possible results every time.
Advanced Equipment and Techniques
When it comes to carpet cleaning, using the right tools is crucial. At Bahouse Cleaning, we use state-of-the-art equipment and the latest cleaning techniques to deliver exceptional results. Our high-powered vacuums and steam cleaning systems allow us to deeply clean carpets without damaging them, leaving them looking like new.
Eco-Friendly Cleaning Products
We understand the importance of protecting the environment, which is why we use eco-friendly, non-toxic cleaning products for all our Carpet Cleaning Service in Oakland services. Our products are safe for your family, pets, and the environment, providing effective cleaning while minimizing environmental impact.
Customized Services for Every Need
Not all carpets are the same, and each home or business has unique needs. Whether you’re dealing with high-traffic areas, stubborn stains, or pet odors, we offer tailored solutions to meet your requirements. We customize our Carpet Cleaning Service in Oakland based on the type of carpet, the level of dirt, and your specific preferences.
Affordable Pricing
Quality carpet cleaning shouldn’t come with a hefty price tag. Bahouse Cleaning offers competitive rates for Carpet Cleaning Service in Oakland without compromising on quality. We provide a transparent pricing structure, so you know exactly what you’re paying for with no hidden fees. Our affordable rates make professional carpet cleaning accessible to everyone in Oakland.
Reliable and Flexible Scheduling
We understand that your time is valuable, which is why we offer flexible scheduling options for our Carpet Cleaning Service in Oakland. Whether you need an early morning appointment or an evening visit, we’ll work with you to find a time that fits your schedule. Our reliable team will show up on time and complete the job efficiently.
How Ba house Cleaning Can Help You with Carpet Cleaning in Oakland?
Choosing Carpet Cleaning Service in Oakland from Ba house Cleaning ensures that your carpets are not only clean but also well-maintained and longer-lasting. Here’s how our services can benefit you:
Prolong Carpet Lifespan
Regular cleaning is essential to prolong the lifespan of your carpets. Dust, dirt, and debris that accumulate in the fibers can wear down the material over time. By choosing Ba house Cleaning, we help remove these particles, preventing them from damaging your carpet and helping it last longer.
Improves Indoor Air Quality
Dirty carpets can trap dust, allergens, and pollutants, which can negatively affect the air quality in your home or office. Our professional cleaning services eliminate these harmful particles, leading to a cleaner, healthier indoor environment. This is especially important for individuals with allergies or respiratory issues.
Enhances Aesthetic Appeal
A clean carpet instantly boosts the overall look of your home or office. Stains, dirt, and discoloration can make carpets look old and worn, detracting from the overall aesthetic of your space. Our Carpet Cleaning Service in Oakland will revitalize your carpets, making them look fresh, vibrant, and inviting.
Eliminates Stubborn Stains
Sometimes, stains just won’t budge no matter how hard you try. Whether it’s red wine, pet accidents, or food stains, our professional carpet cleaners are equipped with the knowledge and tools to effectively remove stubborn stains. Our Carpet Cleaning Service in Oakland will restore your carpet to its former glory.
Pet Odor and Stain Removal
For pet owners, carpets often become the victims of accidents and odors. Our Carpet Cleaning Service in Oakland includes specialized treatments for pet stains and odors, ensuring that your carpets remain clean, fresh, and odor-free.
Conclusion
If you’re looking for high-quality Carpet Cleaning Service in Oakland, Bahouse Cleaning is the best choice for the job. Our experienced team, advanced equipment, eco-friendly products, and affordable pricing set us apart from other carpet cleaning services in Oakland. We’re committed to providing you with a cleaner, healthier, and more beautiful carpet, ensuring that your home or office looks and feels inviting.
Contact Bahouse Cleaning today to schedule your Carpet Cleaning Service in Oakland and experience the difference a professional cleaning can make. Visit our website atba housecleaning to learn more or book your service today!
FAQs
What is included in the Carpet Cleaning Service in Oakland?
Our Carpet Cleaning Service Oakland includes deep cleaning, stain removal, deodorizing, and sanitizing your carpets. We also offer pet stain and odor removal services to ensure your carpets are fresh and clean.
How often should I have my carpets cleaned?
We recommend professional carpet cleaning every 6 to 12 months, depending on the amount of foot traffic in your home or office. Homes with pets or children may require more frequent cleanings.
Are the cleaning products safe for my family and pets?
Yes, we use eco-friendly, non-toxic cleaning products that are safe for both your family and pets. Our cleaning methods are gentle on carpets but tough on dirt and stains.
Can you remove all types of stains?
While we can effectively remove most stains, the success of stain removal depends on the type and age of the stain. Our experienced team will assess your carpet and apply the best solution for removing any stains.
How do I schedule Carpet Cleaning Service in Oakland?
You can easily schedule our Carpet Cleaning Service by visiting our website atBA housecleaning or contacting us directly. We offer flexible scheduling options to suit your needs.
This article is designed to highlight the benefits of choosing Ba house Cleaning for Carpet Cleaning Oakland, with a focus on providing clear, SEO-optimized information for potential customers.