A bathtub can collect more than visible dirt. Soap residue, body oils, hard-water minerals, loose hair, bath products, and moisture may settle across the basin, ledges, drain, fixtures, and areas around the caulk. When these materials remain on the surface, they can create a dull film that becomes harder to remove with every use.
Learning how to clean a bathtub starts with identifying what the tub is made from. Acrylic, fiberglass, porcelain enamel, cast iron, and stone-based materials do not always tolerate the same products or scrubbing tools. A method that removes buildup from one finish may scratch, discolor, or dull another.
At BA House Cleaning, we understand that a clean bathroom depends on more than quickly wiping the center of the tub. The faucet base, overflow plate, drain cover, corners, wall joints, and surrounding floor also contribute to how fresh and comfortable the room feels. This guide explains how to clean common bathtub materials, address soap scum and mineral marks, deal with bathroom moisture, and avoid methods that may damage the finish.
Identify the Bathtub Material Before Cleaning
Before selecting a cleaner, determine whether the bathtub is acrylic, fiberglass, porcelain enamel, enameled cast iron, or another specialty material. Check the manufacturer’s label, purchase information, or care manual when the surface is difficult to identify.
Acrylic and fiberglass tubs often feel warmer and lighter than cast iron. Porcelain-enamel and enameled cast-iron surfaces usually feel harder and colder, but appearance alone does not always provide a reliable answer.
The safest approach is to begin with warm water, mild dish soap, and a soft cloth. Do not apply acidic, abrasive, or heavily alkaline products until you confirm that the manufacturer allows them.
Bathtub manufacturers commonly advise homeowners to use non-abrasive cleaners and soft sponges on acrylic surfaces because rough pads, scrapers, and abrasive powders may scratch or dull the finish.
What to Use to Clean a Bathtub
A basic bathtub-cleaning kit may include:
Rubber or household cleaning gloves
Mild liquid dish soap
Warm water
A soft microfiber cloth
A non-abrasive sponge
A soft nylon brush
A small brush for corners and grout
A bucket or removable shower sprayer
Clean towels for drying
A cleaner approved for the bathtub material
Open a window or operate the bathroom exhaust fan while cleaning. Apply commercial products according to their labels, and never combine cleaners unless their manufacturers specifically state that the combination is safe.
Avoid steel wool, metal scrapers, rough scouring pads, and unidentified cleaning mixtures. Even a durable bathtub may contain a slip-resistant coating, glossy finish, repair layer, or decorative surface that requires special care.
The Safest Basic Method for Bathtub Cleaning
For routine bathtub cleaning, remove bottles, toys, mats, and personal items from the tub. Clear loose hair and debris from the drain area before adding water or cleaner.
Rinse the surface with warm water to loosen fresh residue. Add a small amount of mild dish soap to a damp sponge or dilute it in a bucket of warm water. Begin at the upper ledges and work toward the drain so dirty water moves away from completed areas.
Wipe the basin, walls, corners, faucet base, overflow cover, and drain area using gentle pressure. Allow the soap solution to remain on light buildup for a few minutes, but do not let it dry.
Rinse the bathtub thoroughly and inspect it under good lighting. Repeat the process on any remaining marks rather than immediately switching to an abrasive product. Finish by drying the surface and metal fixtures with a clean microfiber cloth.
How to Clean an Acrylic Bathtub
Acrylic bathtubs require gentle products and non-abrasive tools. Use warm water, mild liquid dish soap, or a cleaner labeled as safe for acrylic.
Apply the cleaner with a soft cloth or sponge and wipe without aggressive scrubbing. Rinse promptly and dry the tub so cleaning residue and water spots do not remain on the glossy finish.
Do not use steel wool, hard brushes, abrasive powders, paint removers, or harsh solvents unless the manufacturer gives specific instructions for a particular problem. Kohler and American Standard both warn against abrasive products on acrylic bath surfaces, while MAAX recommends non-abrasive cleaning products and tools that will not scratch or dull the finish.
For model-specific instructions, use the manufacturer’s official acrylic bathtub cleaning guidance rather than relying on a universal household recipe.
How to Clean a Fiberglass Bathtub
Fiberglass bathtubs may develop a dull appearance when soap film and minerals remain on the surface. Because fiberglass can scratch, begin with mild dish soap, warm water, and a soft sponge.
Work in small areas and rinse frequently. Avoid pressing harder when a stain remains. Give the cleaner additional time to soften the buildup or switch to a product approved for fiberglass.
Do not use stiff wire brushes, powdered abrasives, or cleaning erasers unless the tub manufacturer confirms that they are safe. Sterling’s care instructions for its Vikrell bath material similarly recommend a soft cloth or sponge and advise against abrasive brushes and scouring pads.
Dry the surface after rinsing to reveal any film that still remains. A cloudy appearance may come from leftover cleaner rather than a permanent stain.
How to Clean a Porcelain or Enameled Bathtub
Porcelain-enamel and enameled cast-iron tubs have a hard outer finish, but that coating can chip, scratch, or lose its shine when cleaned incorrectly.
For general cleaning, use warm water, liquid dish detergent, and a soft cloth or non-abrasive sponge. Rinse the cleaner completely and dry the surface afterward.
Avoid metal scrapers, wire brushes, steel wool, highly acidic cleaners, and heavily alkaline products. Kohler’s enameled cast-iron guidance recommends non-abrasive products and cautions that improper cleaners may permanently affect slip-resistant areas.
If the enamel has chipped and exposed the underlying metal, cleaning alone will not repair the damage. Rust may continue to form around the damaged section, so consider an appropriate repair or refinishing assessment.
How to Remove Soap Scum from a Bathtub
Soap scum forms when soap residue combines with minerals, body oils, and other materials on the surface. It often appears as a cloudy or slightly sticky film around the waterline, corners, ledges, and lower walls.
Start with warm water and mild dish soap. Apply the solution generously and allow it to soften the residue for several minutes. Use a soft sponge to move across the surface with light, overlapping strokes.
Rinse and repeat when necessary. Several gentle applications are safer than one aggressive scrubbing session.
A diluted vinegar solution may help with soap scum on some tubs, but only use it when the manufacturer permits acidic cleaners. Do not assume that vinegar is suitable for natural stone, repaired finishes, specialty coatings, or every acrylic product.
How to Remove Hard-Water Stains
Hard-water stains often appear as white, gray, or chalky marks around faucets, drains, and areas where water repeatedly dries.
Begin with the mildest method suitable for the tub. Warm water and dish soap may remove surface film, while a manufacturer-approved mineral-deposit cleaner may be necessary for more established marks.
When the care instructions permit vinegar, apply a diluted solution to a cloth rather than soaking the entire tub. Place the damp cloth over the affected area briefly, then wipe, rinse, and dry.
Do not leave acidic products on metal fixtures, grout, natural stone, or unknown finishes. The best way to clean a bathtub is not to use the strongest available product but to match the cleaner to the material and type of buildup.
How to Address Yellow Bathtub Stains
Yellow discoloration can develop from minerals, product residue, age, rust, or wear within the finish. Different causes require different responses.
Clean the area first with mild soap to determine whether the mark is removable surface residue. If it remains, check the manufacturer’s recommendations for stain removal.
Avoid using salt, turpentine, oven cleaner, chlorine bleach, or other strong chemicals as general-purpose stain treatments. These products may create fumes, affect the finish, or react with residue from another cleaner.
A yellow mark that returns quickly may relate to water quality, corrosion, damaged enamel, or an aging finish rather than incomplete cleaning.
Cleaning Bathtub Fixtures and the Overflow Plate
Bathtub faucets, handles, spouts, drains, and overflow plates often collect water spots and product residue even when the basin looks clean.
Use mild soap and a soft damp cloth. Wipe around fixture bases and narrow joints where moisture remains, then rinse and dry the metal immediately.
Do not leave vinegar or acidic cleaners on chrome, brushed finishes, plated fixtures, or decorative coatings without checking the manufacturer’s instructions. Some finishes require only water and mild soap.
Avoid spraying cleaner directly into openings or behind the overflow plate. Apply the product to the cloth so you can control where the moisture travels.
How to Clean the Bathtub Drain Area
Remove visible hair and loose debris from the drain cover while wearing gloves. Clean the surrounding surface with mild soap and a small soft brush.
Do not push hair or solid material further into the drain. If the water flows slowly, use the drain-cleaning method recommended for the plumbing and bathtub manufacturer.
Avoid pouring random combinations of baking soda, vinegar, bleach, commercial drain opener, or other chemicals into the drain. Products left from a previous treatment may react with the next one.
A recurring blockage, sewage odor, or standing water may require plumbing service rather than additional surface cleaning.
Cleaning Caulk and Grout Around the Bathtub
Caulk seals the joint between the bathtub and surrounding wall. Grout fills gaps between tiles. Both areas may collect soap residue and discoloration, but damaged material cannot always be restored through cleaning.
Use mild detergent, water, and a soft brush for routine care. Avoid scraping caulk with metal tools or scrubbing grout so aggressively that the material begins to erode.
Cracked, separated, or missing caulk allows moisture to travel behind the surface. Replace failed caulk rather than covering the opening with cleaner.
Dark staining that remains inside the caulk may indicate that discoloration has penetrated the material. In that case, removal and replacement may provide a better result than repeated chemical treatment.
How to Deal with Mold and Mildew Around a Bathtub
Bathroom mold often develops where moisture lingers around caulk, grout, ceilings, walls, or fixtures. Cleaning the visible mark without addressing humidity, leaks, or poor ventilation allows the problem to return.
For a small area on a hard surface, the EPA recommends scrubbing with detergent and water and drying the surface completely. Homeowners should also repair leaks and correct the source of moisture. Porous materials may require replacement when mold has grown inside them.
Follow the EPA’s mold cleanup guidance when deciding whether the affected area is appropriate for household cleaning.
Never mix bleach with ammonia, vinegar, or another cleaner. Open windows or doors when using cleaning products, follow label instructions, and consider professional evaluation when mold covers a large area or repeatedly returns.
Can You Use Baking Soda and Vinegar on a Bathtub?
Baking soda and vinegar appear in many household cleaning guides, but they are not suitable for every bathtub.
Baking soda provides mild abrasive action, which may dull glossy acrylic, fiberglass, repaired coatings, or other delicate finishes when applied too aggressively. Vinegar is acidic and may affect stone, grout, metal fixtures, and surfaces whose manufacturers do not approve acidic products.
When the bathtub’s care instructions permit either ingredient, use a small amount, test a hidden section, and rinse thoroughly. Do not assume that combining the two creates a stronger cleaner. Their visible fizzing comes from an acid-base reaction, but the ingredients begin neutralizing each other.
For routine maintenance, mild soap and a soft sponge remain the safer starting point.
Cleaning a Whirlpool or Jetted Bathtub
A jetted bathtub requires care beyond wiping the visible basin. Water remains inside internal lines, jets, and air channels that ordinary surface cleaning cannot reach.
Follow the exact cleaning or flushing procedure in the owner’s manual. Manufacturers may specify water level, cleaner type, cycle duration, and rinsing steps for each model.
Do not pour bleach, dishwashing detergent, oils, or homemade mixtures into the jet system unless the manufacturer permits them. The wrong product may create excessive foam, damage components, or leave residue inside the plumbing.
Stop using the system and seek appropriate service if the jets release dark material repeatedly, leak, fail to operate, or produce an electrical smell.
Common Bathtub Cleaning Mistakes
Avoid these mistakes when deciding what to use to clean a bathtub:
Treating all bathtub materials as though they have the same finish
Using oven cleaner as a general stain remover
Scrubbing acrylic or fiberglass with steel wool
Leaving acidic cleaner on faucets or grout
Mixing bleach with vinegar, ammonia, or other products
Allowing cleaner to dry on the surface
Ignoring the underside of bath mats
Applying excessive force to slip-resistant textures
Pouring chemicals into a slow drain without checking previous treatments
Continuing to clean damaged enamel instead of repairing it
Covering mold without correcting the moisture source
Returning bottles and mats before the tub dries
The right process should remove buildup without creating scratches, chemical residue, damaged caulk, or discoloration.
How Often Should You Clean a Bathtub?
The appropriate schedule depends on how often the tub is used, the number of people in the home, water hardness, ventilation, and the types of bath products used.
Rinse fresh residue after bathing and remove loose hair before it reaches the drain. Wipe the tub lightly during the week when several people use it, and complete a more detailed cleaning when soap film, mineral marks, or discoloration begin to appear.
Drying wet ledges and improving bathroom ventilation can reduce the moisture that supports recurring buildup. Manufacturer guidance for acrylic and other bath materials also commonly recommends wiping the surface with a soft cloth after use and avoiding abrasive tools.
When the Bathroom Needs More Detailed Cleaning
Cleaning the bathtub may improve one major bathroom surface, but dust, product residue, hair, soap film, and moisture often collect in several areas at once.
BA House Cleaning’s Deep Cleaning Services provide additional attention for Oakland and East Bay homes that need a more detailed reset. The service is designed for homes that require more extensive scrubbing and care than routine maintenance.
After a detailed clean, Recurring Cleaning Services can help maintain bathrooms and other frequently used areas through weekly, biweekly, or monthly visits. BA House Cleaning lists tubs, bathroom tiles, shower doors, sinks, and countertops among the areas addressed during its standard recurring service.
Professional house cleaning does not replace repairs, plumbing work, mold remediation, or the manufacturer’s maintenance instructions. It can, however, help prevent routine household buildup from spreading across several bathroom surfaces.
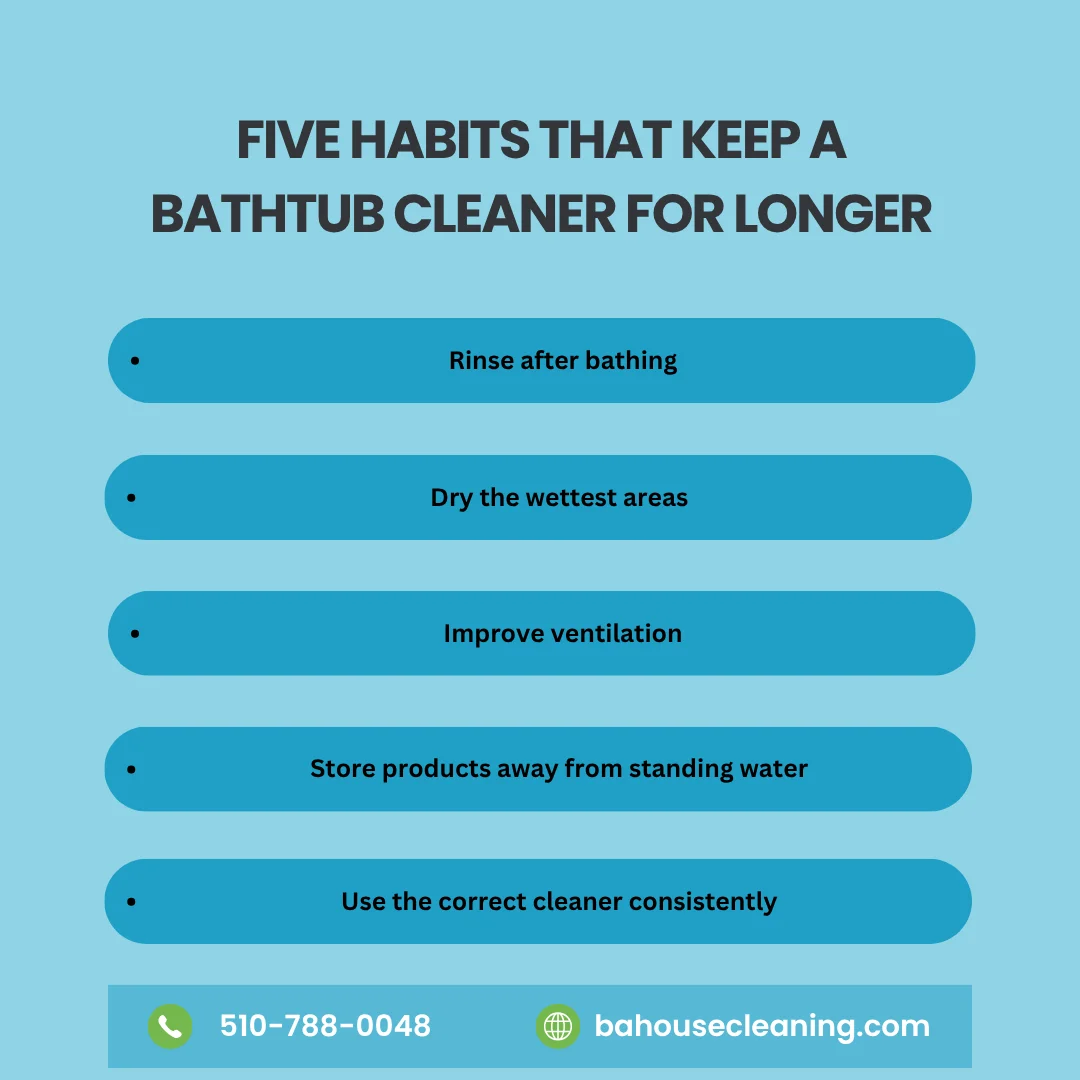
Five Habits That Keep a Bathtub Cleaner for Longer
A practical maintenance routine can reduce soap film, water spots, and difficult stains:
Rinse after bathing: Remove shampoo, soap, bath oil, and loose residue before they dry on the surface.
Dry the wettest areas: Wipe ledges, corners, fixtures, and the area around the drain with a soft cloth.
Improve ventilation: Run the exhaust fan or open an appropriate window to help bathroom moisture escape.
Store products away from standing water: Bottles and containers can trap residue beneath them and leave rings on the tub ledge.
Use the correct cleaner consistently: Keep a manufacturer-approved product available instead of switching between strong household mixtures.
These habits make routine cleaning easier and reduce the need for heavy scrubbing that could affect the bathtub finish.
Give Your Bathroom the Detailed Care It Needs
A clean bathtub can improve the appearance of the entire bathroom, but maintaining the room also requires attention to floors, sinks, fixtures, mirrors, toilets, and surrounding surfaces.
Connect with BA House Cleaning on Facebook to discuss professional home cleaning in Oakland and the East Bay. Choose dependable support for routine bathroom maintenance or a more detailed cleaning when soap residue, dust, and household buildup have become difficult to manage.
Frequently Asked Questions
What is the best way to clean a bathtub?
Identify the bathtub material first. Begin with warm water, mild dish soap, and a soft, non-abrasive sponge. Rinse thoroughly, and use stronger products only when the manufacturer confirms they are safe for the finish.
How do I remove soap scum from a bathtub?
Apply warm water and mild dish soap, allow the solution to soften the film, then wipe gently with a soft sponge. Repeat the process rather than using a harsh scrubber. A manufacturer-approved soap-scum remover may help with heavier buildup.
Can I use vinegar to clean a bathtub?
Some manufacturers permit diluted vinegar on selected bathtub materials, while others recommend different products. Avoid using vinegar on natural stone, unknown coatings, sensitive fixtures, or any surface whose care instructions prohibit acidic cleaners.
Can I use baking soda on an acrylic bathtub?
Baking soda may create fine scratches or dull a glossy surface when used aggressively. Check the acrylic tub manufacturer’s instructions before applying it, use minimal pressure, and test a hidden area first.
How do I clean a fiberglass bathtub without scratching it?
Use warm water, mild liquid soap, and a soft cloth or non-abrasive sponge. Avoid steel wool, stiff brushes, abrasive powders, and cleaning tools that may dull the fiberglass finish.
How can I remove hard-water marks from a bathtub?
Start with mild soap and water. When the manufacturer permits an acidic cleaner, use diluted vinegar or an approved mineral-deposit remover on the affected section. Rinse and dry the surface immediately afterward.
Can bleach damage a bathtub?
Bleach may discolor or damage some acrylic, fiberglass, coated, or decorative surfaces. Do not use it unless the manufacturer approves it for that exact material, and never combine it with vinegar, ammonia, or another cleaner.
How often should I clean my bathtub?
Remove hair and rinse fresh residue after use. Complete a more thorough cleaning weekly or whenever soap film, stains, or mineral deposits begin to appear. Usage, water hardness, and ventilation affect the ideal schedule.
Why do bathtub stains return after cleaning?
Recurring marks may come from hard water, damaged enamel, leaking fixtures, standing moisture, soap residue, mold growth, or products stored on wet ledges. Identify and correct the source instead of repeatedly treating the visible stain.
When should I replace bathtub caulk?
Replace caulk when it cracks, separates from the wall or tub, develops gaps, remains deeply discolored, or no longer forms a watertight seal. Cleaning cannot restore caulk that has physically failed.
Baking soda is a familiar kitchen ingredient, but many households also keep it nearby for small cleaning and deodorizing tasks. It can help lift light residue, absorb certain odors, and add gentle scrubbing action when mixed with water. However, it is not suitable for every surface, and using more of it does not automatically produce better results.
Successful cleaning with baking soda depends on understanding what the product can do, how much to use, and when another cleaning method would be safer. Baking soda is mildly alkaline and slightly abrasive, which makes it useful for selected washable surfaces. Those same properties also mean it may dull, scratch, or leave residue on delicate finishes when used carelessly.
At BA House Cleaning, we understand that homeowners often want practical ways to manage small messes between professional appointments. This guide explains how to use baking soda in kitchens, bathrooms, refrigerators, trash cans, cookware, and other household areas while avoiding misleading cleaning hacks and potentially damaging combinations.
What Is Baking Soda and How Does It Help with Cleaning?
Baking soda is sodium bicarbonate, a mild alkaline substance commonly used in cooking and household care. When mixed with a small amount of water, it forms a soft paste that can help loosen light grime and provide gentle scrubbing action.
Its alkaline nature may also help address some acidic-smelling residues, while the dry powder can absorb certain odors rather than simply covering them with fragrance. This makes baking soda useful for refrigerators, washable trash cans, food containers, and some other odor-prone areas.
However, baking soda is not a universal cleaning product. It does not dissolve every type of grease, remove every stain, or safely clean every finish. It also should not replace manufacturer-approved products when cleaning appliances, specialty flooring, natural stone, electronics, or coated surfaces.
Cleaning Is Different from Disinfecting
Baking soda can help remove visible dirt, residue, and odors, but it should not be presented as a disinfectant.
The CDC’s guidance on cleaning and disinfecting explains that cleaning removes dirt and many germs from surfaces, while disinfecting uses appropriate products to kill remaining germs. In most ordinary household situations, cleaning with soap and water may be sufficient, but disinfecting can become necessary when someone is ill or when a particular contamination risk exists.
When a surface requires disinfection, first remove visible dirt and then use a product that is registered and labeled for the intended surface and purpose. Follow the product’s required contact time and safety instructions.
Do not rely on baking soda, vinegar, or a homemade mixture as a substitute for an approved disinfectant.
What You Need Before Cleaning with Baking Soda
Most small household tasks require only a few basic supplies:
Baking soda
Warm water
Mild dish soap
A soft microfiber cloth
A non-abrasive sponge
A small bowl
A soft-bristled brush
Clean water for rinsing
A dry towel
Keep a separate sponge or brush for bathrooms and food-contact areas. Do not use the same cleaning tool across toilets, counters, sinks, and appliances without washing or replacing it.
Before applying baking soda, read the surface or appliance care instructions. Test the method in a small hidden area when you are uncertain about the finish.
How to Make a Baking Soda Cleaning Paste
A basic paste works well for small, accessible areas with light residue.
Place a small amount of baking soda in a bowl and add water gradually. Stir until the mixture develops a spreadable consistency. The paste should remain moist enough to move across the surface without scattering dry powder.
Apply a thin layer to the affected area and allow it to sit briefly. Use a soft cloth or non-abrasive sponge to work gently over the residue, then rinse the surface thoroughly and dry it.
Avoid allowing the paste to harden completely on porous, textured, or difficult-to-rinse surfaces. Dried baking soda can leave a white film that becomes more noticeable after the surface dries.
Cleaning Kitchen Sinks with Baking Soda
Baking soda can help remove light residue and odors from many stainless steel, porcelain, and ceramic sinks. The correct method still depends on the manufacturer and finish.
Rinse away loose food first. Sprinkle a small amount of baking soda onto a damp sponge or create a soft paste with water. Wipe gently around the basin, drain area, and faucet base without applying excessive pressure.
Rinse thoroughly so no powder remains, then dry the sink with a clean cloth. Drying helps reduce water spots and reveals any residue that still needs removal.
Be cautious with composite, coated, colored, polished, or specialty sinks. Use the product recommended by the sink manufacturer when baking soda is not listed as an approved option.
Using Baking Soda on Stainless Steel
Some appliance manufacturers recommend a baking soda-and-water paste for selected stainless steel stains. When the method is approved, use a soft cloth and wipe in the direction of the grain rather than scrubbing in circles.
After cleaning, remove all residue with clean water and dry the stainless steel completely. Water and cleaning residue may leave marks when allowed to air-dry.
Not every stainless steel appearance is a traditional uncoated finish. Fingerprint-resistant, black stainless, painted, and coated appliances may require different care. Check the model instructions before applying baking soda or vinegar.
Never use steel wool, hard brushes, or excessive pressure on stainless steel.
Cleaning the Inside of a Refrigerator
Baking soda and water can provide a low-odor option for cleaning many refrigerator interiors. Remove food and detachable shelves according to the appliance instructions, then wipe away crumbs and spills before applying any solution.
Mix baking soda with warm water and apply it with a soft cloth. Clean accessible walls, shelves, drawers, and food residue, then wipe everything again with clean water and dry it before returning food.
GE and Whirlpool both publish refrigerator-care instructions that include diluted baking soda and water for selected interior surfaces and odor control. Always follow the instructions for the specific refrigerator model.
Do not pour baking soda into vents, drain openings, electrical components, ice-making systems, or control panels.
Deodorizing the Refrigerator with Baking Soda
A container of baking soda may help absorb some food odors inside a refrigerator, but it cannot compensate for spoiled food, hidden spills, dirty drip trays, or blocked drainage.
Begin by locating and removing the source of the smell. Check drawers, shelves, containers, door seals, and areas beneath removable parts.
After cleaning and drying the refrigerator, place an open box or designated refrigerator deodorizer inside according to the package instructions. Replace it regularly rather than leaving the same open box indefinitely.
Do not use refrigerator deodorizing baking soda for cooking after it has absorbed household odors.
Cleaning Cookware and Burned Food Residue
A baking soda paste may help loosen light burned residue from certain pans, baking dishes, and cookware. Allow the item to cool first, then add warm water and mild dish soap to soften the food.
Apply a paste only after checking that the material can tolerate mild abrasives. Work gently with a non-scratch sponge, rinse thoroughly, and repeat rather than increasing pressure.
Exercise caution with:
Nonstick coatings
Aluminum
Copper
Seasoned cast iron
Painted cookware
Decorative finishes
Specialty ceramic coatings
These materials may require specific care. Follow the cookware manufacturer’s instructions instead of applying a universal cleaning hack.
Cleaning Ovens and Microwaves
Baking soda may work on selected oven and microwave interiors when the appliance manufacturer permits it. A paste can help loosen light residue on accessible surfaces, while baking soda dissolved in water may assist with odors.
Do not apply paste to:
Heating elements
Fans
Electrical openings
Oven door gaskets
Microwave vents
Control panels
Self-cleaning oven components unless approved
Whirlpool includes baking soda among possible household materials for selected oven and microwave cleaning methods, but its guidance still depends on the appliance type and specific instructions.
Remove every trace of paste before operating the appliance again. Dried powder can produce residue, odors, or smoke when heated.
Cleaning Bathroom Sinks, Tubs, and Tiles
A damp sponge with a small amount of baking soda may help lift light soap residue from certain porcelain, ceramic, and tile surfaces.
Rinse the area first, then apply the product gently. Pay attention to corners, faucet bases, drain covers, and areas where soap residue commonly develops. Rinse thoroughly and dry metal fixtures to prevent spotting.
Do not assume that all tubs and shower walls can tolerate abrasion. Acrylic, fiberglass, refinished, painted, and coated surfaces may scratch or lose their shine.
Always test a hidden section or use the cleaner recommended by the surface manufacturer.
Can Baking Soda Clean Grout?
A paste of baking soda and water may help remove light surface residue from some unsealed grout. Apply it with a soft brush, scrub gently, rinse, and dry the area.
Baking soda cannot repair cracked grout, reverse permanent discoloration, or remove contamination that has penetrated deeply into porous material.
Colored grout, sealed grout, epoxy grout, and stone installations may require specialized products. Test the method first and avoid aggressive brushing that could erode the grout lines.
Persistent dark marks may indicate mildew, embedded staining, water intrusion, or another issue that requires more than surface cleaning.
Surfaces That Require Extra Caution
Baking soda is often described as gentle, but it still creates friction. That can affect glossy or delicate finishes.
Avoid using it without manufacturer approval on:
Natural stone countertops and floors
Polished marble
Lacquered or waxed wood
Acrylic and glossy plastic
Painted surfaces
Glass and mirrors
Electronic screens
Gold- or silver-plated finishes
Aluminum
Antique or delicate items
Coated appliance exteriors
The Natural Stone Institute recommends using neutral cleaners, stone soap, or mild dishwashing detergent for routine care of natural stone. A specialized poultice may contain baking soda for particular stone stains, but that is different from routinely scrubbing the whole surface with dry powder.
Using Baking Soda on Carpets and Rugs
People often sprinkle baking soda on carpets to manage light odors, but the method has limitations.
Fine powder may settle deep into carpet fibers or backing, especially when too much product is applied. Repeated use may also make complete vacuum removal difficult. Baking soda does not remove the source of pet urine, moisture, mold, food contamination, or deeply embedded stains.
Before using it:
Check the carpet or rug care instructions.
Test a hidden area.
Keep the powder dry.
Apply only a light amount.
Keep children and pets away.
Vacuum thoroughly.
Avoid using it on wet contamination.
For persistent smells, widespread staining, or heavily soiled fibers, professional Carpet Cleaning Services may provide a more appropriate solution than repeatedly adding dry powder.
Deodorizing Trash Cans
Baking soda can help manage light odors in washable trash cans after the actual waste and residue have been removed.
Empty the container, wash it with appropriate soap and water, rinse it, and let it dry. Sprinkle a small amount of baking soda into the dry base or use a diluted cleaning solution if the material allows it.
Do not use baking soda to cover leaking food, liquid, mold, or spoiled waste. Odor control works best after physical cleaning.
ARM & HAMMER includes trash cans, refrigerators, drains, and selected appliances among its published baking soda cleaning and deodorizing applications.
Can You Mix Baking Soda and Vinegar?
Baking soda is alkaline, while vinegar is acidic. Combining them causes fizzing and produces carbon dioxide gas. The visible reaction may help move loose debris in some situations, but the two ingredients also neutralize each other as the reaction proceeds.
That means the mixture is not automatically stronger than using either product appropriately on its own.
Never mix or store baking soda and vinegar in a sealed bottle or container because pressure can build as gas forms. Use them only in an open, ventilated area and only when the surface instructions allow both ingredients.
More importantly, do not combine homemade ingredients with bleach, ammonia, drain cleaners, disinfectants, or unidentified commercial products.
Never Mix Household Cleaning Products Randomly
A safe rule is to use one cleaning product at a time and follow its label.
Poison Control’s cleaning safety guidance advises against mixing household cleaning products because unexpected chemical reactions may produce irritating or dangerous gases. Bleach should never be combined with vinegar, ammonia, or other acidic or ammonia-containing cleaners.
Baking soda itself is generally mild, but that does not make every mixture containing baking soda safe.
Rinse the surface and allow it to dry before changing to another cleaning product. Keep products in their original labeled containers and store them away from children and pets.
Is Baking Soda Safe Around Children and Pets?
Baking soda should still be stored and used carefully.
Small amounts used correctly for cleaning are different from swallowing a large quantity. Poison Control notes that excessive ingestion of baking soda can cause serious toxicity because it contains sodium and bicarbonate.
Keep open containers, pastes, and freshly treated areas away from children and animals. Do not sprinkle baking soda directly onto a pet’s fur or bedding without veterinary guidance.
After using it on a household surface, rinse or vacuum thoroughly as appropriate. Store the package securely after use.
Common Baking Soda Cleaning Mistakes
Baking soda becomes less useful when it is applied without considering the surface or the type of mess.
Avoid these common mistakes:
Treating baking soda as a disinfectant
Scrubbing delicate surfaces with dry powder
Applying it to natural stone without guidance
Combining it with unidentified cleaning chemicals
Mixing it with bleach
Storing baking soda and vinegar in a sealed container
Using excessive amounts on carpets
Leaving dried paste inside appliances
Pouring powder into vents or drains without checking instructions
Using the same sponge in kitchens and bathrooms
Skipping the rinse step
Assuming every “natural” method is automatically safe
A successful method should remove residue without creating scratches, chemical exposure, white film, or damage to the surrounding material.
When a Home Needs More Than a Baking Soda Paste
Baking soda can help with an isolated sink mark, refrigerator odor, or small area of surface residue. It cannot replace detailed cleaning when grease, soap buildup, dust, debris, and grime extend across several rooms or hard-to-reach areas.
BA House Cleaning’s Deep Cleaning Services provide a more thorough option for Oakland and East Bay homes that need additional attention beyond routine maintenance. Deep cleaning can help reset kitchens, bathrooms, floors, baseboards, and other frequently overlooked areas.
For ongoing maintenance, Recurring Cleaning Services can help homeowners follow a weekly, biweekly, or monthly cleaning schedule rather than waiting for buildup to become difficult to manage. BA House Cleaning lists deep cleaning, recurring cleaning, and carpet cleaning among its residential services.
Five Rules for Safer Cleaning with Baking Soda
Using a simple routine can reduce the risk of scratches, residue, and unsuitable product combinations:
Check the surface first: Read manufacturer instructions and identify whether the material is coated, polished, porous, painted, or otherwise delicate.
Test a hidden area: Apply a small amount in an inconspicuous location and allow it to dry before treating a larger section.
Use gentle pressure: Let moisture and time loosen residue instead of relying on aggressive scrubbing.
Rinse completely: Remove every trace of baking soda to prevent white film, gritty residue, or powder entering appliance openings.
Never treat it as a universal cleaner: Choose another method when the surface requires a neutral cleaner, specialty product, disinfectant, or professional treatment.
Following these five rules makes cleaning with baking soda more practical while protecting the materials and finishes throughout the home.
Create a Cleaner Routine for Your Entire Home
Small cleaning methods can make everyday maintenance easier, but they work best as part of a consistent routine. When kitchens, bathrooms, floors, and frequently used surfaces receive regular attention, isolated spills and odors are less likely to develop into widespread buildup.
Connect with BA House Cleaning on Facebook to discuss professional house cleaning in Oakland and the East Bay. Choose dependable support for routine upkeep, detailed cleaning, and the areas of your home that need more attention than a simple household cleaning paste can provide.
Frequently Asked Questions
What can you clean with baking soda?
Baking soda may help clean selected stainless steel, porcelain, ceramic, refrigerator interiors, washable trash cans, cookware, sinks, tubs, and tile surfaces. Always check the manufacturer’s instructions and test a hidden area before treating the complete surface.
Can baking soda disinfect surfaces?
No. Baking soda can help remove dirt, residue, and some odors, but it is not an EPA-registered disinfectant. Use an appropriate labeled product when a surface requires disinfection.
How do you make a baking soda cleaning paste?
Place a small amount of baking soda in a bowl and add water gradually until the mixture becomes spreadable. Apply a thin layer, clean gently with a soft cloth or sponge, rinse thoroughly, and dry the surface.
Can you mix baking soda and vinegar for cleaning?
The combination produces fizzing as the acid and alkaline ingredients react. The reaction may move loose debris, but it also neutralizes both ingredients over time. Never store the mixture in a closed container or combine it with commercial cleaners.
Can you mix baking soda with bleach?
Do not create homemade mixtures involving bleach. Use bleach only according to its product label, and never combine it with vinegar, ammonia, acids, or unidentified cleaning products.
Is baking soda safe for natural stone?
Routine scrubbing with baking soda is not the preferred care method for natural stone. Use a neutral cleaner or stone-specific product unless a stone professional recommends a controlled poultice for a particular stain.
Can baking soda scratch stainless steel?
Some manufacturers allow a baking soda paste for traditional stainless steel when applied gently in the direction of the grain. Coated, fingerprint-resistant, black stainless, and other specialty finishes may require different care.
Can I leave baking soda on a carpet overnight?
Check the carpet manufacturer’s instructions first. Fine powder may settle deeply into fibers and become difficult to remove. Avoid applying it to wet stains, delicate rugs, or pet accidents, and keep children and animals away from the treated area.
Does baking soda remove every household odor?
No. It may absorb some light odors, but it cannot correct spoiled food, pet urine, mold, moisture, plumbing problems, smoke damage, or residue hidden beneath a surface. Remove the source of the smell before attempting to deodorize the area.
How often can I clean with baking soda?
Use it only when appropriate for the surface and type of residue. Frequent abrasive cleaning may gradually affect some finishes, so gentle routine cleaning with the manufacturer-recommended product is often more suitable.
A coffee maker may look clean from the outside while coffee oils, water spots, loose grounds, and mineral deposits gradually collect inside its removable parts and internal water system. Over time, this buildup can affect the way the machine operates and may leave coffee tasting bitter, stale, or different from the flavor you normally expect.
Learning how to clean a coffee maker involves more than rinsing the carafe after breakfast. The filter basket, lid, water reservoir, warming plate, reusable filter, exterior controls, and internal brewing system all require different types of care. Some parts need washing after every use, while the internal system may require a separate descaling cycle based on the manufacturer’s instructions.
At BA House Cleaning, we understand that small kitchen routines can make a noticeable difference in how clean and comfortable the complete room feels. Regularly cleaning the coffee station, removing spills, and wiping surrounding countertops can prevent sticky residue and scattered grounds from becoming part of a larger kitchen mess.
This guide explains how to clean a drip coffee maker, wash the carafe and removable components, remove mineral buildup, use vinegar safely, clean without vinegar, care for a single-serve brewer, and avoid common mistakes that may damage the machine.
Why Coffee Makers Need Regular Cleaning
Every brewing cycle brings coffee grounds, natural oils, heat, and water into contact with different parts of the machine. Grounds may collect around the basket, while brewed coffee can drip onto the warming plate or exterior. Water also leaves minerals behind as it moves through the reservoir, tubes, and heating system.
These types of buildup require different cleaning methods. Warm water and dish soap can remove coffee residue from washable components, but they cannot always reach mineral deposits inside the internal water pathway. That is why a complete coffee maker cleaning routine includes both surface cleaning and periodic descaling.
Cuisinart explains that coffee oils, residue, and hard-water deposits can affect flavor, brewing speed, and the machine’s operation. Its guidance separates washing the carafe and filter basket from descaling the internal system.
Cleaning Versus Descaling a Coffee Maker
Cleaning and descaling are related, but they do not solve the same problem.
Routine Cleaning
Routine cleaning removes visible coffee grounds, spills, oils, stains, and residue from accessible components. It normally covers the carafe, lid, brew basket, reusable filter, removable water reservoir, warming plate, and exterior surfaces.
The parts that come into direct contact with coffee should receive the most frequent attention because oils and damp grounds can remain behind after brewing.
Descaling
Descaling targets mineral deposits left by the water used in the machine. These deposits may develop inside the reservoir, tubing, heating system, or other areas that a cloth cannot reach.
A descaling cycle usually involves running a manufacturer-approved solution through the machine without coffee grounds. Depending on the model, the recommended product may be diluted vinegar or a branded descaling solution.
Because coffee makers vary, always check the manual before selecting a solution or starting a cleaning cycle.
What You Need Before Cleaning
Gathering the right supplies helps you clean the machine without using harsh or unsuitable products.
You may need:
Warm water.
Mild, unscented dish soap.
A soft sponge or microfiber cloth.
A small soft-bristled brush.
White distilled vinegar, when approved for the model.
A manufacturer-approved descaling solution.
A clean, dry towel.
A paper coffee filter, when required for the cleaning cycle.
Avoid steel wool, abrasive scouring pads, sharp tools, bleach, and commercial oven cleaners. These products may scratch removable components, damage finishes, or leave unwanted residue.
Unplug the machine and allow it to cool before cleaning the exterior, warming plate, or removable parts. Never immerse the electrical base, power cord, or plug in water.
How to Clean a Coffee Maker After Every Use
A quick cleaning after brewing prevents grounds and coffee oils from remaining inside the machine until the next day.
Once the coffee maker cools, remove the used paper filter and grounds. Empty and rinse the carafe, then wash the brew basket, reusable filter, and lid if the manufacturer identifies them as washable.
Use warm water, mild dish soap, and a soft sponge. Rinse each component thoroughly so no soap remains, then allow the parts to dry before returning them to the machine.
Wipe coffee drips from the warming plate and surrounding exterior with a damp cloth. Apply the water to the cloth rather than pouring or spraying it directly onto electrical components.
How to Clean the Coffee Carafe
The carafe often develops a brown film when coffee remains inside for several hours or when the pot receives only a quick rinse after use.
Start by washing the carafe with warm water, mild dish soap, and a non-abrasive sponge. Pay attention to the pouring lip, underside of the lid, handle connection, and corners where coffee may collect.
For a stubborn stain, add warm water and a small amount of baking soda to the carafe. Allow it to sit briefly, then clean the surface gently with a soft sponge or bottle brush. Rinse several times before using the carafe again.
Avoid sudden temperature changes with a glass pot. Do not pour cold water into a hot carafe because thermal shock may crack the glass.
Cuisinart recommends washing the carafe and filter basket with warm soapy water and identifies a baking soda paste as an option for deeper carafe stains.
How to Clean the Brew Basket and Reusable Filter
The brew basket and reusable filter come into direct contact with wet coffee grounds and oils. When residue remains in the small openings, it may interfere with drainage or carry an old flavor into the next pot.
Remove both parts according to the manual. Empty all loose grounds, rinse the pieces, and wash them with warm water and mild dish soap.
Use a soft brush to reach mesh, corners, or narrow openings without bending or puncturing the filter. Rinse carefully and allow the components to dry completely.
Check whether the manufacturer allows dishwasher cleaning. A removable part may look dishwasher-safe but still require hand washing, so rely on the model instructions rather than appearance.
How to Clean the Water Reservoir
Empty standing water when the coffee maker will not be used for an extended period. A removable reservoir can usually be washed more thoroughly than a fixed one, but the correct method depends on the machine.
When the reservoir is removable and washable, use mild soap, warm water, and a soft cloth. Rinse it well so no detergent remains.
For a fixed reservoir, wipe only the accessible areas with a clean damp cloth. Do not pour dish soap directly into the internal water system unless the manufacturer specifically instructs you to do so.
Avoid using baking soda in a non-removable reservoir because undissolved particles may remain inside the machine. Baking soda is better suited to accessible surfaces such as the carafe.
How to Clean a Drip Coffee Maker with Vinegar
White vinegar can help remove mineral deposits from many traditional drip coffee makers, but the correct water-to-vinegar ratio varies by brand and model.
Before starting:
Empty the carafe.
Remove the coffee grounds.
Wash the basket.
Remove a charcoal water filter when the manual requires it.
Check that the manufacturer permits vinegar.
Fill the reservoir with the recommended vinegar-and-water solution. Place the empty carafe beneath the basket and run the machine without coffee grounds.
Some models complete the process in one cleaning cycle. Others instruct the user to pause halfway, allow the solution to sit, and then finish the cycle.
Afterward, empty and rinse the carafe. Fill the reservoir with clean water and run one or more full brewing cycles until the vinegar smell disappears.
Cuisinart’s official coffee maker cleaning guide recommends checking the individual manual because its models may use different vinegar ratios and cleaning functions. The company also recommends running a fresh-water cycle after descaling.
Can You Use Undiluted Vinegar?
Do not assume that stronger vinegar will provide better results. Undiluted vinegar may leave a powerful odor and may not match the manufacturer’s instructions for the machine.
Some coffee makers use a three-parts-water-to-one-part-vinegar mixture, while others use different amounts. Certain manufacturers prefer a dedicated descaling solution instead.
Follow the instructions for the exact machine rather than applying a universal ratio from a general cleaning article. This is particularly important for machines with filters, sensors, pumps, specialized tubing, or built-in cleaning programs.
How to Clean a Coffee Maker Without Vinegar
Some people dislike the smell of vinegar, while some manufacturers recommend a branded descaling product instead.
To clean a coffee maker without vinegar, use the descaling solution listed in the appliance manual. Measure and dilute the product exactly as directed, run the required cleaning cycle, and complete all recommended rinsing cycles.
Do not replace a commercial descaler with lemon juice, citric acid, bleach, dishwashing liquid, or baking soda unless the manufacturer approves that substitute.
Baking soda can help clean an accessible carafe, but running it through internal tubing may leave particles behind when it does not dissolve completely.
The safest vinegar-free option is the product and method approved for the specific coffee maker.
How to Clean a Single-Serve Coffee Maker
Single-serve brewers include components that differ from a traditional drip machine. These may include a pod holder, entrance needle, exit needle, removable drip tray, water reservoir, and replaceable water filter.
Unplug the brewer and allow it to cool. Remove and wash the drip tray, reservoir, lid, and pod holder when the manufacturer permits it.
Coffee grounds may collect around the pod holder and needles. Follow the manual’s procedure carefully because these needles are sharp and may require a special maintenance tool.
Descale the internal water system according to the brewer’s instructions. Keurig states that descaling removes calcium deposits from parts that come into contact with water and provides model-specific procedures for activating the correct descaling cycle.
Avoid copying the button sequence from a different brewer. Even machines from the same company may use different controls and descaling modes.
How to Clean a Coffee Maker with a Grinder
A grind-and-brew coffee maker requires additional care because coffee oils and fine grounds may remain inside the grinder, chute, and basket.
Unplug the machine before cleaning the grinder area. Remove loose grounds using the brush supplied with the appliance or another manufacturer-approved tool.
Do not introduce water into a grinder unless the manual identifies the component as removable and washable. Moisture inside the grinding mechanism may cause grounds to clump or affect electrical parts.
Wash the removable brew basket and carafe separately, then clean and descale the brewing system according to the model instructions.
How to Remove Coffee Odors
Old coffee smells often come from damp grounds, residue inside the basket, coffee left in the carafe, or spills on the warming plate.
Empty the grounds immediately after brewing and wash all removable coffee-contact components. Clean beneath the filter basket and around the carafe lid, where residue may remain less visible.
A small amount of baking soda can help deodorize a washable carafe, but rinse it thoroughly afterward.
Avoid masking the smell with perfume, essential oils, or heavily scented cleaners. Any product used on coffee-contact surfaces should rinse away completely.
Signs Your Coffee Maker Needs Descaling
A calendar provides a useful reminder, but the way the machine operates may also indicate mineral buildup.
Common signs include:
Brewing takes longer than usual.
The machine produces less coffee than expected.
Water flow appears uneven.
The brewer makes unfamiliar sounds.
A clean or descale indicator appears.
Coffee develops an unusual flavor despite fresh grounds.
White mineral residue appears around accessible water-contact areas.
These signs may have causes other than scale. Stop using the machine and contact the manufacturer when you notice leaking, electrical odors, sparks, damaged wiring, or repeated error messages.
How Often Should You Clean a Coffee Maker?
Clean the carafe, filter basket, lid, and reusable filter after each use or according to the appliance manual. Wipe the warming plate and exterior whenever you notice drips or loose grounds.
Descaling frequency depends on water hardness, brewing frequency, the machine’s design, and whether it uses a water filter. Cuisinart recommends descaling some machines every one to three months depending on water hardness, while Mr. Coffee advises cleaning selected models every 40 to 80 brewing cycles. Keurig commonly recommends descaling supported brewers every three to six months or when the descale indicator appears.
These schedules are general brand guidance, not universal rules. Follow the manual and indicator lights for the specific model.
Common Coffee Maker Cleaning Mistakes
Avoid these mistakes when cleaning or descaling the machine:
Starting before the coffee maker cools.
Immersing the electrical base or power cord in water.
Running dish soap through the internal brewing system.
Using vinegar without checking the manual.
Forgetting to remove the water filter before descaling.
Brewing coffee before completing the rinse cycles.
Scrubbing the carafe with steel wool.
Cleaning grinder components with water when they are not washable.
Returning wet parts to the machine.
Ignoring a persistent leak or electrical smell.
A cleaning method should match both the type of machine and the manufacturer’s recommendations.
Keep the Complete Coffee Station Cleaner
Cleaning the brewer is easier when the surrounding coffee station also receives regular attention. Grounds may spread across countertops and floors, while coffee, milk, sweeteners, and water may leave sticky marks on cabinet fronts, handles, and nearby appliances.
BA House Cleaning’s Recurring Cleaning Services help Oakland and East Bay homeowners maintain kitchens and other frequently used areas through weekly, biweekly, or monthly appointments. The service page states that standard cleaning can include kitchen counters, sinks, appliance exteriors, stovetops, floors, and other routine household surfaces.
Professional house cleaning does not replace the internal maintenance required by the coffee maker’s manufacturer. It can, however, help keep the surrounding kitchen cleaner and reduce the everyday buildup that develops around a busy coffee station.
Five Habits That Make Coffee Maker Cleaning Easier
A consistent routine prevents small spills and loose grounds from turning into stubborn buildup:
Empty grounds after brewing: Remove the used filter and wet coffee grounds instead of leaving them inside the basket for several hours.
Wash coffee-contact parts regularly: Clean the carafe, lid, filter basket, and reusable filter according to the manufacturer’s instructions.
Wipe spills while they are fresh: Allow the warming plate to cool, then remove coffee drips before heat causes them to dry onto the surface.
Follow a descaling schedule: Use the appliance manual, water hardness, brewing frequency, and descale indicator to decide when the internal system needs attention.
Complete every rinse cycle: After using vinegar or descaling solution, run the required fresh-water cycles before brewing coffee again.
These habits create a simpler coffee maker cleaning routine and help keep the brewer, carafe, and surrounding coffee station easier to manage.
Start Every Morning with a Cleaner Kitchen
A clean coffee maker supports a fresher morning routine, but it represents only one small part of the kitchen. Counters, floors, cabinet fronts, sinks, and frequently touched surfaces also require consistent attention throughout the week.
Connect with BA House Cleaning on Facebook to learn more about dependable home cleaning in Oakland and the East Bay. Build a recurring schedule that keeps your kitchen and living spaces cleaner, more comfortable, and ready for everyday use.
Frequently Asked Questions
What is the best way to clean a coffee maker?
Wash the removable coffee-contact parts with warm water and mild dish soap, wipe the exterior, and descale the internal water system according to the manufacturer’s instructions. The correct descaling solution and frequency depend on the model.
Can I clean a coffee maker with vinegar?
Many drip coffee makers allow diluted white vinegar, but not every machine follows the same ratio or procedure. Check the manual before adding vinegar to the reservoir, then complete all required fresh-water rinses.
How do I descale a coffee maker?
Empty the machine, remove filters when instructed, add the approved descaling solution, and run the designated cleaning or brewing cycle. Rinse the reservoir and complete the recommended water-only cycles afterward.
How often should I descale my coffee maker?
The schedule depends on the model, water hardness, and brewing frequency. Some manufacturers recommend every one to three months, while others recommend every three to six months or when a descale light appears. Follow the manual for the specific brewer.
Can I use baking soda to clean a coffee maker?
Baking soda can help clean stains and odors from an accessible carafe. Avoid running it through internal tubing unless the manufacturer specifically approves the method, because undissolved material may remain inside the machine.
How can I clean a coffee maker without vinegar?
Use the branded or manufacturer-approved descaling solution listed in the manual. Follow the dilution, cycle, and rinsing instructions exactly.
Why does my coffee taste bitter after cleaning the machine?
Cleaning solution may remain inside the water system when the machine has not completed enough rinse cycles. Run the manufacturer-recommended fresh-water cycles and wash the carafe and filter basket again before brewing.
Should I wash the coffee carafe after every use?
Regular washing helps remove coffee oils and prevents stains from building up. Use warm water, mild dish soap, and a soft sponge unless the manufacturer provides different instructions.
Can coffee maker parts go in the dishwasher?
Some carafes, lids, reservoirs, and filter baskets are dishwasher-safe, while others require hand washing. Check the manual before placing any removable component in the dishwasher.
Why is my coffee maker brewing slowly?
Mineral buildup may restrict water flow, but slow brewing can also have other causes. Descale the machine according to its instructions. Contact the manufacturer if the problem continues after cleaning.
A microwave is one of the most frequently used appliances in many kitchens, yet people often overlook its interior during routine cleaning. Sauces, soups, butter, oil, and reheated leftovers can leave splashes on the walls, ceiling, door, and turntable. Crumbs and liquid may also collect beneath the rotating plate, while repeated heating can cause grease, dried food, and strong odors to build up over time.
Learning how to clean a microwave properly does not require aggressive scrubbing or a cabinet full of harsh chemicals. Simple household products such as warm water, mild dish soap, white vinegar, lemon juice, and baking soda can handle many everyday messes when used correctly. Steam helps loosen dried food and soften stubborn residue, allowing a soft cloth or non-abrasive sponge to remove the buildup without scratching the appliance’s interior.
The most effective microwave cleaning hack is also one of the simplest: wipe spills before they dry and use steam to make older stains easier to remove. Regular attention can prevent unpleasant odors, reduce heavy buildup, and make future cleaning faster. At BA House Cleaning, we understand that maintaining a clean kitchen involves more than wiping visible countertops. Small appliances, handles, turntables, cabinet fronts, and surrounding surfaces all contribute to how fresh and comfortable the space feels.
This guide explains the safest and easiest ways to clean the microwave interior, wash the turntable, remove food smells, treat stubborn stains, clean the door and controls, and avoid common methods that may damage the appliance.
Why Microwave Messes Become Difficult to Remove
Microwave stains often begin as small splashes from sauces, soups, butter, oil, or reheated leftovers. Heat then dries these splashes onto the interior surfaces. When the appliance is used again, the residue may become harder, darker, and more difficult to wipe away.
Strong-smelling foods can also leave odors behind, especially when grease or food particles remain hidden under the turntable or around the door. Cleaning only the center of the appliance may therefore improve its appearance without completely removing the source of the smell.
An easy-clean microwave routine should address the complete appliance rather than only the most visible stains. That includes the ceiling, corners, turntable, roller ring, inside of the door, handle, control panel, and exterior vents.
What to Use to Clean the Inside of a Microwave
Before starting, collect a few simple supplies:
A microwave-safe bowl or measuring cup.
Warm water.
Mild dishwashing liquid.
A soft sponge or microfiber cloth.
White vinegar.
Lemon juice or fresh lemon.
Baking soda.
A clean, dry towel.
Check the appliance manual before using any product that is not specifically recommended for the model. Interior coatings and exterior finishes vary, and the correct method for one microwave may not be suitable for another.
Avoid steel wool, sharp tools, abrasive powders, commercial oven cleaners, bleach, and products containing ammonia. Samsung advises against abrasive cleaners, solvents, steel wool, and bleach because they can damage the finish. GE also recommends mild products and warns against abrasive, ammonia-based, bleach-based, and commercial oven cleaners.
The Easy Way to Clean a Microwave with Steam
Steam is often the easiest way to clean a microwave because it softens dried food before wiping begins. It does not eliminate the need to clean the surface, but it can reduce the amount of scrubbing required.
Fill a microwave-safe bowl with approximately one cup of water. Heat it for three to five minutes, or until enough steam has developed to coat the interior. The exact time will depend on the microwave’s power, so watch the bowl carefully and do not allow it to boil dry.
Leave the door closed for several minutes after heating. This gives the steam more time to loosen dried splashes. Carefully remove the bowl using oven mitts if it remains hot, then wipe the interior with a soft cloth and a small amount of mild dish soap.
Whirlpool’s official microwave cleaning instructions also recommend using a microwave-safe container, water, mild soap, and a soft cloth. Its guidance explains that heated water can soften heavy buildup before the interior is wiped, rinsed, and dried.
How to Clean a Microwave with Vinegar
White vinegar can be added to the steam-cleaning method to help loosen residue and reduce lingering food odors.
Combine one cup of water with approximately one tablespoon of white vinegar in a microwave-safe bowl. Heat the mixture for two to five minutes, allow it to stand briefly, and carefully remove the bowl. Wipe the walls, ceiling, floor, and inside of the door with a soft cloth.
When using vinegar for microwave cleaning, more is not necessarily better. A small amount diluted in water is usually enough for routine cleaning. Concentrated vinegar may leave a powerful smell and should not be applied directly to sensitive exterior finishes unless the manufacturer allows it.
After cleaning, wipe the interior again with a cloth dampened with clean water. Dry all surfaces before replacing the turntable and using the appliance.
How to Clean a Microwave with Lemon
Lemon provides another simple method for loosening residue while leaving a fresher scent.
Add one tablespoon of lemon juice to a cup of water, or place several lemon slices in a microwave-safe bowl of water. Heat the mixture until steam develops, leave the door closed for a few minutes, and then wipe the interior.
The citric acid naturally present in lemon juice may help with light grease and odors. However, anyone researching how to clean a microwave with citric acid should avoid using a strong concentrated solution unless the appliance manual confirms that it is suitable.
Fresh lemon juice diluted in water is generally a more practical option for routine cleaning. Whirlpool includes lemon juice among the natural ingredients that can be combined with water for microwave cleaning.
How to Clean a Microwave with Baking Soda
Baking soda can be useful for odors and food residue that remains after steam cleaning. It should be used gently because excessive scrubbing may affect some finishes.
One method is to add several tablespoons of baking soda to a microwave-safe bowl filled with water. Heat the mixture for a few minutes, allow it to cool, and wipe the interior with a soft sponge or cloth.
For an isolated stubborn spot, combine a small amount of baking soda with water to create a soft paste. Apply it to the stain, leave it briefly, and wipe without aggressive scrubbing. Remove all residue with a clean damp cloth afterward.
This cleaning microwave with baking soda method is more appropriate for specific marks than spreading dry powder across the entire interior.
Can You Clean a Microwave with Salt?
Some online tips explain how to clean a microwave with salt, but dry salt is not the best choice for routine interior cleaning. Its grains may act as an abrasive when rubbed against painted, plastic, or coated surfaces.
Salt also does not provide the same steam-softening effect as water mixed with lemon juice or vinegar. If the goal is to loosen food, reduce smells, or remove light grease, diluted vinegar, lemon water, baking soda, mild soap, and a soft cloth are more practical options.
Do not scrub the interior with coarse salt simply because it is available in the kitchen. Manufacturer-approved methods should take priority over a popular cleaning microwave hack, especially when the hack involves abrasive materials.
How to Clean the Microwave Turntable and Roller Ring
The glass turntable collects spills, grease, and crumbs that may not be visible until it is removed. Allow the plate to cool completely before washing it because sudden temperature changes may cause hot glass to crack.
Remove the turntable carefully and check the appliance manual to determine whether it is dishwasher-safe. Otherwise, wash it by hand using warm water, mild dish soap, and a soft sponge.
Clean the roller ring and the surface underneath it before returning both parts to their correct positions. Food trapped beneath the plate may cause odors and interfere with smooth rotation.
Whirlpool recommends allowing the turntable to cool before washing and checking the manual before placing it in a dishwasher. Samsung similarly advises washing the turntable regularly and making sure it is completely dry before returning it to the microwave.
Cleaning the Microwave Door and Seals
Food residue around the door can affect the appliance’s appearance and may prevent the door area from staying properly clean.
Use a soft cloth with mild soap and water to wipe the inside and outside of the door. Pay attention to corners, edges, and the area around the handle. A cotton swab or folded microfiber cloth may help reach narrow spaces, but avoid sharp objects.
The door seals should remain free from grease and hardened food. Do not soak them or apply excessive pressure. Samsung notes that residue around the seals may interfere with proper door closure and recommends cleaning the glass with mild soap, water, and a soft cloth.
If the door is damaged, misaligned, cracked, or unable to close correctly, stop using the microwave and arrange an appropriate appliance inspection.
How to Clean the Microwave Exterior and Control Panel
Turn off or unplug the microwave before cleaning its exterior, particularly around the control panel and vents. Apply cleaning solution to the cloth rather than spraying it directly onto the appliance.
Wipe the control panel with a lightly dampened cloth, then dry it immediately. Avoid excessive water because moisture may enter around buttons or electronic controls.
For stainless steel, check the owner’s manual before applying vinegar or general household products. Some fingerprint-resistant and coated finishes require specific care. Always wipe in the direction of the grain when the manufacturer recommends it.
Do not spray cleaner into vents, openings, seams, or beneath the control panel. GE’s official recommendations advise using a soft damp cloth on the controls and warn against spraying cleaning solution directly onto them.
How to Deodorize a Microwave
Understanding how to deodorize a microwave begins with removing the source of the smell. Fragrance alone will not solve the problem if burned food, grease, or liquid remains inside the appliance.
Remove the turntable and check underneath it. Wipe the ceiling, walls, corners, door, seals, and roller ring. Once visible residue has been removed, heat a microwave-safe bowl containing one cup of water and one tablespoon of vinegar or lemon juice for two to five minutes.
Leave the bowl inside briefly before removing it carefully. Wipe the interior and dry it with a clean microfiber cloth. Whirlpool recommends cleaning food debris first and then using diluted lemon juice or vinegar to help remove remaining odors.
For persistent smells, leave an open container of dry baking soda inside the cool, unused microwave overnight. Remove it before operating the appliance again.
How to Get Burnt Food Smell Out of a Microwave
Burned popcorn, overheated sauces, and forgotten leftovers may leave a smell that lasts longer than ordinary food odors.
Start by allowing the microwave to cool and removing all burned food or loose debris. Wash the turntable and clean every interior surface with mild soap and water. Follow with the vinegar or lemon steam method, then wipe and dry the appliance thoroughly.
Leave the microwave door open for a short period after cleaning to allow trapped odors and moisture to escape. When the microwave is not in use, a dry bowl of baking soda may help absorb remaining smells.
If the smell resembles burning plastic, wiring, or an electrical fault rather than burned food, stop using the appliance. Persistent smoke, sparks, damaged interior coating, or an unusual electrical odor should be assessed by a qualified appliance professional.
How to Sanitize a Microwave Safely
Cleaning and sanitizing are not always the same process. Steam from water can loosen grease and food, but it should not automatically be treated as a guaranteed disinfecting method.
Begin by removing crumbs, spills, grease, and other visible material. Cleaning products work more effectively when surfaces are free from soil.
Only use a sanitizing or disinfecting product if the microwave manufacturer confirms that it is suitable for the interior surface. Follow the product label, required contact time, rinsing instructions, and appliance manual.
Do not mix vinegar with bleach or other cleaners. Avoid leaving chemical residue on surfaces that may come close to food, and rinse whenever the instructions require it.
Common Microwave Cleaning Mistakes
A useful microwave cleaning trick should make the process safer and easier, not create additional damage. Avoid these common mistakes:
Heating water for too long or allowing the container to boil dry.
Removing a hot bowl without hand protection.
Using metal containers during steam cleaning.
Spraying liquid directly into vents or controls.
Scrubbing with steel wool, sharp tools, or coarse abrasives.
Using commercial oven cleaner inside the microwave.
Mixing household cleaning chemicals.
Returning the turntable before it dries completely.
Using the appliance despite damage to the door or interior.
Always stop and check the owner’s manual when you are uncertain about a surface, cleaning mode, removable part, or recommended product.
How Often Should You Clean Your Microwave?
The ideal cleaning schedule depends on how often you use the appliance and the types of food you prepare. Wipe fresh spills as soon as the microwave cools to prevent grease and food residue from hardening. For appliances used regularly, a weekly wipe is a practical starting point, while a more detailed cleaning may be necessary whenever odors, stains, or dried food begin to build up.
Whirlpool recommends cleaning the microwave about once a week and dealing with large spills promptly, while Samsung advises using a soft cloth regularly and removing fresh stains before they become difficult to clean. Covering food with a microwave-safe lid can also reduce splashes, limit buildup, and make routine cleaning faster and easier.
Keeping the Rest of the Kitchen Under Control
Cleaning one appliance helps, but kitchens usually require a broader routine. Grease and crumbs may also collect on countertops, cabinet fronts, stovetops, floors, handles, and surrounding appliances.
BA House Cleaning offers Recurring Cleaning Services for homeowners who want ongoing support with commonly used areas of the home. Weekly, biweekly, or monthly cleaning can help prevent everyday mess from developing into heavier buildup across the kitchen and other living spaces.
Professional recurring cleaning does not replace the appliance manufacturer’s care instructions. It can, however, help maintain the surrounding surfaces and make the complete kitchen easier to manage.
Five Habits That Make Microwave Cleaning Easier
The best way to clean a microwave is to prevent food and grease from remaining long enough to harden. A simple routine can reduce odors, limit scrubbing, and keep the appliance more presentable:
Cover food before heating: Use a vented, microwave-safe cover to reduce splashes while allowing steam to escape safely.
Wipe fresh spills promptly: Wait until the appliance is cool, then remove splashes before they dry onto the interior.
Check beneath the turntable: Crumbs and liquid often collect under the glass plate and may become a source of odor.
Use steam before scrubbing: Warm water can soften dried food, reducing the need for abrasive tools or excessive pressure.
Clean the complete appliance: Include the door, handle, seals, controls, turntable, roller ring, exterior, and surrounding counter area.
Following these habits creates an easier microwave-cleaning routine and helps prevent small spills from becoming stubborn stains.
Give Your Kitchen a Cleaner, Fresher Routine
A clean microwave is easier to maintain when the rest of the kitchen receives consistent attention. Instead of waiting for grease, crumbs, and everyday mess to spread across several surfaces, create a regular cleaning routine that fits your home and schedule.
Connect with BA House Cleaning on Facebook to learn more about dependable home cleaning in Oakland and the East Bay. Let an experienced team help keep your kitchen and living spaces fresh, comfortable, and easier to manage.
Frequently Asked Questions
What is the easiest way to clean a microwave?
Heat water in a microwave-safe bowl for several minutes to create steam, then allow it to stand briefly before wiping the interior with a soft cloth. Mild dish soap can be used after the steam loosens the food residue.
Can I clean a microwave with normal vinegar?
Plain white distilled vinegar is commonly diluted with water for microwave cleaning. Use a small amount, avoid applying concentrated vinegar directly to sensitive finishes, and check the appliance manual before cleaning coated exterior surfaces.
How do I clean the inside of a microwave?
Remove the turntable, loosen dried residue with steam, and wipe the ceiling, walls, floor, corners, and inside of the door with mild soap and a soft cloth. Rinse away product residue and dry the interior before replacing the clean turntable.
How do I clean a microwave with baking soda?
Add several tablespoons of baking soda to a microwave-safe bowl of water and heat it for a few minutes. Once the bowl has cooled enough to handle safely, remove it and wipe the loosened residue with a soft cloth.
Can salt be used to clean a microwave?
Salt is not the preferred option because dry grains may scratch some interior finishes. Water, mild soap, diluted vinegar, lemon juice, or baking soda are generally more useful for loosening food and addressing odors.
How do I remove a bad smell from a microwave?
Remove all food residue first, including crumbs under the turntable. Use a bowl of water with diluted vinegar or lemon juice to create steam, wipe the interior, and dry it thoroughly. A bowl of dry baking soda may be left inside the cool, unused microwave overnight.
How often should a microwave be cleaned?
Clean large spills as soon as the appliance has cooled. A weekly wipe is a practical starting point for a frequently used microwave, but the exact schedule depends on usage and the amount of grease or food splatter.
Is it safe to spray cleaner inside a microwave?
It is better to apply cleaner to a soft cloth instead of spraying it directly into the appliance. This reduces the risk of liquid entering vents, seams, controls, or other openings.
Can I use bleach or oven cleaner inside a microwave?
Manufacturer guidance commonly warns against bleach, commercial oven cleaners, ammonia-based products, and abrasive cleaners. Use mild soap and manufacturer-approved methods unless the model’s manual states otherwise.
Why does my microwave still smell after cleaning?
Food residue may remain beneath the turntable, around the door seals, on the ceiling, or inside corners. Clean all removable parts and interior surfaces before using vinegar, lemon, or baking soda to address the remaining odor.
Managing a successful Vrbo property involves much more than uploading attractive photographs and responding quickly to booking requests. Every guest expects to enter a rental that feels clean, organized, comfortable, and ready for their stay.
That expectation makes reliable Vrbo cleaning services an essential part of vacation rental management. Unlike ordinary residential cleaning, rental turnover work must be completed within a specific window between checkout and the arrival of the next guest.
A professional cleaning process may include preparing bedrooms, cleaning bathrooms and kitchens, washing linens, replacing towels, removing trash, restocking essential supplies, and completing a final inspection before check-in.
For hosts in Oakland and the East Bay, BA House Cleaning provides vacation rental cleaning designed to help properties remain consistently prepared between reservations. Its vacation rental cleaning service can include turnover cleaning, onsite laundry when an in-unit washer and dryer are available, linen changes, bed preparation, and restocking support.
Does Vrbo Provide Cleaning Services?
A common question from new hosts is: Does Vrbo provide cleaning services?
Vrbo provides a marketplace where travelers can find and book vacation rental properties. It also gives hosts tools for managing listings, pricing, reservations, cleaning fees, and guest expectations. However, Vrbo does not send a cleaning crew to prepare properties after checkout.
The property owner or manager is responsible for arranging the actual cleaning. Hosts can clean the property themselves, hire independent cleaners, or work with a professional Vrbo cleaning service.
Vrbo publishes cleaning guidance and allows hosts to disclose cleaning practices on their listings, but it does not operate or inspect the individual properties listed on its platform.
This means hosts need their own dependable system for:
Scheduling cleaning after every checkout.
Providing access to the property.
Communicating check-in and checkout times.
Managing linens and towels.
Replacing guest supplies.
Checking the property before the next reservation.
What Are Vrbo Cleaning Services?
Vrbo cleaning services are professional cleaning solutions designed specifically for short-term rental properties listed on Vrbo. Unlike standard residential cleaning, the purpose is not simply to make the home look tidy but to completely reset the property after one guest stay and prepare it for the next arrival, often within a limited turnover window. This requires a consistent process that covers guest-facing spaces, high-touch surfaces, bathrooms, kitchens, bedrooms, floors, trash removal, and the overall presentation of the rental.
A thorough turnover may also include changing bed linens, replacing towels, completing onsite laundry, restocking essential supplies, checking drawers and cabinets for items left behind, and returning furniture or décor to its intended position. Depending on the agreement with the host, cleaners may also report visible damage, maintenance concerns, missing items, or low supplies. The main goal is to ensure that every guest enters a clean, organized, comfortable, and fully prepared property that reflects the standards promised in the listing.
How Vrbo Rental Cleaning Differs from Regular House Cleaning
Standard residential cleaning is normally scheduled around the homeowner’s routine. The same client lives in the property before and after the appointment, and a slight scheduling change may be manageable.
Vrbo rental cleaning works differently because the cleaning is connected to confirmed arrival and departure times. A delay can affect the next guest’s ability to check in.
Turnover cleaners must therefore work from a repeatable checklist and understand how a rental should be presented. The work may involve removing items left by previous guests, checking cabinets and drawers, making beds consistently, replacing towels, and verifying that the property is ready for a new arrival.
Cleaning a short-term rental also requires communication. Hosts need to know when the work is complete, whether supplies are low, and whether the cleaner noticed unusual damage or maintenance concerns.
Why Consistent Vrbo Cleaning Matters
Cleanliness shapes the first impression
Guests begin evaluating the property as soon as they enter. Clean floors, fresh bedding, prepared bathrooms, and an organized kitchen help confirm that the listing is professionally managed.
An unpleasant smell, stained towel, dirty appliance, or hair in the bathroom can quickly change the guest’s perception of the entire stay.
Guests can evaluate cleanliness separately
Vrbo allows travelers to use cleanliness-related information when evaluating properties. Its help center explains that guests may find properties rated highly for cleanliness and may see cleanliness ratings for eligible listings.
This makes consistent Vrbo cleaning important beyond appearance. It forms part of the overall experience guests may later describe in their reviews.
Turnover appointments create frequent opportunities to notice changes inside the rental. A cleaner may observe a leaking faucet, damaged item, missing towel, unusual stain, or supply shortage before the next guest arrives.
The cleaner is not a property inspector or maintenance contractor, but timely communication can help the host investigate potential problems sooner.
A repeatable process reduces missed tasks
Hosts who rely on an informal approach may receive different results after every reservation. A written cleaning checklist makes responsibilities clearer and helps maintain consistency across busy periods.
What Should Cleaning Services for Vrbo Include?
The exact scope should be agreed upon before the first appointment. Property size, occupancy, amenities, laundry requirements, and booking frequency can all affect the service.
The following areas should normally be considered when creating a turnover checklist.
Entryway and common areas
The entrance should feel orderly and welcoming. Floors should be vacuumed or mopped, visible dust removed, furniture arranged, and items left by previous guests collected.
Cleaners should also look for fingerprints or marks on commonly touched surfaces such as door handles, switches, and railings.
Kitchen
The kitchen requires more than wiping the counters. Sinks, faucets, countertops, appliance exteriors, dining surfaces, and floors should be cleaned.
The refrigerator, microwave, cabinets, and drawers should be checked for food or belongings left behind. Trash and recycling should be removed according to the host’s instructions.
The host should clarify whether interior oven or refrigerator cleaning is part of every turnover or an additional deep-cleaning task.
Bathrooms
Bathrooms are one of the areas guests inspect most closely. Toilets, sinks, faucets, counters, mirrors, showers, tubs, and floors should receive careful attention.
Used towels must be collected and replaced. Soap, toilet paper, and other guest supplies should be restocked when this service is included.
Cleaners should also report visible leaks, slow drains, loose fixtures, or damaged dispensers.
Bedrooms
All used bedding should be removed after checkout and replaced with fresh linens according to the property’s setup.
Beds should be made consistently, furniture dusted, floors cleaned, and drawers or closets checked for items left by guests.
Hosts with multiple beds should provide clear photographs or instructions showing how each room should be staged.
Living and dining spaces
Furniture should be returned to its intended arrangement, visible surfaces cleaned, floors vacuumed or mopped, and decorative items positioned correctly.
Remote controls, switches, handles, and other high-touch items may also need attention according to the cleaning plan.
Laundry and linens
Laundry can be one of the most time-consuming parts of Vrbo cleaning services. Sheets, pillowcases, bath towels, hand towels, kitchen towels, and other reusable linens must be processed between guests.
BA House Cleaning can handle sheets and towels when the rental has an in-unit washer and dryer. The team can strip beds, collect laundry, wash and dry the items, and remake the beds with fresh linens.
Supplies and restocking
Hosts should identify which supplies must be checked after each stay. These may include:
Toilet paper.
Hand soap.
Dishwashing liquid.
Dishwasher tablets.
Trash bags.
Paper towels.
Coffee pods.
Sponges.
Laundry products.
BA House Cleaning’s vacation rental service can replenish host-provided supplies and notify the host when selected items are running low.
Turnover Cleaning Versus Deep Cleaning
Turnover cleaning
After a guest checks out, the property must be cleaned, reset, and prepared before the next arrival. This process focuses on removing signs of the previous stay, sanitizing guest areas, replacing used linens, making beds, removing trash, and restoring the rental’s intended presentation.
Because the work is tied to specific checkout and check-in times, cleaners must follow an organized checklist and complete every task within the available turnover window. The goal is to leave the property fresh, organized, and fully guest-ready for the next reservation.
Deep Cleaning
A deep cleaning addresses dirt and buildup in areas that may not require detailed attention after every stay. Depending on the property, it may include baseboards, blinds, vents, cabinet fronts, interior appliances, detailed tile cleaning, and spaces behind movable furniture.
Why Hosts May Need Both
Regular turnovers maintain the rental between reservations, while periodic deep cleaning helps preserve its overall condition. The ideal schedule depends on booking frequency, occupancy levels, pet policies, property size, and how quickly buildup develops.
A Practical Vrbo Cleaning Checklist
A useful checklist should match the actual property rather than relying on a generic template.
Before cleaning begins
Confirm the previous guest has checked out.
Review the next check-in time.
Confirm access instructions.
Note any special host requests.
Check whether laundry must be completed onsite.
During the turnover
Remove trash and abandoned food.
Collect used towels and bedding.
Clean and reset the kitchen.
Clean and prepare all bathrooms.
Dust furniture and visible surfaces.
Vacuum carpets and rugs.
Mop hard floors.
Make beds with fresh linens.
Return furniture and décor to the intended layout.
Replace host-provided supplies.
Before leaving
Complete a final walkthrough.
Check for obvious belongings left behind.
Verify that lights and appliances are set according to host instructions.
Confirm doors and windows are secured.
Report low supplies or noticeable property concerns.
Notify the host that cleaning is complete.
What Is Vrbo Enhanced Cleaning?
The phrase Vrbo enhanced cleaning generally refers to additional cleaning or disinfecting measures that a host may disclose to travelers.
Vrbo’s published guidance mentions practices such as cleaning with disinfectant, addressing high-touch surfaces, washing towels and bedding between stays, and using contactless check-in where appropriate.
However, Vrbo also states that it does not verify a property’s adherence to the cleaning guidance displayed on the platform.
For hosts, the important lesson is to avoid making claims that cannot be supported. Any cleaning practice mentioned in the listing should reflect the process that is actually followed at the property.
Is There a Vrbo Cleanliness Guarantee?
Hosts and travelers sometimes search for a Vrbo cleanliness guarantee, expecting the platform to supervise cleaning at each rental.
Vrbo provides standards, listing tools, guest support, and cleaning-related guidance, but individual hosts remain responsible for preparing their properties. Vrbo does not own, manage, control, or inspect the homes listed on its marketplace.
Therefore, hosts should not rely on the platform as a replacement for their own quality-control process.
A clear checklist, dependable cleaners, realistic scheduling, and a final property review remain the most practical ways to maintain consistent results.
Understanding the Vrbo Cleaning Policy in California
Under the official Vrbo Cleaning Tasks Policy, hosts with properties in California must disclose any required guest cleaning tasks, mandatory cleaning fees, and stated consequences for incomplete tasks before a traveler completes a booking. These requirements have applied since June 30, 2025, helping guests understand exactly what will be expected at checkout and what charges are included in the reservation.
The policy distinguishes between simple guest responsibilities and work that should normally be handled through professional cleaning. Reasonable requests may include removing personal food, taking out the trash, loading the dishwasher, stripping used bedding, or returning temporary beds to their original position. These tasks should take only a few minutes, require minimal tools, and relate directly to the guest’s use of the property.
Vrbo considers more demanding duties—such as detailed bathroom cleaning, washing windows, cleaning major appliances, dusting every surface, or completing general property maintenance—unreasonable checkout requirements. Hosts may leave a negative guest review when a clearly disclosed task is not completed, but they cannot impose a financial penalty solely for failing to complete that task. California hosts should therefore review their listing, house rules, cleaning fees, and checkout instructions regularly to ensure every requirement is reasonable, clearly disclosed, and consistent with Vrbo’s current policy.
How Vrbo Cleaning Fees Work
Vrbo allows hosts to add a standard cleaning fee to their property pricing. Mandatory fees must be entered in the appropriate section of the owner dashboard and are displayed to travelers as part of upfront pricing.
The cleaning fee is different from Vrbo’s traveler service fee. Vrbo explains that its service fee supports functions such as payment processing, platform improvements, and customer support. The host’s cleaning fee is a separate property charge intended to cover cleaning-related costs.
Hosts should set the fee based on the actual size, condition, laundry requirements, amenities, and turnover workload of the rental.
The fee and any checkout expectations should be clearly disclosed. Guests should not discover mandatory charges or extensive cleaning instructions only after completing the booking.
How to Choose Reliable Vrbo House Cleaners
Searching for Vrbo house cleaners is not the same as finding someone for occasional residential cleaning.
Before hiring a cleaner or comparing Vrbo cleaning companies, ask about the following areas.
Vacation rental experience
The cleaner should understand checkout deadlines, property resets, guest-ready presentation, and communication with owners or managers.
Scheduling reliability
Ask how appointments are handled during busy weekends, holidays, same-day turnovers, or changes to reservation dates.
Written cleaning scope
Confirm what is included in the standard service and which tasks require an additional appointment or fee.
Laundry capacity
Determine whether laundry will be processed onsite, sent elsewhere, or handled by the host. Onsite laundry can significantly affect the required cleaning time.
Restocking responsibilities
Clarify whether the Vrbo cleaners will restock supplies, where backup items are stored, and how shortages will be reported.
Communication procedures
A reliable Vrbo cleaning company should have a clear method for confirming completion and reporting access problems, low supplies, belongings left behind, or visible concerns.
Training and business protection
BA House Cleaning uses trained W-2 employees rather than subcontractors and states that its team is insured and covered by workers’ compensation. Its wider service information also describes staff screening and bonding.
Finding Vrbo Cleaning Services Near Me
When hosts search for Vrbo cleaning services near me, the closest provider is not automatically the best choice.
The company should serve the property’s actual location, understand local travel times, and be able to schedule work within the rental’s turnover window.
Hosts should also confirm:
Whether the provider covers the complete property address.
Whether recurring turnovers are available.
How last-minute changes are managed.
Whether laundry and restocking are included.
How access information is stored and communicated.
What happens if a cleaner discovers damage or a maintenance concern.
BA House Cleaning serves Oakland and communities throughout the East Bay, including Berkeley, Alameda, Castro Valley, Hayward, San Leandro, Fremont, Dublin, Pleasanton, Walnut Creek, and additional nearby areas.
Professional Vacation Rental Support from BA House Cleaning
Managing bookings is easier when the cleaning process does not need to be rebuilt after every checkout.
BA House Cleaning’s Vacation Rental Cleaning Services are designed to help East Bay hosts prepare their properties between guest stays.
The service can include cleaning kitchens and bathrooms, dusting, vacuuming, mopping hard floors, changing linens, making beds, handling onsite laundry when an in-unit washer and dryer are available, and replenishing host-provided supplies.
Hosts who need dependable support between reservations can explore our Vacation Rental Cleaning Services to learn more about available turnover cleaning, onsite laundry, linen changes, restocking support, and guest-ready property preparation across Oakland and the East Bay.
Building a Reliable Vrbo Cleaning Routine
Reliable Vrbo cleaning services help hosts create a consistent system between reservations and reduce last-minute pressure. A dependable routine should include five essential elements:
Clearly defined responsibilities: Hosts and cleaners should agree on which tasks are completed after every checkout, including bathrooms, kitchens, bedrooms, floors, trash removal, and property presentation.
Realistic turnover timing: The cleaning schedule should allow enough time for the property size, laundry volume, number of rooms, and any special preparation required before the next check-in.
A property-specific checklist: Each rental should have its own checklist covering linens, towels, guest supplies, room setup, access instructions, and the final condition expected before arrival.
Consistent communication: Cleaners should confirm when the turnover is complete and report low supplies, belongings left behind, visible damage, access issues, or maintenance concerns.
Regular deep-cleaning appointments: Turnover cleaning should be supported by periodic deep cleaning based on booking frequency, occupancy, seasonal demand, and the overall condition of the property.
By following the same standards after every reservation, hosts can maintain more consistent results, protect the property, and spend less time coordinating individual cleaning tasks.
Keep Your Vrbo Rental Ready for Every Arrival
Your guests should walk into a rental that feels fully prepared—not a property that looks as though the previous stay ended only hours earlier.
Connect with BA House Cleaning on Facebook to discuss dependable vacation rental cleaning for your Oakland or East Bay property. Build a consistent turnover routine, reduce last-minute cleaning pressure, and give every reservation the clean beginning it deserves.
Frequently Asked Questions
What do Vrbo cleaning services usually include?
The service may include bathrooms, kitchens, bedrooms, common areas, floors, trash removal, linen changes, bed preparation, laundry, restocking, and a final walkthrough. The exact scope depends on the property and the agreement between the host and cleaner.
Is Vrbo cleaning required after every guest?
The property should be cleaned and reset after every completed stay. Even when a rental appears tidy, used bathrooms, kitchens, towels, bedding, floors, and high-touch areas still require attention before the next arrival.
What is the difference between turnover cleaning and deep cleaning?
Turnover cleaning prepares the rental for the next guest within the reservation schedule. Deep cleaning targets buildup and detailed areas that may not be addressed during every turnover, such as baseboards, blinds, vents, appliance interiors, and hard-to-reach spaces.
Can a California Vrbo host require guests to clean the property?
California hosts may request reasonable, clearly disclosed tasks such as removing trash or loading the dishwasher. Vrbo’s California policy does not treat detailed bathroom cleaning, window cleaning, major appliance cleaning, or whole-property dusting as reasonable guest checkout tasks.
How long does Vrbo rental cleaning take?
The time depends on property size, number of bedrooms and bathrooms, guest condition, laundry volume, amenities, and the requested checklist. Hosts should give the cleaning company accurate property information rather than relying on a universal estimate.
Does Vrbo provide cleaning services?
No. Vrbo provides the booking platform and tools for managing listings, reservations, cleaning fees, and guest expectations. Property owners and managers remain responsible for arranging cleaning themselves or hiring professional cleaners.
Can hosts charge a cleaning fee on Vrbo?
Yes. Hosts may add a cleaning fee to help cover turnover-related costs. Any mandatory charge should be entered correctly in the listing settings and clearly displayed to travelers before booking.
Mildew often begins as a small patch near a shower, window, sink, or another damp surface. At first, it may look like a minor cleaning problem. However, wiping away the visible mark does not always solve the underlying cause. If moisture remains, the same patch can return within days or weeks.
Learning how to get rid of mildew requires two important steps. First, you need to clean the affected surface safely. Second, you must reduce the moisture that allowed the growth to develop. Skipping either step can lead to recurring odors, stubborn stains, and new surface growth.
Oakland homes can develop mildew for several reasons. Bathrooms may stay damp after showers, condensation can collect around windows, and slow plumbing leaks may keep cabinets or walls moist. Wet towels, laundry, poor airflow, and high indoor humidity can also create suitable conditions for mildew.
BA House Cleaning helps Oakland and East Bay homeowners maintain cleaner, fresher, and more comfortable living spaces. While routine cleaning can help manage small surface-level buildup, the source of moisture must also be addressed to prevent mildew from returning.
This guide explains how to identify common mildew, clean small affected areas, protect different materials, and reduce the chance of regrowth. It also explains when professional cleaning services may help and when the situation requires a qualified mold remediation specialist instead.
What Is Mildew?
Mildew is a common name for certain types of surface-level fungal growth. People often use the word to describe flat, powdery, or patchy growth found in damp household areas. It may appear white, gray, brown, green, or dark in color.
In everyday home care, the difference between mildew and mold is less important than the moisture source. Both depend on damp conditions. Both can spread when the surface stays wet. In addition, appearance alone cannot confirm the exact species.
The National Institute of Environmental Health Sciences explains that mold is a type of fungus that thrives in wet places. Leaks, flooding, humidity, and poor ventilation can all support indoor growth. Therefore, the most effective response begins with moisture control rather than surface cleaning alone.
Mildew may grow on shower grout, window frames, painted walls, fabrics, wood, rubber seals, and other materials. Some surfaces can be cleaned successfully. However, porous materials may hold growth below the visible surface and may need replacement when the contamination is extensive.
Mildew vs. Mold: Is There a Real Difference?
Homeowners often describe a flat patch as mildew and a thicker or fuzzy patch as mold. This can be a useful visual description, but it is not a reliable diagnostic test.
Mildew usually appears to sit on the surface. It may look powdery and spread in a relatively flat pattern. Mold may appear raised, fuzzy, slimy, or irregular. Still, color and texture vary widely. Dark growth is not automatically a specific type of “toxic mold,” and light-colored growth is not automatically harmless.
For practical cleaning decisions, focus on three questions:
How large is the affected area?
What material is affected?
Is there an ongoing leak, flooding issue, or hidden moisture source?
A small patch on a hard bathroom surface may be suitable for careful household cleaning. Growth across drywall, insulation, ceiling materials, carpet padding, or HVAC components requires a different level of caution. If the moisture source is hidden, cleaning the visible area may only delay the problem.
Why Mildew Keeps Returning
The main reason mildew returns is simple: the surface remains damp. Professional cleaning services can remove visible residue and surface buildup, but the growth may return when humidity, condensation, leaks, or poor ventilation continues.
The EPA identifies moisture control as the key to managing mold. Its guidance recommends fixing leaks, cleaning hard surfaces with detergent and water, and drying everything completely. It also notes that moldy porous materials may be difficult or impossible to clean fully.
Common causes include:
Bathrooms that stay humid after showers
Kitchen steam without effective ventilation
Leaking faucets, pipes, toilets, or roofs
Condensation around windows and exterior walls
Damp laundry left in baskets or washing machines
Furniture placed tightly against a cold wall
Wet carpet, padding, or fabric that dries slowly
Indoor humidity that remains too high
The CDC recommends keeping indoor humidity no higher than 50% when possible. Air conditioning, dehumidifiers, exhaust fans, and better airflow can help maintain a drier indoor environment.
Therefore, learning how to get rid of mildew is not only about cleaning. It also requires better ventilation, property maintenance, and complete drying.
Signs You May Have a Mildew Problem
Visible spotting is the most obvious sign. However, mildew may also appear as a recurring stain or dull film that returns after normal wiping.
A persistent musty odor can also indicate damp materials or hidden growth. The smell may be stronger after the room has remained closed. In bathrooms, it may come from grout, caulk, shower curtains, bath mats, or areas behind stored products.
Other warning signs include:
Discoloration near windows or ceiling corners
Peeling paint or bubbling wall finishes
Soft or swollen drywall
Repeated condensation
Damp cabinet interiors
Staining beneath a sink
Musty towels or clothing after washing
Dark residue on appliance seals
Do not ignore water stains, even when no growth is visible. They may indicate a plumbing, roof, or condensation problem. Fixing the source early can prevent a much larger cleanup later.
Safety Steps Before You Start Cleaning
Before deciding how to get rid of mildew, assess the area honestly. Small surface patches are different from widespread growth following a leak or flood.
Protect your skin and eyes from both the growth and the cleaning product. Wear gloves and use eye protection when splashing is possible. Increase ventilation by opening a window or running an exhaust fan that vents outdoors.
Read the product label before use. Never mix bleach with ammonia or any other cleaner. The CDC specifically warns that mixing bleach with ammonia or other cleaning products can create dangerous fumes.
Keep children and pets away from the work area until the surface is clean, rinsed when required, and completely dry. Also, avoid aggressive dry brushing. It can disturb particles and spread them into the surrounding area.
People with asthma, severe allergies, chronic lung conditions, weakened immune systems, or other health concerns should avoid direct exposure and seek appropriate medical or professional guidance.
How to Get Rid of Mildew on Hard, Washable Surfaces
For a small patch on tile, glass, sealed counters, or another hard washable surface, begin with detergent and water. The goal is to remove the growth physically, clean the residue, and dry the surface thoroughly.
Follow these steps:
Improve ventilation in the room.
Put on gloves and eye protection.
Remove nearby personal items.
Apply a suitable detergent solution according to its label.
Gently scrub the affected hard surface.
Rinse if the product instructions require it.
Dry the area completely.
Correct the moisture source.
The EPA recommends scrubbing mold from hard surfaces with detergent and water, then drying the surface completely.
Avoid soaking seams, unsealed wood, drywall edges, or cracked grout. Excess liquid can move deeper into the material and create another moisture problem.
After cleaning, check the area again over the next several days. If the spotting or odor quickly returns, the visible patch may not be the full problem.
How to Get Rid of Mildew in a Bathroom
Bathrooms provide moisture, warmth, and repeated condensation. As a result, showers, grout lines, caulk, ceilings, and window frames are common problem areas.
Start by running the exhaust fan during the shower and for a reasonable period afterward. Leave the shower door or curtain open so wet surfaces can dry. Remove bottles and bath products that trap moisture against tile or tub edges.
For small patches on tile or sealed surfaces, use a product approved for that material. Scrub gently and dry the area afterward. Do not combine different cleaning agents in an attempt to create a stronger solution.
Caulk deserves special attention. Surface staining may clean up, but growth can penetrate old or damaged caulk. When discoloration remains below the surface, replacing the caulk may provide a better result than repeated scrubbing.
Check the ceiling, especially above the shower. Recurring spots can indicate poor ventilation, roof issues, or condensation on a cold surface. Cleaning alone will not correct those causes.
How to Get Rid of Mildew on Grout and Caulk
Grout is more porous than smooth tile. Therefore, it can hold moisture and discolor more easily. Start with the gentlest method suitable for the grout type and sealer.
Use a soft brush rather than a metal tool that may damage the joint. Apply the cleaner for the label’s recommended contact time, then scrub and rinse as directed. Dry the surface carefully.
When grout remains dark after cleaning, the issue may be deep staining, deteriorated sealer, or growth below the surface. Regrouting or resealing may be necessary.
Caulk can be even harder to restore. If it has separated, cracked, softened, or developed staining beneath its surface, remove and replace it after the area is fully cleaned and dried. Fresh caulk should not be applied over damp or contaminated material.
Preventive care matters. Squeegee shower walls, spread towels to dry, and avoid leaving wet bath mats against the floor.
How to Get Rid of Mildew on Painted Walls and Ceilings
Painted surfaces require caution because aggressive scrubbing can remove the finish. Before cleaning, determine whether the wall is simply spotted or whether the material feels soft, swollen, or damaged.
A small surface patch on sound, washable paint may respond to gentle detergent cleaning. Test the method in an inconspicuous area first. Use as little moisture as possible, and dry the wall promptly.
Do not paint over active mildew. New paint may temporarily hide the mark, but the problem can return through the coating. First, identify the moisture source. Then clean and dry the surface according to the material’s requirements.
If drywall has softened, crumbled, or developed widespread staining, replacement may be safer than repeated surface treatment. Porous materials can hold growth inside spaces that a cloth cannot reach.
Ceiling spots require extra investigation. Check for roof leaks, plumbing above the room, poor bathroom ventilation, or condensation. When the cause is unclear, contact an appropriate property professional.
Cleaning Mildew Around Windows
Windows often develop condensation when warm indoor air meets cold glass or frames. Water can collect along tracks, sills, seals, and nearby walls.
Begin by wiping away condensation when you notice it. Clean tracks and frames with a product suitable for their material. Then dry each groove carefully. Avoid allowing dirty water to drain into wall cavities.
Check the condition of window seals and exterior caulking. Damaged seals may allow moisture to enter. Curtains, blinds, and furniture can also limit airflow around the glass.
To reduce recurrence, improve room ventilation and monitor humidity. A small hygrometer can help you track conditions. If condensation occurs every day, the issue may require more than cleaning.
When staining extends into drywall or wood framing, ask a qualified professional to assess the moisture source.
How to Handle Mildew on Fabric, Towels, and Clothing
Fabric can develop a musty smell or spotting when it remains damp. Act quickly because growth can spread through fibers.
Take washable items outdoors or to a well-ventilated area when practical. Follow the care label and use the warmest water allowed for the fabric. Add an appropriate laundry product according to its instructions. Dry the item completely before storing it.
Do not place a still-damp item back into a closet or hamper. Clean the storage area as well, especially if it smells musty.
Some staining may remain even after the growth is removed. Delicate, valuable, or dry-clean-only items may need professional textile care. Heavily affected porous materials may not be worth saving.
Prevent future problems by moving laundry promptly from the washer to the dryer or drying rack. Allow towels to spread out instead of remaining folded while wet.
How to Clean Mildew From Wood
Wood varies greatly. Sealed wood may tolerate gentle surface cleaning, while unfinished wood can absorb moisture and growth.
First, identify the finish. Use a cleaner approved for that surface and test a small hidden area. Avoid soaking the wood. Wipe with minimal moisture and dry it immediately.
If the wood is warped, soft, deeply stained, or affected across a large area, stop treating it as a routine cleaning job. A carpenter, restoration professional, or mold specialist may need to inspect it.
Furniture placed against exterior walls may trap humid air. Leave a small gap to improve circulation. Also, avoid storing damp items in wooden cabinets or closets.
Should You Use Bleach for Mildew?
Bleach is not the automatic answer for every mildew problem. It may damage finishes, discolor materials, create irritating fumes, or fail to reach growth inside porous surfaces.
The CDC states that bleach or dish detergent may be used in some home cleanup situations. It also advises using no more than one cup of household bleach in one gallon of water and never mixing bleach with ammonia or other cleaners.
However, the product label and surface manufacturer’s guidance still matter. Never use bleach on a surface that the manufacturer warns against. Increase ventilation and wear appropriate protection.
For many small patches on hard surfaces, detergent and water, followed by complete drying, may be sufficient. The moisture source remains the most important part of the solution.
When DIY Cleaning Is Not Enough
Knowing how to get rid of mildew also means knowing when to stop. A routine house cleaning company is not the same as a licensed mold remediation or water-damage restoration specialist.
Seek specialist help when:
Growth covers a large area
The problem followed flooding or sewage
Drywall, insulation, carpet padding, or ceilings are affected
The odor persists without a visible source
HVAC systems may be involved
The material is structurally damaged
The growth returns quickly after cleaning
A resident has significant health concerns
The moisture source cannot be identified
The CDC’s disaster cleanup guidance recommends protective equipment and stresses that drying the home and removing water-damaged materials are essential after major water events.
BA House Cleaning can support routine household cleaning and maintenance. However, extensive mold, contaminated building materials, flooding, and hidden moisture require the appropriate remediation, plumbing, roofing, or restoration professional.
How Deep Cleaning Services Support Mildew Prevention
Deep Cleaning Services can help address the dirt, soap residue, dust, and buildup that collect in moisture-prone areas. A detailed visit may include closer attention to bathroom surfaces, kitchen areas, baseboards, reachable fixtures, and other locations included in the selected checklist.
However, deep cleaning does not replace leak repair, moisture testing, structural drying, or mold remediation. The service works best after the underlying moisture problem has been corrected and when the affected area is within the safe scope of routine residential cleaning.
For example, a detailed cleaning can help refresh shower surfaces, window sills, sink areas, and other reachable hard surfaces. It can also help homeowners establish a cleaner baseline for ongoing maintenance.
Discuss visible staining, odors, leaks, and damaged materials before booking. Accurate information allows the cleaning company to determine whether the request fits its service or requires a specialist.
Where Sanitizing Cleaning Services Fit Into the Process
Sanitizing Cleaning Services focuses on selected surfaces and high-touch areas according to the booked service. They should not be confused with mold remediation.
Cleaning removes dirt and organic residue. Sanitizing reduces certain microorganisms on suitable surfaces when the correct product and contact time are used. Mildew control still requires physical removal, complete drying, and correction of the moisture source.
If you request Sanitizing Cleaning Services, tell the company about delicate finishes, pets, allergies, ventilation concerns, and product preferences. The team can then explain what the service includes.
For a recurring mildew problem, start with the moisture source. Sanitizing a damp surface without correcting humidity or leaks will not prevent future growth.
Choosing Cleaning Services in Oakland for Moisture-Prone Homes
When comparing cleaning services in Oakland, choose a provider that sets realistic boundaries. A trustworthy company should not promise to solve extensive mold problems through ordinary house cleaning.
Ask what the service includes and whether the team can work safely on the affected material. Also, explain the size of the area, the location, the surface, and whether a leak has been repaired.
Professional cleaning services can help maintain kitchens, bathrooms, bedrooms, common areas, and other parts of the home. Regular care can reduce the buildup that makes damp spaces feel dirty or musty. Still, maintenance works best when ventilation and repairs keep the property dry.
Oakland homes include older properties, apartments, modern buildings, and spaces with different airflow challenges. A local provider should record access instructions, cleaning priorities, pets, and material concerns before the visit.
How to Prevent Mildew From Returning
After learning how to get rid of mildew, prevention becomes the next priority. A clean surface will not stay clean if moisture continues.
Keep Humidity Under Control
Use a dehumidifier or air conditioner when indoor humidity remains high. The CDC recommends keeping humidity no higher than 50% when possible.
Improve Ventilation
Run bathroom and kitchen exhaust fans that vent outdoors. Open windows when weather and security allow. Keep interior doors open when better airflow is needed.
Fix Leaks Promptly
Repair dripping faucets, pipe leaks, roof problems, and damaged seals. After repairs, dry the affected material completely.
Dry Wet Items Quickly
Spread towels, bath mats, and cleaning cloths so they can dry. Move laundry out of the washer promptly. Do not store damp items inside closets or cabinets.
Reduce Condensation
Wipe window condensation and improve airflow around exterior walls. Avoid placing large furniture tightly against cold surfaces.
Maintain a Regular Cleaning Routine
Routine cleaning removes soap film, dust, and organic residue from moisture-prone surfaces. It also makes new discoloration easier to notice.
Inspect Hidden Areas
Check under sinks, behind appliances, inside cabinets, and around toilets. Early detection can prevent a small leak from becoming a larger problem.
Why Oakland Homeowners Choose BA House Cleaning
BA House Cleaning helps local homeowners maintain cleaner, more comfortable living spaces through organized residential cleaning options.
Cleaning Plans Based on Your Home
Customers can share priorities, surface concerns, pets, entry instructions, and rooms that need extra attention before the visit.
Detailed Service Options
Homeowners can choose ongoing cleaning, Deep Cleaning Services, Sanitizing Cleaning Services, move-related care, and other available solutions based on their needs.
Local Oakland Experience
A local team understands the scheduling, parking, access, and layout differences found across Oakland and the East Bay.
Clear Service Boundaries
Responsible cleaning services should explain what routine cleaning can handle and when water damage, structural issues, or extensive mold require a specialist.
Support Beyond the Cleaning Visit
Customers can contact the company about scheduling, service questions, updates, or concerns rather than depending only on one cleaner.
BA House Cleaning is a practical choice when you want help maintaining moisture-prone rooms after leaks and ventilation problems have been addressed. The team can provide regular cleaning within the agreed scope while you focus on keeping the home dry.
Create a Cleaner, Drier Home With BA House Cleaning
Mildew is easier to manage when you respond early. Clean small surface areas safely, dry them completely, and correct the source of moisture. If the affected material is porous, damaged, widespread, or connected to flooding, contact a qualified specialist rather than relying on household cleaning alone.
Once the property is dry and the problem falls within routine cleaning, BA House Cleaning can help you maintain kitchens, bathrooms, bedrooms, and shared areas. Choose the service level that matches the condition of your home and share any problem areas before the appointment.
Send BA House Cleaning a message on Facebook to describe your cleaning priorities and explore a suitable service for your Oakland home. Build a routine that keeps moisture-prone spaces cleaner, easier to inspect, and more comfortable throughout the year.
Frequently Asked Questions
What Is the Fastest Way to Remove Mildew?
For a small patch on a hard, washable surface, use a suitable detergent, scrub gently, and dry the area completely. Also, fix the moisture source. Fast surface cleaning will not prevent regrowth when the area stays damp.
Can I Permanently Remove Mildew?
You can remove many small surface patches, but lasting control depends on moisture. Repair leaks, improve ventilation, reduce humidity, and dry wet materials quickly.
Is Mildew the Same as Mold?
Mildew is a common term for certain surface-level fungal growth and is generally treated as a type of mold. Appearance alone cannot reliably identify the exact species.
Can Vinegar Remove Mildew?
Some homeowners use vinegar, but official guidance commonly emphasizes detergent and water for hard surfaces. Always follow surface and product instructions, and never mix cleaning chemicals.
Does Bleach Kill Mildew?
Bleach may be suitable in some situations, but it is not appropriate for every material. Never mix it with ammonia or other cleaners. Follow the label and use proper ventilation.
Why Does Mildew Keep Returning in My Bathroom?
The bathroom may remain humid after showers, have weak ventilation, or contain damp grout and caulk. Run the exhaust fan, dry surfaces, and check for leaks or condensation.
Can I Paint Over Mildew?
No. Painting may hide the spot temporarily, but it does not solve active growth or moisture. Clean and dry the area first, then correct the cause before repainting.
When Should I Throw Away a Moldy Item?
Porous materials may be difficult to clean when growth penetrates deeply. Heavily affected carpet padding, ceiling tiles, insulation, or damaged drywall may require removal. Seek specialist advice for extensive contamination.
Can Professional Cleaning Services Remove All Mildew?
Routine cleaning services may clean small reachable surface areas within their scope. They do not replace mold remediation, structural drying, plumbing repair, or water-damage restoration.
How Can I Stop Mildew in Closets?
Keep clothing dry, improve airflow, avoid overpacking, and monitor humidity. Do not place damp shoes, towels, or laundry inside. Check nearby walls and floors for hidden leaks or condensation.
Choosing who will clean your home is not only a question of price. You are also deciding who will enter your personal space, handle your belongings, follow your instructions, and return when you need help again. For many Oakland homeowners, the real decision is Cleaning Service vs an Individual. Both options can provide useful support, but they do not always offer the same level of reliability, protection, flexibility, or customer care.
An independent cleaner may offer a personal relationship and a lower initial rate. A professional company may provide trained teams, backup cleaners, insurance, documented procedures, and office support. Neither option should be judged by assumptions alone. The better choice depends on your schedule, home, priorities, and tolerance for risk.
This guide gives you a balanced comparison of a cleaning service vs an Individual before you hire. It explains what each option may provide, where the differences matter most, and which questions can protect your time and property. It also shows why many households choose professional cleaning services in Oakland when they want dependable help that can continue beyond a single appointment.
Cleaning Company vs Individual: What Is the Basic Difference?
The phrase cleaning company vs individual describes two different service structures. An individual cleaner usually works alone and manages scheduling, supplies, communication, and payment directly. The same person may clean your home at every appointment. This arrangement can feel simple and personal, especially when you already know and trust the cleaner.
A cleaning company operates as an organized business. It may employ several technicians, use an office or customer support team, maintain written service standards, and assign replacements when needed. The company may also manage training, payroll, insurance, quality control, scheduling software, and customer concerns.
The difference is not simply one person compared with several people. It is an informal service model compared with a business system. When evaluating Cleaning Service vs an Individual, consider what happens before, during, and after the cleaning. Ask who confirms appointments, who handles a complaint, who provides backup, and who accepts responsibility if a problem occurs.
What Cleaning Services Typically Provide Beyond Basic Cleaning
Cleaning services typically offer more than a person who arrives with supplies. A professional provider usually creates a process around the appointment. That process may include a booking form, a written checklist, arrival notifications, payment procedures, customer records, and follow-up support.
The company can also offer different service levels. A homeowner may start with a detailed first visit and then move to recurring maintenance. Another client may need a one-time reset, move-related help, vacation rental care, or office cleaning. A larger service menu makes it easier to adjust as your needs change.
Professional cleaning companies may also maintain equipment, purchase products in volume, train technicians on common surfaces, and document special instructions. These systems do not guarantee perfection. However, they reduce the amount of planning a customer must manage alone.
By comparison, an individual cleaner may provide excellent basic care but have limited capacity. If the cleaner does not offer a requested task, there may be no other team member or department available to help.
How Cleaning Needs Are Met Reliably Through a Company Structure
A major concern in the Cleaning Service vs an Individual decision is continuity. A home does not stop collecting dust because a cleaner becomes sick, takes a vacation, or faces a personal emergency. If one independent cleaner is unavailable, the appointment may need to be rescheduled.
A company can often assign another trained technician when the regular cleaner cannot attend. The replacement should receive the same work order, access details, priorities, and service checklist. This structure helps ensure cleaning needs are met reliably even when staffing changes.
Consistency also depends on records. An individual may remember your preferences well, but information can remain in personal messages or memory. A company can place instructions in a customer profile. That makes it easier to communicate details about pets, alarm systems, delicate surfaces, excluded rooms, or preferred products.
Reliable service does not mean the same person will always arrive. It means the business has a plan for maintaining the appointment and service standard. For busy families, professionals, landlords, and office managers, that backup can be more valuable than a slightly lower price.
Reliability and Scheduling in Cleaning Service vs an Individual
Scheduling often reveals the clearest difference between the two options. An independent cleaner controls a limited number of working hours. Once that schedule is full, changing your appointment may be difficult. A missed day can also create a long gap before the next available opening.
Cleaning companies usually manage a wider schedule. They may offer several appointment windows, recurring routes, automated reminders, and customer support for changes. If one technician is unavailable, another may cover the visit. This does not remove every scheduling challenge, but it creates more options.
For recurring clients, dependable timing matters. A delayed visit before guests arrive, a move, or an important workday can cause real stress. Therefore, ask how each provider handles illness, lateness, vacations, and emergency changes.
When comparing a cleaning service vs an Individual, do not ask only whether the cleaner is usually reliable. Ask what system exists when the usual plan fails. The answer shows whether you are hiring one person’s availability or a service designed to continue.
Insurance, Bonding, and Responsibility
Inviting someone into your home creates practical risks. A cleaner may slip, a fragile item may break, or a surface may react badly to a product. Most visits happen without a serious problem. Even so, customers should understand who is responsible if something unexpected occurs.
A professional company may carry general liability insurance, workers’ compensation, and bonding based on its business structure. Customers should confirm the exact protections rather than assume every company has the same coverage. Insurance does not mean every claim will be approved, but it creates a documented process for eligible incidents.
An individual cleaner may also purchase insurance. Some do, while others may not. The important point is to ask directly. Request clear information about property damage, injuries, and claim reporting.
BA House Cleaning states that its staff is vetted, trained, insured, and bonded. Its customer guidelines also describe background checks, reference checks, workers’ compensation, liability insurance, and bonding for employees.
In the Cleaning Service vs an Individual comparison, this protection can influence more than peace of mind. It shows whether the provider has prepared for the responsibilities of working inside other people’s homes.
Employee Screening and Trust
Trust is essential because cleaners may work near personal documents, electronics, jewelry, keys, and private rooms. A company should explain how it selects people before assigning them to customer homes.
Professional cleaning companies may use interviews, reference checks, background screening, training, and supervised work. They can also document performance concerns and remove access when an employee leaves. A customer may contact the office instead of confronting a technician directly.
An individual cleaner may come through a personal referral and build strong trust over time. That relationship can be valuable. However, the customer often performs the screening alone. You may need to verify references, experience, identity, insurance, and work history yourself.
Neither structure removes the need to secure cash, sensitive documents, medications, and irreplaceable items. Good preparation protects everyone. Still, a formal screening process gives customers another layer of confidence before the first visit.
Training and Cleaning Quality
Skill varies among both companies and independent cleaners. A person who has cleaned homes for many years may deliver excellent results. Likewise, a company name does not automatically guarantee quality. The real difference is whether the provider has a repeatable training and review process.
A professional company can train technicians on checklists, products, equipment, surface care, safety, and customer communication. It can also inspect work, collect feedback, and address patterns across multiple appointments. If a cleaner misses a task, the office can review the agreed scope and arrange the proper response.
An individual cleaner may use personal methods developed through experience. This can produce strong results, especially when the same person learns about your home. However, quality may depend entirely on that person’s habits. There may be no written standard or supervisor available.
When weighing Cleaning Service vs an Individual, ask how the provider defines a completed visit. A clear checklist, realistic scope, and correction policy matter more than general promises about a spotless home.
Cleaning Supplies, Equipment, and Product Choices
Some independent cleaners bring their own products. Others ask customers to provide supplies and equipment. Either arrangement can work, but you should confirm it before booking. A low hourly rate may become less attractive if you must purchase and maintain everything.
Cleaning companies usually bring standard products, microfiber cloths, vacuums, and other tools needed for the booked service. They may also maintain backup equipment if something stops working. Because technicians use the same systems regularly, the company can train them on proper handling.
Specialty surfaces still require communication. Natural stone, delicate wood, vintage fixtures, and sensitive finishes may need specific products. Tell the provider about these materials before the appointment. Also share allergies, fragrance concerns, pets, or product preferences.
The best provider will not use every chemical on every surface. It will ask questions, follow label directions, and avoid unsupported promises. Equipment is useful, but judgment and communication protect your home.
Service Range and Customization
Your current cleaning need may be simple, but it can change. You might begin with monthly maintenance and later need a deep cleaning, move-related cleaning, office support, or more frequent care. A company with several service options can often adjust without requiring you to find a new provider.
Maid Services may include routine kitchen, bathroom, bedroom, dusting, vacuuming, and floor care. House Cleaning Services can also include recurring plans, detailed first visits, or customized priorities based on the property. The exact scope depends on the provider, so review the checklist before booking.
An individual cleaner may customize the visit through direct discussion. This flexibility can be a benefit. However, the cleaner may have limits based on time, equipment, training, or physical capacity.
Professional cleaning services can also customize work, but changes may need office approval or extra time. The advantage is that the request becomes part of a documented plan. That protects the cleaner’s schedule and gives the customer a clearer expectation.
Cost: Is an Individual Cleaner Always Cheaper?
An individual cleaner often charges less because the business has fewer overhead costs. There may be no office team, scheduling platform, backup staff, advertising budget, payroll system, or large insurance package. For a simple home and a flexible customer, the lower rate may be attractive.
A professional company may charge more because the price covers more than cleaning time. It can include employee training, insurance, taxes, customer service, supplies, management, quality control, scheduling, and replacement coverage. The customer is paying for a system as well as labor.
Therefore, compare total value rather than the hourly number alone. Ask whether supplies are included, whether the quote is flat or hourly, and whether add-ons cost extra. Also consider the cost of a missed appointment, a damaged item, or a last-minute search for another cleaner.
The correct Cleaning Service vs an Individual choice depends on what you value. If your main goal is the lowest possible price, an independent provider may fit. If you want support, backup, documented standards, and broader protection, a company may provide stronger long-term value.
Communication and Customer Support
With an individual cleaner, all communication usually happens directly. This can be convenient because you speak to the person doing the work. Instructions can feel personal, and there is no office between you and the cleaner.
However, direct communication has limits. The cleaner may not answer while working, driving, or managing another appointment. If a disagreement occurs, the same person must clean, schedule, collect payment, and resolve the complaint.
Cleaning companies often separate those responsibilities. A customer service team can update instructions, answer billing questions, document concerns, and coordinate a return visit. The cleaning technician can then focus on the work.
When comparing a cleaning service vs an Individual, think about how much support you expect. Some customers prefer a direct relationship. Others want an office they can contact when the assigned cleaner is unavailable or when the issue should be handled by someone with more authority.
Accountability and Satisfaction Policies
Every provider can miss a task. What matters is how the concern is handled. Before booking, ask whether there is a written satisfaction policy and how quickly you must report an issue.
A company can compare your concern with the service checklist, speak with the technician, and arrange a correction when appropriate. It may keep photos, work notes, arrival records, and customer messages. This documentation makes the conversation more objective.
An individual cleaner may also return to correct a problem. In fact, a trusted cleaner may respond quickly because the relationship matters. However, there may be no written guarantee. The outcome can depend on the cleaner’s judgment and availability.
Do not assume a guarantee covers every complaint. A missed included task differs from an add-on you did not purchase or an area the cleaner could not access. Clear expectations before the visit reduce conflict later.
When an Individual Cleaner May Be the Right Choice
A balanced cleaning company vs individual comparison should recognize that an independent cleaner can be the right option for some households. You may already know a reliable person through family or friends. The cleaner may understand your home well and offer a schedule that fits both of you.
An individual can also work well when the scope is simple, the home is small, and you are comfortable managing supplies, access, payment, and backup plans. Some customers value seeing the same person every time more than having office support.
Before hiring, verify references and discuss insurance. Agree on the tasks, rate, timing, cancellation rules, and payment method. You should also decide what happens if the cleaner is ill or unavailable.
A personal working relationship can be successful when both sides communicate clearly. The risk comes from assuming trust replaces practical planning. Even with someone you like, written expectations help protect the relationship.
When a Cleaning Company Is the Better Choice
A company is often the stronger choice when you need recurring reliability, several service options, or support beyond one cleaner. It may also suit households with demanding schedules, larger homes, frequent guests, pets, or changing priorities.
Cleaning companies can provide replacements, customer records, trained teams, and formal quality procedures. They may offer a clearer path for handling billing, damage, complaints, or schedule changes. For many clients, those systems reduce the mental work of managing home cleaning.
A company may also fit when several people need to coordinate the service. Couples, families, property managers, and office administrators can share instructions through one customer account instead of relying on messages to a single person.
In the Cleaning Service vs an Individual decision, choose a company when continuity and accountability matter more than maintaining the lowest rate.
Cleaning Services in Oakland: Local Factors to Consider
Oakland homes vary widely. A cleaner may work in an apartment with controlled entry, a historic property with delicate surfaces, a modern home with specialty finishes, or a building with limited parking. Local access and scheduling can affect the appointment as much as the cleaning itself.
When reviewing cleaning services in Oakland, ask whether the provider serves your neighborhood regularly. A local company may understand traffic patterns, parking limits, shared entrances, lockboxes, building staff, and common appointment challenges.
You should also discuss the size and condition of the home honestly. A first visit may require more time than routine maintenance. Stairs, pets, clutter, and special surfaces can also influence the plan.
BA House Cleaning serves Oakland and the wider East Bay with residential and business options. Its current site lists recurring cleaning, deep cleaning, move-related cleaning, sanitizing, vacation rental care, office cleaning, and carpet cleaning among its services.
Cleaning Services for Homes, Rentals, and Offices
Cleaning services are not limited to one household routine. Different properties need different schedules and checklists. A family home may need weekly or biweekly maintenance. A rental may need a detailed reset between guests. An office may require work around employees, equipment, and access hours.
A company can create separate procedures for each service type. It can train technicians on the checklist and assign enough time for the booked scope. This is especially helpful when a customer needs more than routine dusting and floor care.
An independent cleaner may also serve several property types. However, ask about experience and equipment. Office work, rental turnovers, and detailed residential cleaning can involve different priorities.
The best service is not the one with the longest task list. It is the one that clearly defines what will happen, schedules enough time, and assigns someone prepared for the property.
A Practical Decision Checklist for Oakland Homeowners
Choose an individual cleaner when you value a direct relationship, have a simple scope, can tolerate schedule changes, and have verified the person’s experience and protection. This option can work especially well when a trusted referral already exists.
Choose a company when you need dependable recurring care, backup staff, documented instructions, broader service options, or office support. The higher price may provide more stability and reduce the amount of coordination you handle yourself.
Also consider your home’s access requirements. If cleaners will enter while you are away, screening, records, insurance, and secure key or code procedures become more important. If you are always present, direct coordination may feel easier.
Finally, think beyond the first appointment. A provider that fits one light cleaning may not meet your needs during a busy season, move, family change, or work deadline. Choose a service structure that can grow with you.
Why Choose BA House Cleaning?
Choosing between a company and an individual cleaner becomes easier when you know what level of support, protection, and consistency you will receive. BA House Cleaning gives Oakland and East Bay clients several practical advantages.
Cleaning Plans Built Around Your Property
Every home, office, and rental has different priorities. BA House Cleaning records your preferred tasks, access instructions, pets, delicate surfaces, and areas that need extra attention before the visit begins.
Flexible Services as Your Needs Change
You can arrange recurring care, a detailed one-time cleaning, move-related support, vacation rental cleaning, office cleaning, sanitizing, or carpet cleaning without searching for a new provider each time.
Reliable Support When Schedules Change
Your cleaning plan does not depend entirely on one person’s availability. A professional support team can assist with scheduling updates, service questions, special requests, and concerns.
Trained Professionals and Clear Standards
Cleaners follow documented service expectations rather than relying only on personal routines. This approach creates a more consistent experience across different appointments and team members.
Added Protection for Your Property
BA House Cleaning uses vetted, insured, and bonded cleaning professionals. These safeguards offer greater confidence when allowing a team into your home, workplace, or rental property.
For clients comparing Cleaning Service vs an Individual, BA House Cleaning offers more than basic cleaning. You receive flexible options, organized communication, dependable support, and a service process designed to protect your time and property.
Make the Choice That Protects Your Time and Home
There is no universal answer for every household. A skilled individual cleaner can provide personal, affordable, and consistent care when the relationship works well. A professional company can offer stronger backup, formal processes, insurance, training, and customer support.
Your decision should reflect the level of service you need and the responsibility you want to manage. Compare the full scope, not only the hourly price. Review reliability, screening, supplies, insurance, communication, and the process for correcting problems.
For many busy Oakland households, a professional service offers the most practical long-term solution. It helps ensure cleaning needs are met reliably through a system that does not depend on one person alone.
Use this Cleaning Service vs an Individual guide to ask better questions and choose with confidence. The right provider should make your home easier to manage, respect your property, and communicate clearly from the first estimate through every completed visit.
Let BA House Cleaning Simplify Your Routine
Your free time should not disappear into an endless cleaning schedule. BA House Cleaning can create a plan around your home, priorities, and preferred frequency. Whether you need regular Maid Services, detailed House Cleaning Services, or help preparing your property for an important change, our team can guide you toward the right option.
Tell us about your rooms, pets, access instructions, delicate surfaces, and the areas that need the most attention. We will use those details to define the service and help you prepare for a smoother appointment.
Connect with BA House Cleaning on Facebook to explore your options and request a cleaning date that works for you. Choose a local Oakland team that brings dependable support, clear communication, and professional care to every visit.
Frequently Asked Questions
Is a cleaning company always better than an individual cleaner?
No. The best option depends on your priorities. An individual may offer a lower rate and a direct relationship. A company may provide insurance, backup staff, training, office support, and a broader range of services.
Why can a professional cleaning company cost more?
The price may support employee wages, taxes, insurance, training, supplies, scheduling, customer service, and quality control. You are paying for the business system as well as the cleaning time.
Will a cleaning company send the same cleaner every time?
Many companies try to maintain consistency, but they may send a trained replacement during illness, vacation, or scheduling changes. Ask how the company shares your home instructions with substitute cleaners.
Are independent cleaners insured?
Some are, while others are not. Ask the cleaner directly about liability coverage and how property damage or injuries would be handled. Do not assume coverage based on experience or a referral.
Do cleaning companies bring their own supplies?
Many companies provide standard products and equipment, but policies vary. Confirm what is included and tell the provider about allergies, fragrance preferences, pets, or specialty surfaces before the appointment.
Can I customize a professional cleaning service?
Yes. Many companies allow customers to select a service level, frequency, and approved add-ons. Share priorities before the appointment so the office can assign enough time and document the request.
What happens if my regular cleaner is unavailable?
An individual cleaner may need to reschedule. A company may assign another trained technician. Ask about backup procedures before choosing a recurring plan.
Are Maid Services different from house cleaning?
The terms often overlap. Maid services typically refer to recurring household upkeep, while house cleaning may include routine, detailed, or one-time options. The provider’s checklist matters more than the label.
How do I compare cleaning services in Oakland?
Compare scope, price, insurance, screening, reliability, customer support, supplies, and reviews. Also ask whether the provider regularly serves your neighborhood and can manage your building’s access or parking requirements.
How do I book BA House Cleaning?
You can connect with BA House Cleaning on Facebook, describe your property and priorities, and request an appointment. The team can help you select a service based on your home, schedule, and cleaning goals.
Valentine’s Day is the perfect opportunity to express your love and appreciation for your wife. But finding the ideal gift can be challenging. While traditional gifts like flowers and chocolates are always nice, they often lack a personal touch. This year, consider gifting your wife something unique, thoughtful, and truly meaningful—a cleaning certificate. It’s a perfect Valentine’s Day gift that shows your love not just with words, but with a gesture that brings her peace and relaxation.
A cleaning certificate may not be the first gift that comes to mind, but it offers so much more than the typical presents. It shows your wife that you recognize her hard work, understand her need for a break, and are willing to help out in a practical and thoughtful way. Keep reading to discover why a cleaning certificate is the perfect Valentine’s Day gift for your wife.
Why a Cleaning Certificate is the Ideal Valentine’s Day Gift for Your Wife
Most Valentine’s Day gifts are centered around romantic symbols—roses, chocolates, jewelry—but these can sometimes feel repetitive. A cleaning certificate, however, offers something different. It’s a gift that provides real value, alleviates stress, and gives your wife the gift of time, something we all wish for more of.
The housework, the cooking, the laundry—it all adds up, and many wives juggle these responsibilities while balancing family, work, and personal commitments. By gifting your wife a cleaning certificate, you give her a chance to relax, knowing that the usual chores are taken care of. This thoughtful gesture allows her to focus on herself, and it speaks volumes about how much you care for her well-being.
The Thoughtful Gesture Behind a Cleaning Certificate
A cleaning certificate isn’t just a way to check off an item from the gift list; it’s an action that shows you genuinely care. It’s a symbol of your appreciation for all the hard work your wife does to maintain the home. Rather than giving her another item that may collect dust on a shelf, you offer her the practical gift of peace of mind.
Imagine how wonderful it will feel for her to know that she doesn’t have to spend her time scrubbing floors or folding laundry on Valentine’s Day. With a cleaning certificate, she gets to enjoy the time she would have spent on housework, whether that means unwinding, spending quality time with you, or doing something she loves.
Creative Ways to Present a Cleaning Certificate to Your Wife
The presentation of the cleaning certificate can be just as important as the gift itself. Here are some creative ways to make your gift extra special:
Design a Personalized Certificate: You can create a certificate with her favorite colors, fonts, and even a loving message. Personalize it with specific tasks she’d like done around the house to make the gift more meaningful.
Be Specific About What’s Included: Add details to the certificate, such as what cleaning services you’ll be handling—whether it’s vacuuming, mopping, doing the dishes, or a full deep clean. This helps set expectations and makes the gift feel more like a custom service.
Pair It with Something Special: While the cleaning certificate alone is already a thoughtful gesture, you can enhance it by pairing it with a small gift such as a bouquet of flowers, a box of chocolates, or a heartfelt note.
DIY Approach: If you want to make the gift even more personal, consider designing and printing the certificate yourself. A handmade certificate shows that you’ve invested time and thought into creating a meaningful and unique gift.
Benefits of Giving a Cleaning Certificate as a Gift
The benefits of a cleaning certificate go beyond just the gift itself. Here are some reasons why this is the perfect Valentine’s Day present:
Time-Saving: Your wife will appreciate the extra time she gets to herself, knowing that she won’t need to handle house chores. This time could be spent relaxing, pampering herself, or spending quality time with you.
Stress Relief: Housework can be overwhelming and time-consuming. A cleaning certificate is a great way to ease some of that stress. By taking on the chores, you create a more peaceful home environment, which allows her to focus on enjoying the day.
Practical and Useful: A cleaning certificate isn’t just another item that will be forgotten. It’s something she can use immediately, and it will be appreciated every time she doesn’t have to worry about cleaning.
Strengthens Your Relationship: Thoughtful gifts that cater to your partner’s needs can help strengthen your relationship. By offering a cleaning certificate, you’re showing that you care about her happiness and well-being, which is a key to maintaining a healthy, happy relationship.
Why Choose BA House Cleaning for Your Cleaning Certificate
If you’re looking to make the gift even more special, consider choosing BA House Cleaning for the cleaning services. We offer a wide range of cleaning services that can be customized to your wife’s needs, whether it’s a deep clean, a regular cleaning service, or specific tasks she’d prefer to be done. At BA House Cleaning, we pride ourselves on providing top-notch cleaning services that will leave your wife feeling pampered and relaxed.
When you choose BA House Cleaning for the cleaning certificate, you’re not just gifting a certificate—you’re gifting professional cleaning services that will transform your home. You’ll be able to give your wife the best possible experience, knowing that the cleaning will be done to the highest standard by professionals who care about delivering exceptional results.
The Perfect Valentine’s Day Gift for Your Wife
This Valentine’s Day, surprise your wife with a thoughtful, practical, and meaningful gift—a cleaning certificate. It’s a gift that shows you truly care for her well-being and appreciate the hard work she puts into managing the household. By gifting her the freedom to relax and enjoy her day without worrying about chores, you’re offering her something invaluable.
Whether you choose to personalize the certificate, pair it with a small treat, or opt for a DIY version, your wife will appreciate this gesture of love and care. And if you want to go above and beyond, consider choosing BA House Cleaning for the cleaning services to ensure she receives the best possible experience.
Take Action Now! Visit BA House Cleaning to learn more about our cleaning services and how we can help make your wife’s Valentine’s Day extra special. Give her the gift of time, relaxation, and a spotless home—because she deserves it!
Imagine a world where the burden of chores melts away, replaced by sparkling floors, gleaming windows, and the sweet scent of a freshly cleaned home. A world where time stretches before you, free from the mundane tasks that often steal our precious moments. This, dear reader, is the magic of House Cleaning Gift Certificates—a thoughtful, meaningful present for anyone seeking peace, happiness, and relaxation.
But House Cleaning Gift Certificates offer far more than just a clean home. These unique gifts unlock an array of positive benefits for both the giver and the receiver. Let’s explore the profound and transformative potential of gifting a House Cleaning Gift Certificate:
Give the Gift of Time: Reclaim Precious Moments
Time is the most valuable thing we can offer to the ones we love. By gifting a House Cleaning Gift Certificate, you’re giving the recipient the freedom to reclaim their hours, swapping the stress of cleaning for treasured moments of leisure, family time, and self-care. Picture this: gifting a parent the chance to enjoy a stress-free weekend, providing a busy professional the opportunity to recharge, or offering a new homeowner the chance to settle in without the burden of endless cleaning tasks.
This is the gift of time—an investment in relaxation and enjoyment, offering moments that would otherwise be spent on household chores.
A Stress-Free Home: The Ultimate Relief from Domestic Pressure
A cluttered, messy home can quickly become a source of overwhelming stress. The mounting pile of dishes, the dust that collects on surfaces, and the never-ending to-do list can weigh heavily on anyone’s mind. A House Cleaning Gift Certificate offers the perfect escape from this daily grind. Imagine the relief the recipient will feel, knowing that a clean and tidy home is just a call away.
With this thoughtful gift, the recipient can say goodbye to stress and welcome a sense of calm and tranquility into their space. No more worrying about the dishes or the laundry; only a peaceful, serene home where they can unwind and relax.
The Power of Self-Care: Reconnect with Your Inner Peace
In today’s fast-paced world, self-care often takes a backseat to the hustle and bustle of life. However, a clean, organized home can be a powerful tool for nurturing one’s well-being. A cluttered environment can add to stress and make it difficult to relax, while a tidy, clean home encourages a sense of calm and balance.
By gifting a House Cleaning Gift Certificate, you’re offering the recipient a chance to create a sanctuary of peace. Imagine walking into a home where surfaces gleam, clutter melts away, and a sense of tranquility fills the air. It’s a place where they can focus on their health, both physical and mental, and prioritize their own self-care.
Strengthen Your Bonds: Build Deeper Relationships with a Thoughtful Gift
When you gift a House Cleaning Gift Certificate, you are doing more than just offering a practical solution. You are strengthening relationships and creating lasting memories. Whether you’re giving it to a friend, family member, or partner, this gift shows that you understand their challenges and care about their happiness.
This thoughtful gesture helps alleviate their time pressures, offering them more moments to spend with their loved ones, pursue hobbies, or simply relax. It’s a meaningful way to demonstrate that you care, and it can deepen connections and foster closer bonds.
A Gift of Gratitude: Show Appreciation in a Unique Way
Gratitude is a powerful sentiment, and showing appreciation is a cornerstone of strong relationships. A House Cleaning Gift Certificate is a unique and meaningful way to say “thank you.” It conveys a message of love and appreciation: “Thank you for everything you do. I want you to have time for yourself, to relax, and enjoy life.”
This thoughtful gift allows the recipient to feel valued, and it’s a gesture that leaves a lasting impression. It speaks volumes about your understanding of their needs and your desire to contribute to their well-being.
House Cleaning Gift Certificates: A Symbol of Change and Care
House Cleaning Gift Certificates go beyond their practicality. They are symbols of care, love, and transformative change. By giving this gift, you provide the recipient with the opportunity to break free from the cycle of housework, reclaim valuable time, and prioritize their own well-being. It’s not just a gift—it’s a chance to create a healthier, happier, and more peaceful life.
How to Choose the Perfect House Cleaning Gift Certificate
When choosing the right House Cleaning Gift Certificate, consider the recipient’s needs and preferences. Do they need a one-time deep clean, or would they benefit from ongoing maintenance? Consider the size of their home, their cleaning priorities, and their desired level of service.
At BA House Cleaning, we offer a variety of customizable cleaning options, ranging from one-time cleaning sessions to comprehensive deep-cleaning packages and recurring maintenance plans. You can tailor your gift to meet the recipient’s exact needs, ensuring they get the most out of this thoughtful present.
The Ideal Gift for Any Occasion: A Perfect Fit for Everyone
House Cleaning Gift Certificates are ideal for anyone who appreciates a clean, organized home. They’re the perfect gift for busy professionals, overwhelmed parents, new homeowners, or anyone who enjoys a calm and tidy space.
This gift fits into every lifestyle, offering a universal benefit: the magic of a clean home and the peace of mind that comes with it. Whether it’s for a birthday, holiday, or just because, it’s a gift that everyone will appreciate and enjoy.
Why Choose BA House Cleaning for Your House Cleaning Gift Certificates?
At BA House Cleaning, we provide exceptional House Cleaning Gift Certificates that cater to the unique needs of each recipient. Here’s why you should choose us:
Expert Cleaning: We specialize in deep cleaning, targeting hard-to-reach areas where dust and allergens hide.
Eco-Friendly Products: We use non-toxic, biodegradable cleaning products that are safe for both your family and the environment.
Customizable Plans: We offer personalized cleaning solutions based on your needs and preferences.
Reliable and Professional Team: Our team is trained, insured, and dedicated to providing the highest level of service.
Give the Gift of a Clean Home Today with BA House Cleaning
Are you ready to gift someone the ultimate present—a sparkling clean home and the precious gift of time? BA House Cleaning is here to help. With our House Cleaning Gift Certificates, you can give the gift of peace, relaxation, and a stress-free home. Our flexible scheduling and customized cleaning options ensure that you can find the perfect gift for any occasion.
Don’t wait for the next special occasion—give the gift of a cleaner, more peaceful home today. Visit BA House Cleaning to purchase your House Cleaning Gift Certificate now and brighten someone’s life with the gift of cleanliness and serenity.
Let’s be honest: the term “spring cleaning” often evokes groans and memories of backaches. However, what if your home wasn’t just cleaned seasonally, but maintained as a healthy, year-round sanctuary? Enter the “home clean” philosophy—a concept that goes beyond spotless surfaces and taps into the powerful connection between a tidy space and a healthier, happier you.
Think about it: your home is your sanctuary. It’s a place where you rest and recharge. But when clutter and dust take over, this haven can transform into a source of stress, allergies, and illness. It’s time to take back control and create a healthy space. Let’s explore the key health reasons why making your home clean today is the ultimate act of self-love.
How a Tidy Home Can Keep Germs at Bay
We all know a clean home feels good, but it also plays a crucial role in maintaining your family’s health. By keeping your home clean, you can reduce the presence of harmful germs, thus creating a healthier environment for everyone.
Germs Everywhere!
Every surface and corner in your home is a potential breeding ground for germs. From common cold viruses to foodborne bacteria, germs can thrive on doorknobs, light switches, countertops, and even your favorite throw blanket.
Cleaning to the Rescue
The good news is that cleaning doesn’t have to be overwhelming. By adopting a few simple habits, you can significantly reduce the number of germs in your home:
Declutter regularly: Clutter provides more places for germs to hide. Remove unnecessary items and organize your belongings, making cleaning easier and more effective.
Wipe down high-touch surfaces: Doorknobs, light switches, faucet handles, and remote controls collect germs easily. Clean them daily with a disinfectant wipe or solution.
Don’t forget the floors: Regular sweeping or vacuuming, especially in high-traffic areas, reduces dust and germs. Use a mop with disinfectant for a deeper clean.
Wash linens and bedding: Germs can live in your sheets and pillowcases. Wash them weekly in hot water to remove bacteria and allergens.
Keep the kitchen spotless: Food spills attract not only germs but pests too. Disinfect countertops, appliances, and the inside of your fridge regularly.
Manage moisture: Damp areas promote mold and mildew, which can worsen respiratory conditions. Use fans and exhaust vents to control moisture in bathrooms and kitchens.
Beyond Germ Warfare
A clean home isn’t just about keeping germs at bay. It can also improve your overall well-being:
Reduced stress: Cluttered spaces increase stress. A clean, organized home promotes calm and peace of mind.
Improved sleep: Sleeping in a clean bedroom has been shown to enhance sleep quality. Fewer allergens in the air contribute to better rest.
Boosted productivity: A tidy workspace helps you focus. Keeping work areas clean boosts productivity and efficiency.
The Mental Health Benefits of a Clean Space
It’s no secret that a messy home can be mentally draining. Shoes scattered across the floor, dishes piling up, and clutter in every corner can overwhelm your mind. But did you know that a clean home can significantly improve your mental well-being?
A tidy home isn’t just about looking good—it creates a sanctuary for your mind. Here are some of the ways making your home clean can benefit your mental health:
Reduced Stress and Anxiety
Clutter often reminds us of unfinished tasks. This can lead to feelings of anxiety and overwhelm. A clean, organized space, however, provides a sense of order and calm, helping to reduce stress.
Improved Focus and Productivity
When your environment is cluttered, distractions are everywhere. This makes it hard to focus. A clean space, on the other hand, helps you stay focused on tasks and boosts productivity.
Enhanced Mood and Self-Esteem
Living in a clean and organized environment boosts self-esteem and confidence. A tidy space promotes positive feelings, making you feel accomplished and more at ease in your own home.
Better Sleep
A messy bedroom can make it difficult to sleep. Clutter disrupts relaxation, while a clean bedroom fosters a calming atmosphere that encourages better sleep.
Increased Sense of Control
A cluttered home can make you feel like you’re losing control. By cleaning and organizing, you regain control over your space, which boosts feelings of empowerment and satisfaction.
Create a Calm and Serene Sanctuary in Your Bedroom
The bedroom is your personal haven, a place to rest and unwind. But with clothes, work, and general chaos, it can easily become cluttered. Here’s how you can transform your bedroom into a peaceful retreat:
Step One: Declutter and Cleanse
Start with a deep decluttering session. Sort through your belongings, getting rid of items you no longer need. Once the clutter is gone, give your room a thorough clean—dust surfaces, vacuum, and tackle forgotten corners. A clean bedroom is a peaceful bedroom.
Step Two: Embrace Softness and Serenity
Choose soft, calming colors like pale blues, lavenders, and sage greens for your walls and decor. Add cozy textures with plush blankets and pillows. Let natural light fill the room, and consider adding warm, soft lamps for evening relaxation.
Step Three: Banish Electronics
The blue light from screens disrupts your sleep. Keep electronics out of your bedroom and replace them with relaxing activities such as reading or meditation.
Step Four: Add Nature’s Touch
Bring the outdoors inside with plants. Low-maintenance plants like succulents or snake plants not only add beauty but also improve air quality and mood. Place them near windows, bedside tables, or hang them from the ceiling.
Step Five: Personalize Your Sanctuary
Surround yourself with meaningful items. Display artwork, photos, or elements from your favorite hobbies to make the space uniquely yours. A personalized bedroom is a space that feels both comforting and inspiring.
Breathe with Confidence with BA House Cleaning Experts
Imagine stepping into a sparkling clean home. Surfaces gleam, the air feels fresh, and a wave of calm washes over you. BA House Cleaning Experts are committed to making this a reality.
A clean home is more than just tidy—it’s a healthy home. Our professional cleaning services provide:
Deep Cleaning Expertise: We don’t just dust and mop; we focus on tough-to-reach areas where dirt and allergens hide.
Eco-Friendly Products: We use non-toxic, biodegradable cleaning products, safe for your family and pets.
Customized Cleaning Plans: We understand every home is unique. We tailor our cleaning services to your needs.
Reliable and Trustworthy: Our trained and insured team gives you peace of mind while we work.
The benefits of a truly clean home with BA House Cleaning go far beyond just looking good:
Improved Health: Reduced allergies, asthma triggers, and germs lead to a healthier family.
Enhanced Well-Being: A clean space promotes relaxation and reduces stress.
Increased Productivity: A clean, organized home helps you stay focused and productive.
Higher Property Value: A clean, well-maintained home adds value and appeal.
Let BA House Cleaning Be Your Seasonal Wellness Partner
As the seasons change, so should your approach to home cleaning. Embrace the “home clean” philosophy all year round. It’s not just about aesthetics—it’s about creating a living space that supports your well-being through every season.
Spring Awakening: As the weather warms, open windows and let in fresh air. Don’t forget to deep clean to remove hidden allergens and pollutants.
Summer Sun: Long, relaxing days at home are more enjoyable in a clean space that promotes calm and relaxation.
Autumnal Bounty: A clean home enhances gatherings with loved ones and sets the stage for joyful memories.
Winter Warmth: Cozy up in a clean and clutter-free space, free from the grime and dust of colder months.
BA House Cleaning ensures your home is a sanctuary of cleanliness and comfort through every season.
Making “Home is Clean” a Reality
Ready to transform your home and well-being? Partner with BA House Cleaning to experience the transformative power of a clean home. We offer flexible scheduling, customized cleaning plans, and competitive pricing to fit your needs.